Okta Integration
Video Tutorial: How to integrate with Okta
Use Okta to provision, manage your user, and provide Single Sign On (SSO) to your users. This page explains how to integrate Okta with Semaphore to manage your users and groups using Okta.
Overview
Okta is an enterprise identity management platform. It provides a centralized place to manage your users and groups across different products. You can integrate Okta with Semaphore to manage your users from the Okta application.
It's possible to integrate Semaphore with other SCIM/SAML-based identity providers such as JumpCloud. If that the case, please contact support@semaphoreci.com so we can help you configure the integration.
To use the Okta integration you need the following:
- An Okta organization
- A Semaphore organization
- Admin access to Okta and Semaphore
If you set up and later remove the Okta integration, all the users created during the integration are deleted from Semaphore.
How to integrate Okta with Semaphore
The process of integrating Okta with Semaphore involves three steps:
The set up steps are explained in this section.
Step 1: Create Okta app
To create an Okta app integration:
-
Log in to your Okta organization
-
Press the Admin button to access the administrator dashboard
-
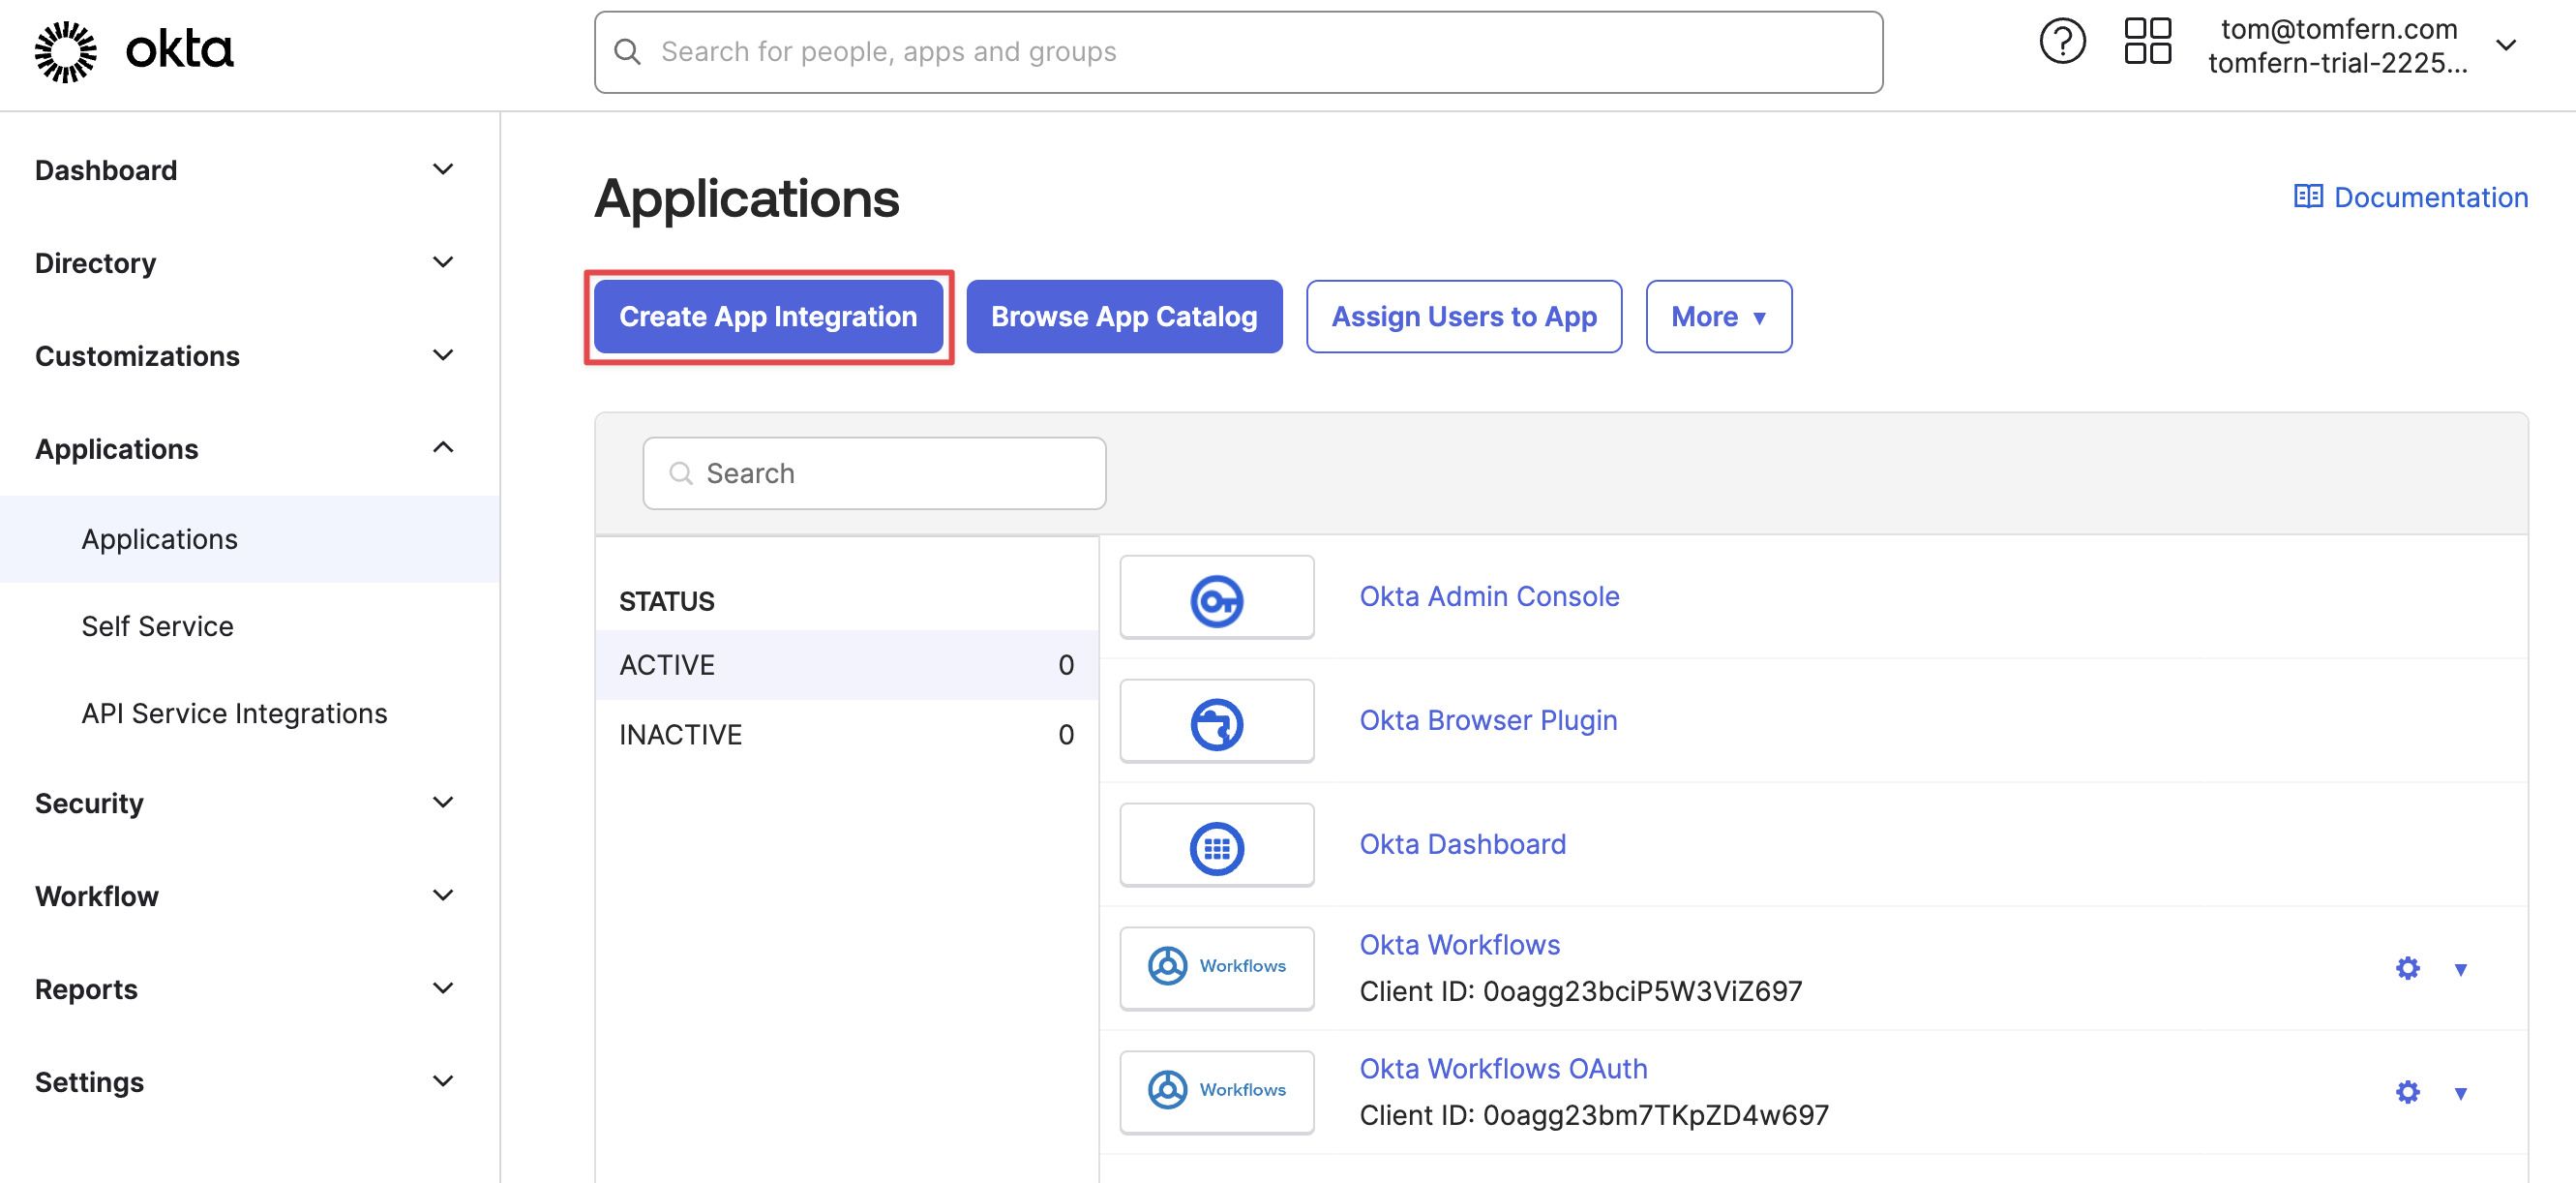
On the left side, select Applications > Applications
-
Press Create App Integration
-
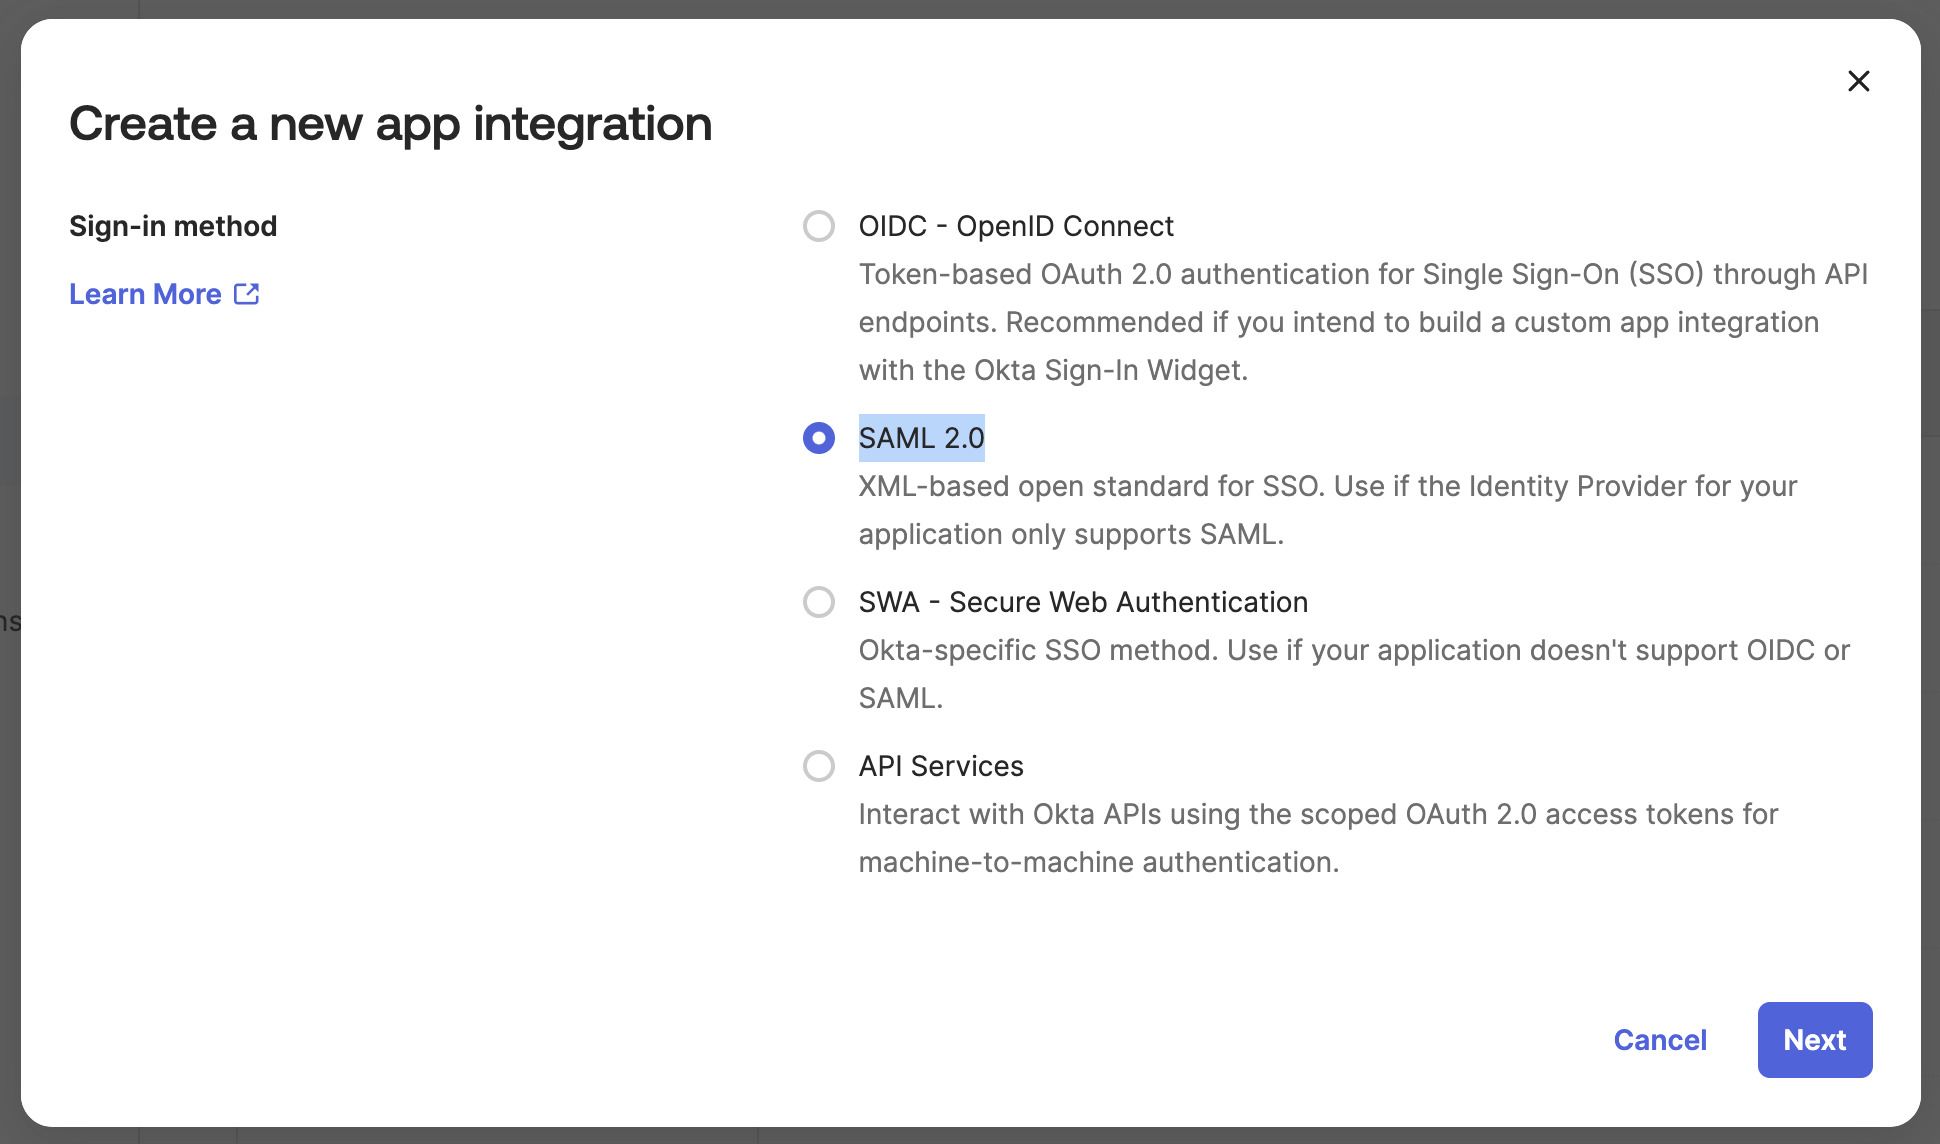
On the next screen, select SAML 2.0 and press Next:
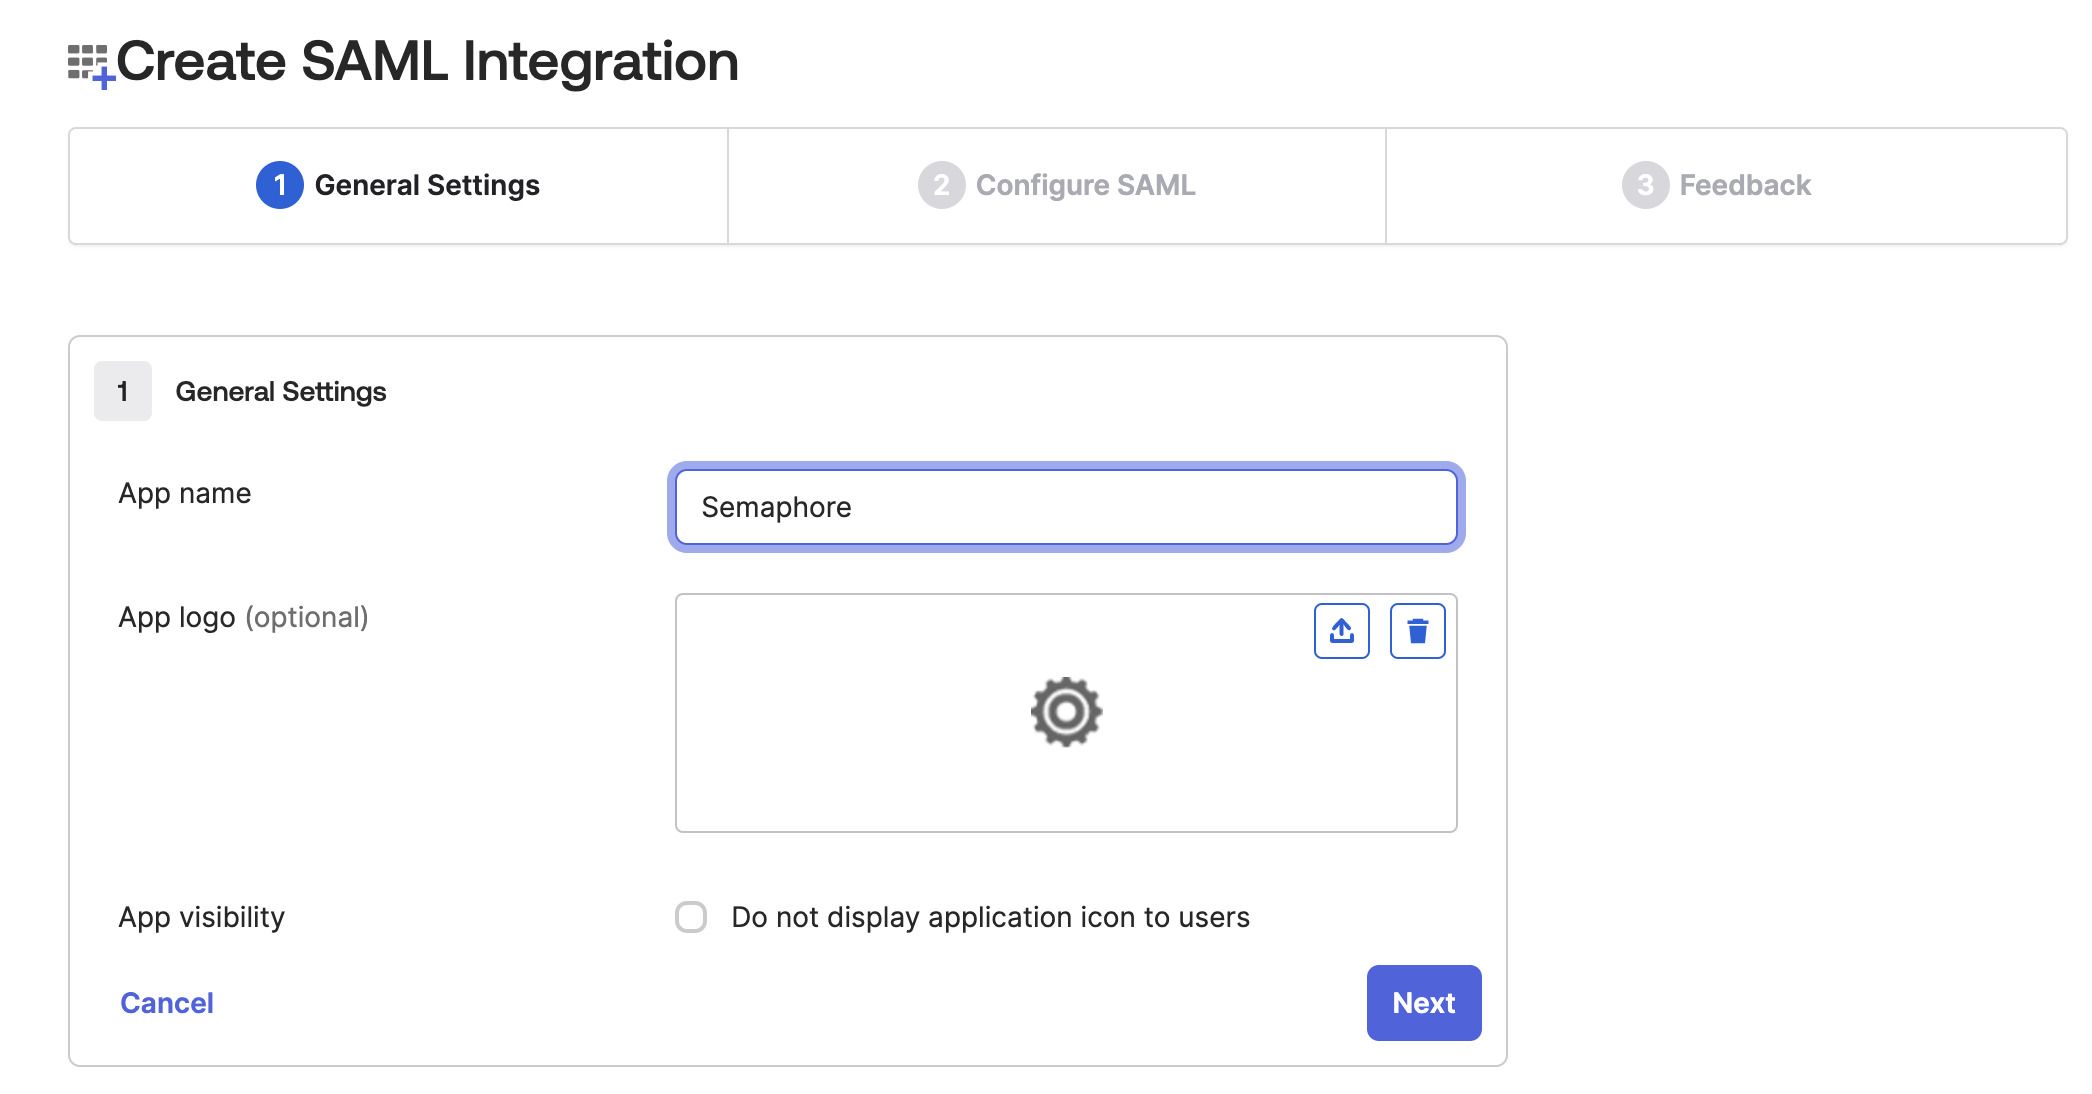
In General Settings, fill in the following values and then press Next:
- App name: use a descriptive name, e.g. "Semaphore"
- App logo: optional logo image
- App visibility: leave unchecked the option (this is the default)
-
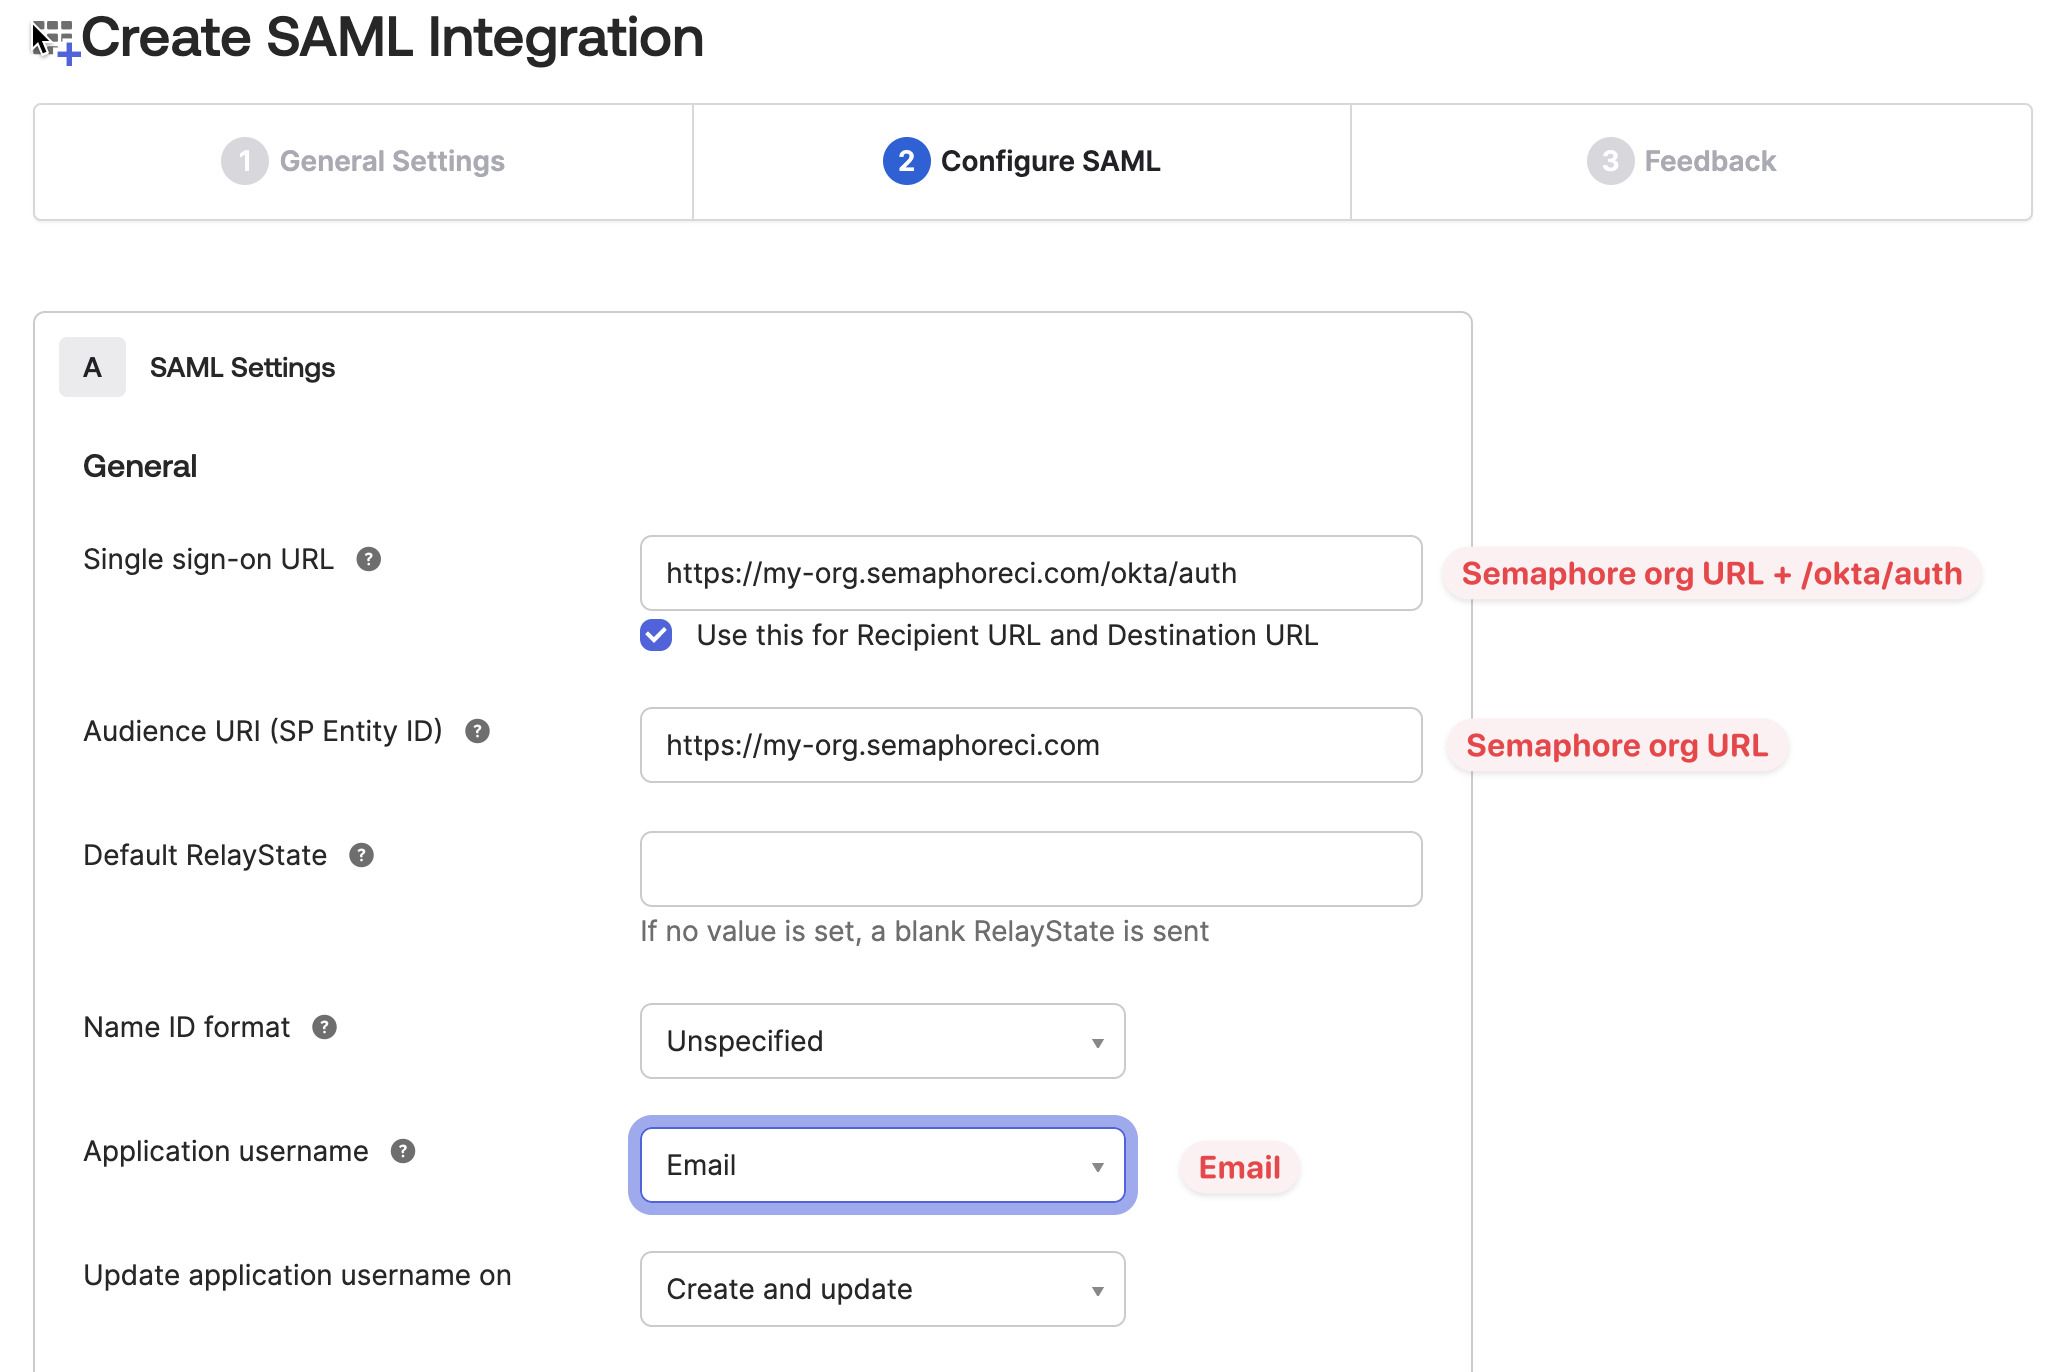
On the Configure SAML page, fill in the following values and press Next:
- Single Sign On URL: this is the URL of your Semaphore organization followed by
/okta/auth. For example, if your organization URL ishttps://my-org.semaphoreci.com, you must fill in the valuehttps://my-org.semaphoreci.com/okta/auth - Leave the option Use this for Recipient URL and Destination URL checked (default)
- Audience URL: this is the URL of your Semaphore organization. For example
https://my-org.semaphoreci.com - Application username: choose Email from the selection box
- Single Sign On URL: this is the URL of your Semaphore organization followed by
-
On the Feedback page, select I'm an Okta customer adding an internal app
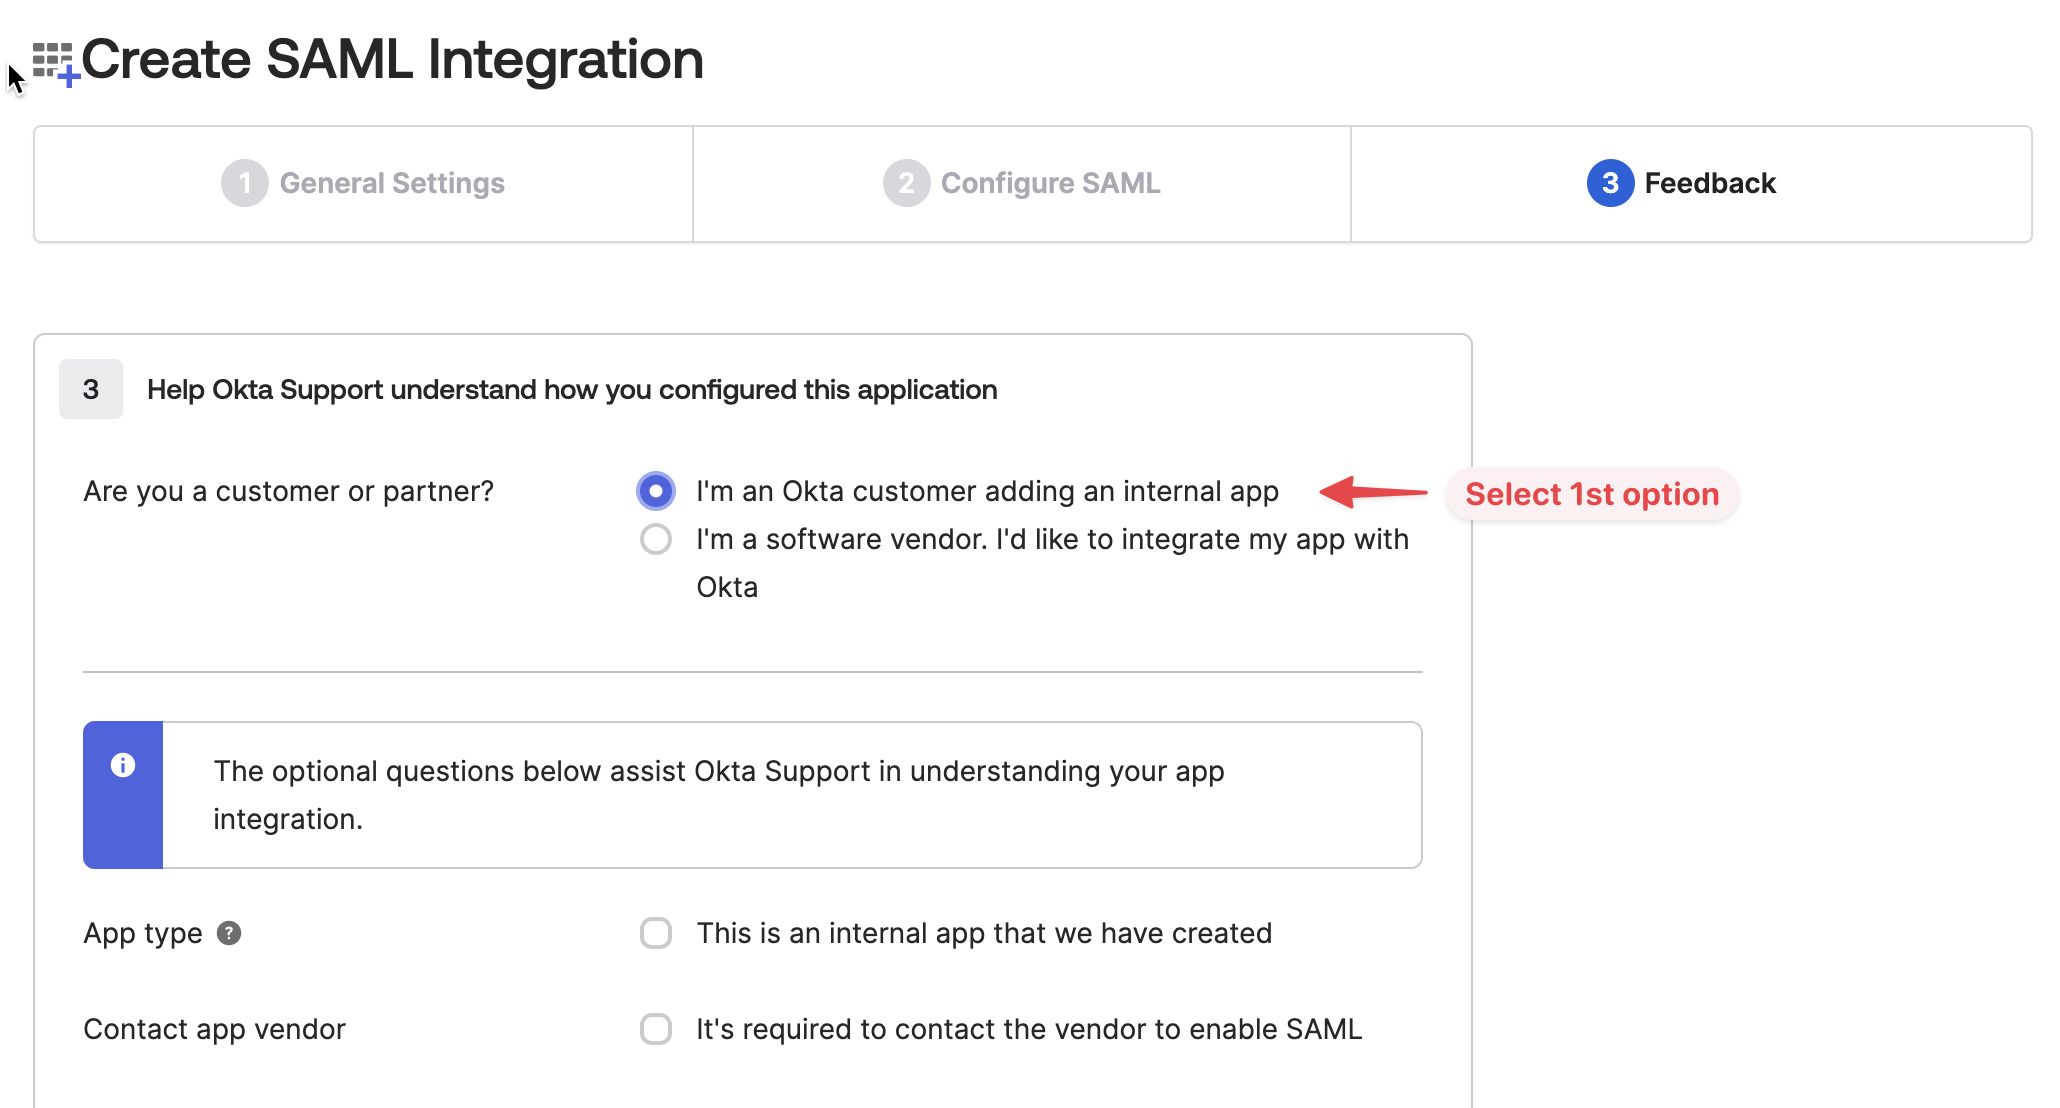
You can leave the rest of the settings in their default values. Press Finish to complete the setup.
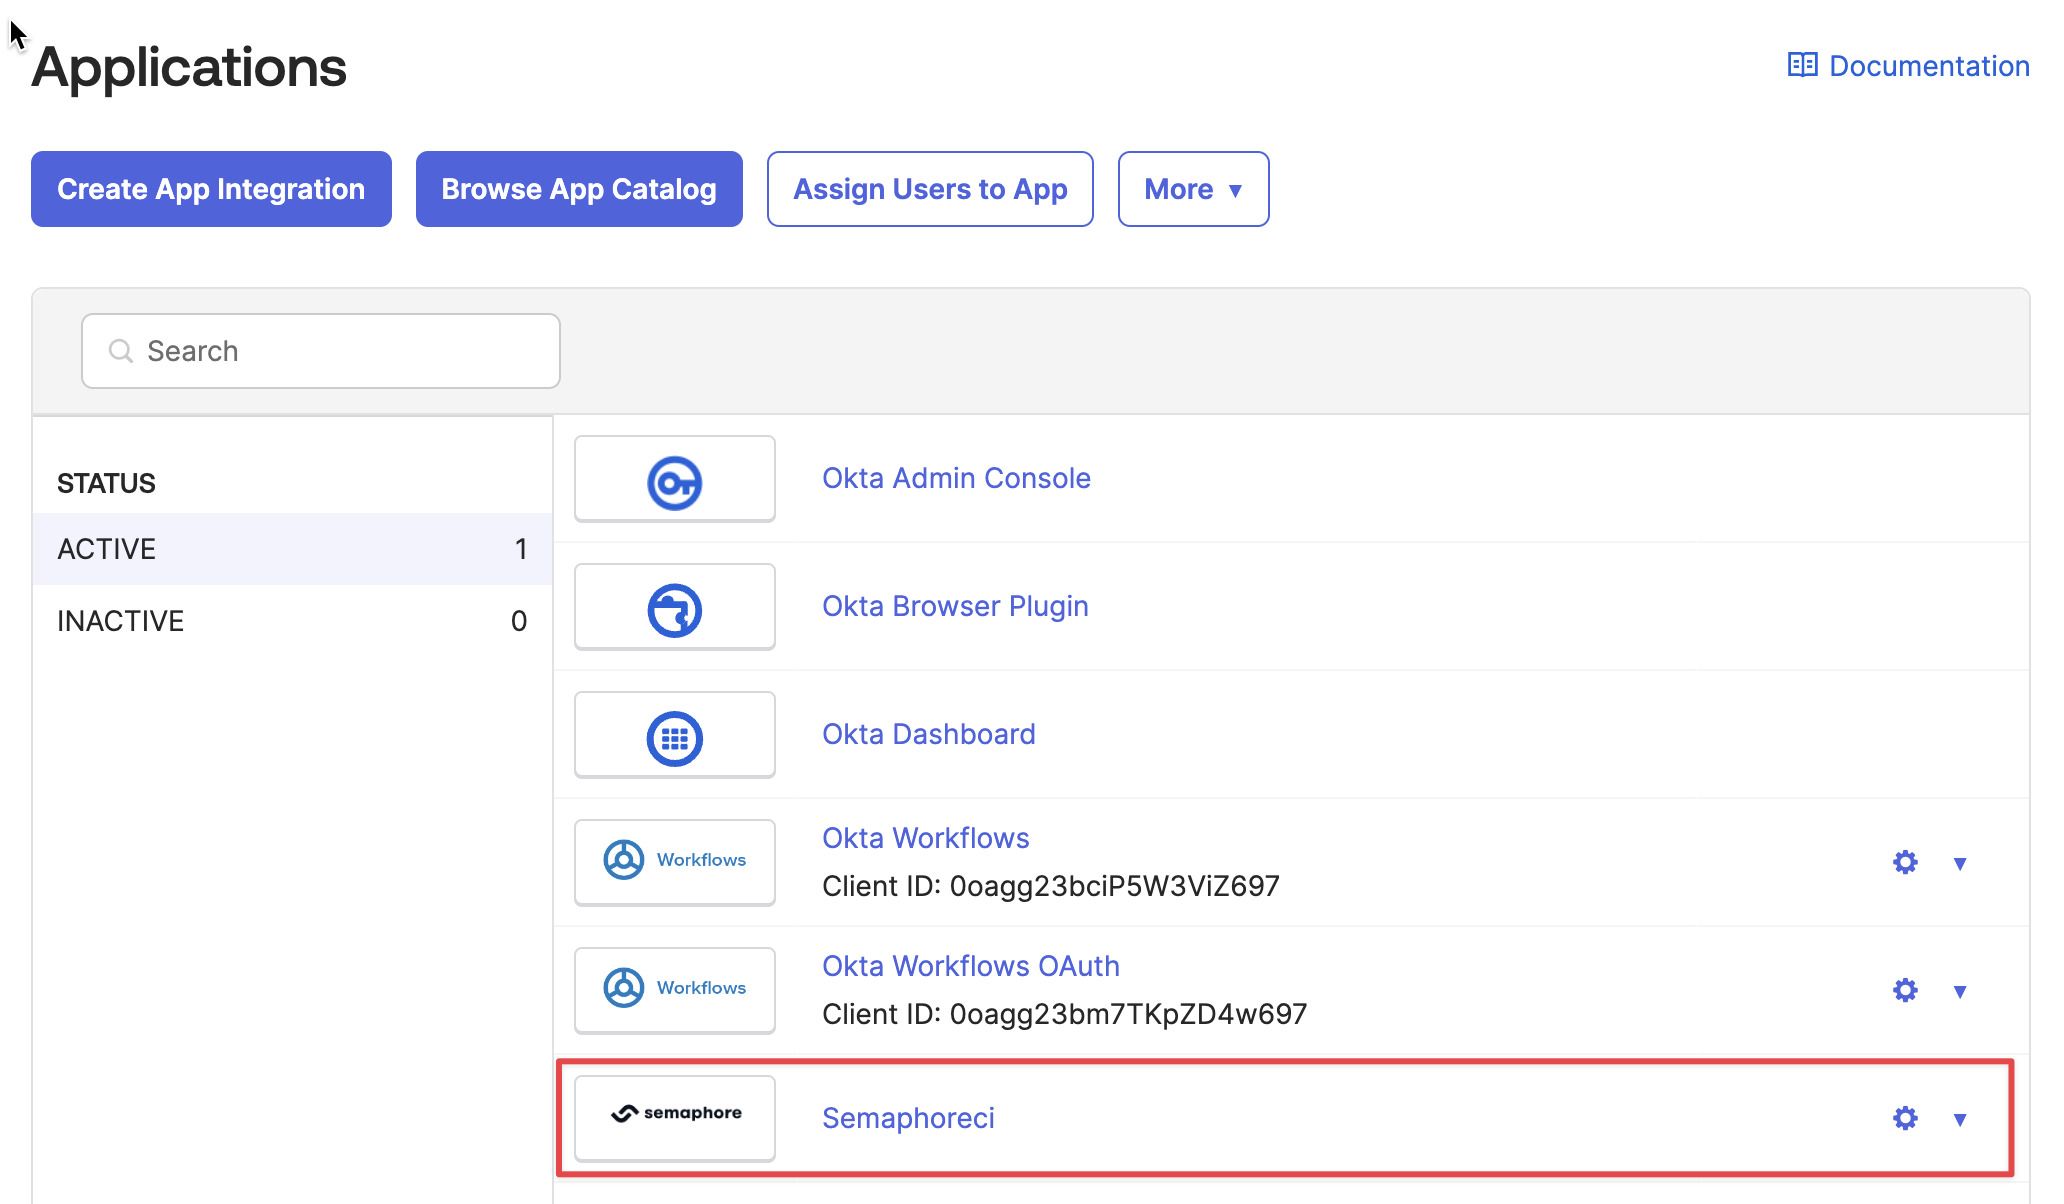
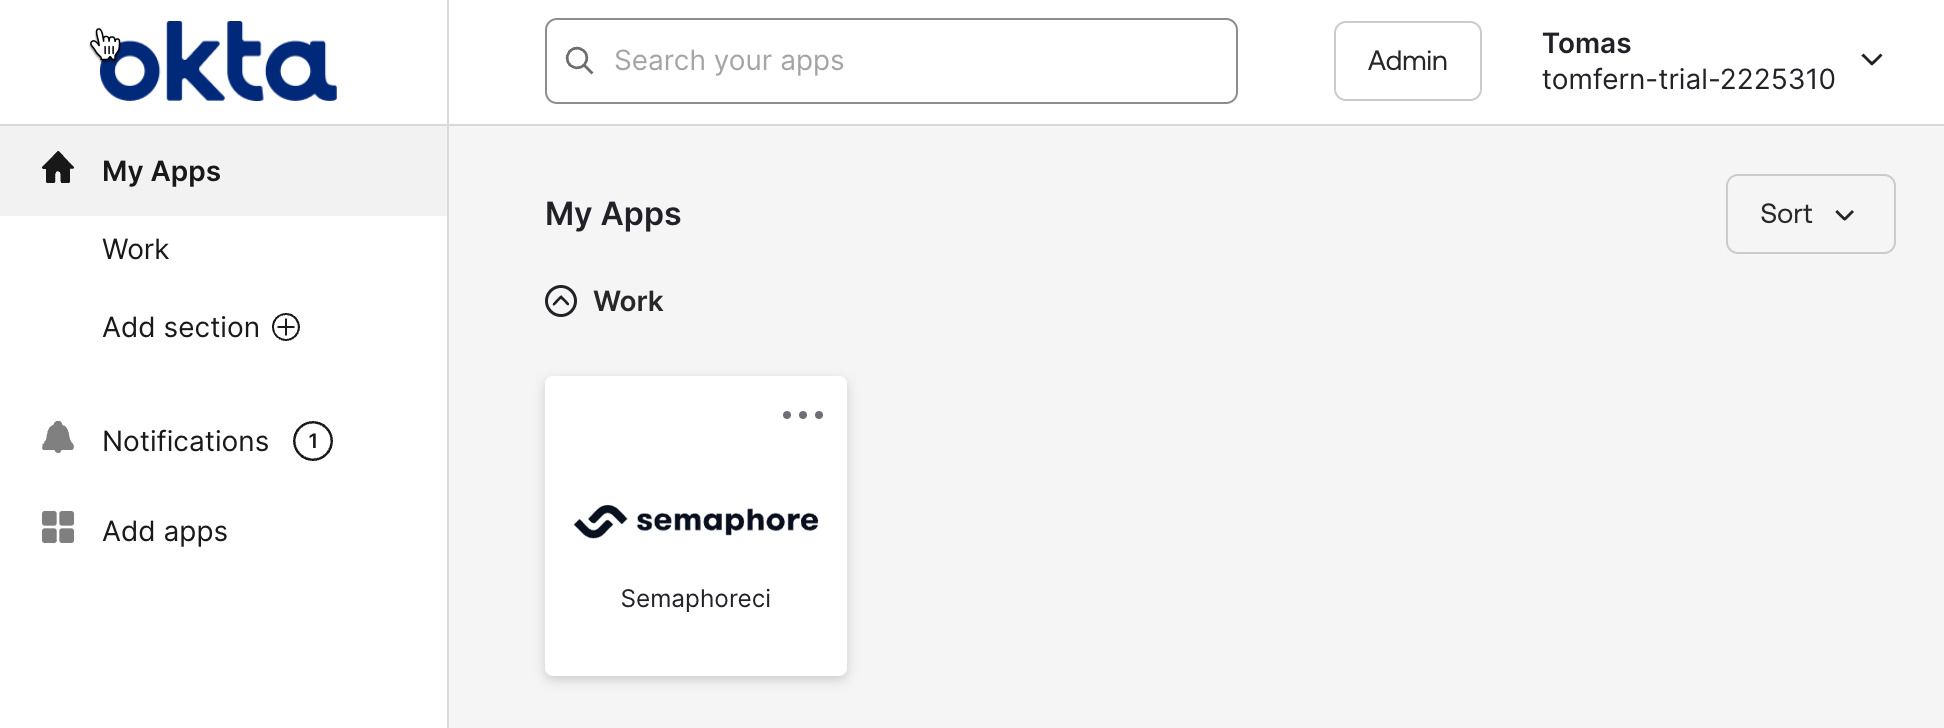
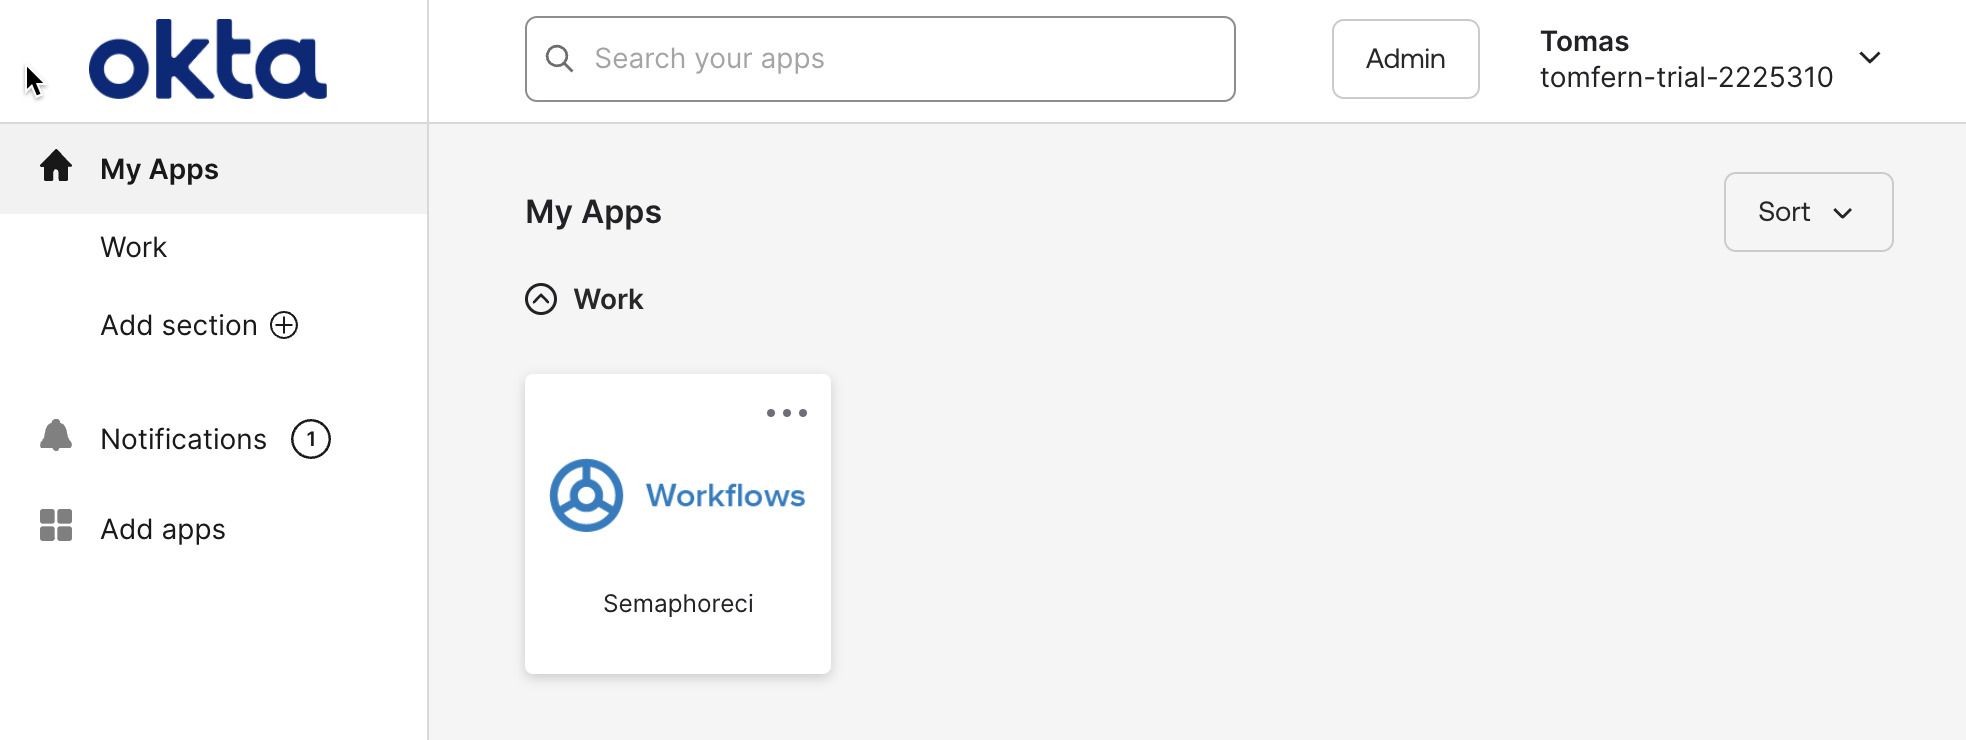
You should see the new Semaphore application on your Okta applications page.
Step 2: Connect with Semaphore
The second step is to connect Semaphore with Okta. Before you can do this, you need to copy some values from the Okta application page:
-
Navigate to the Okta Application you created earlier
-
Go to the Sign On tab
-
Press View SAML setup instructions on the bottom-right corner
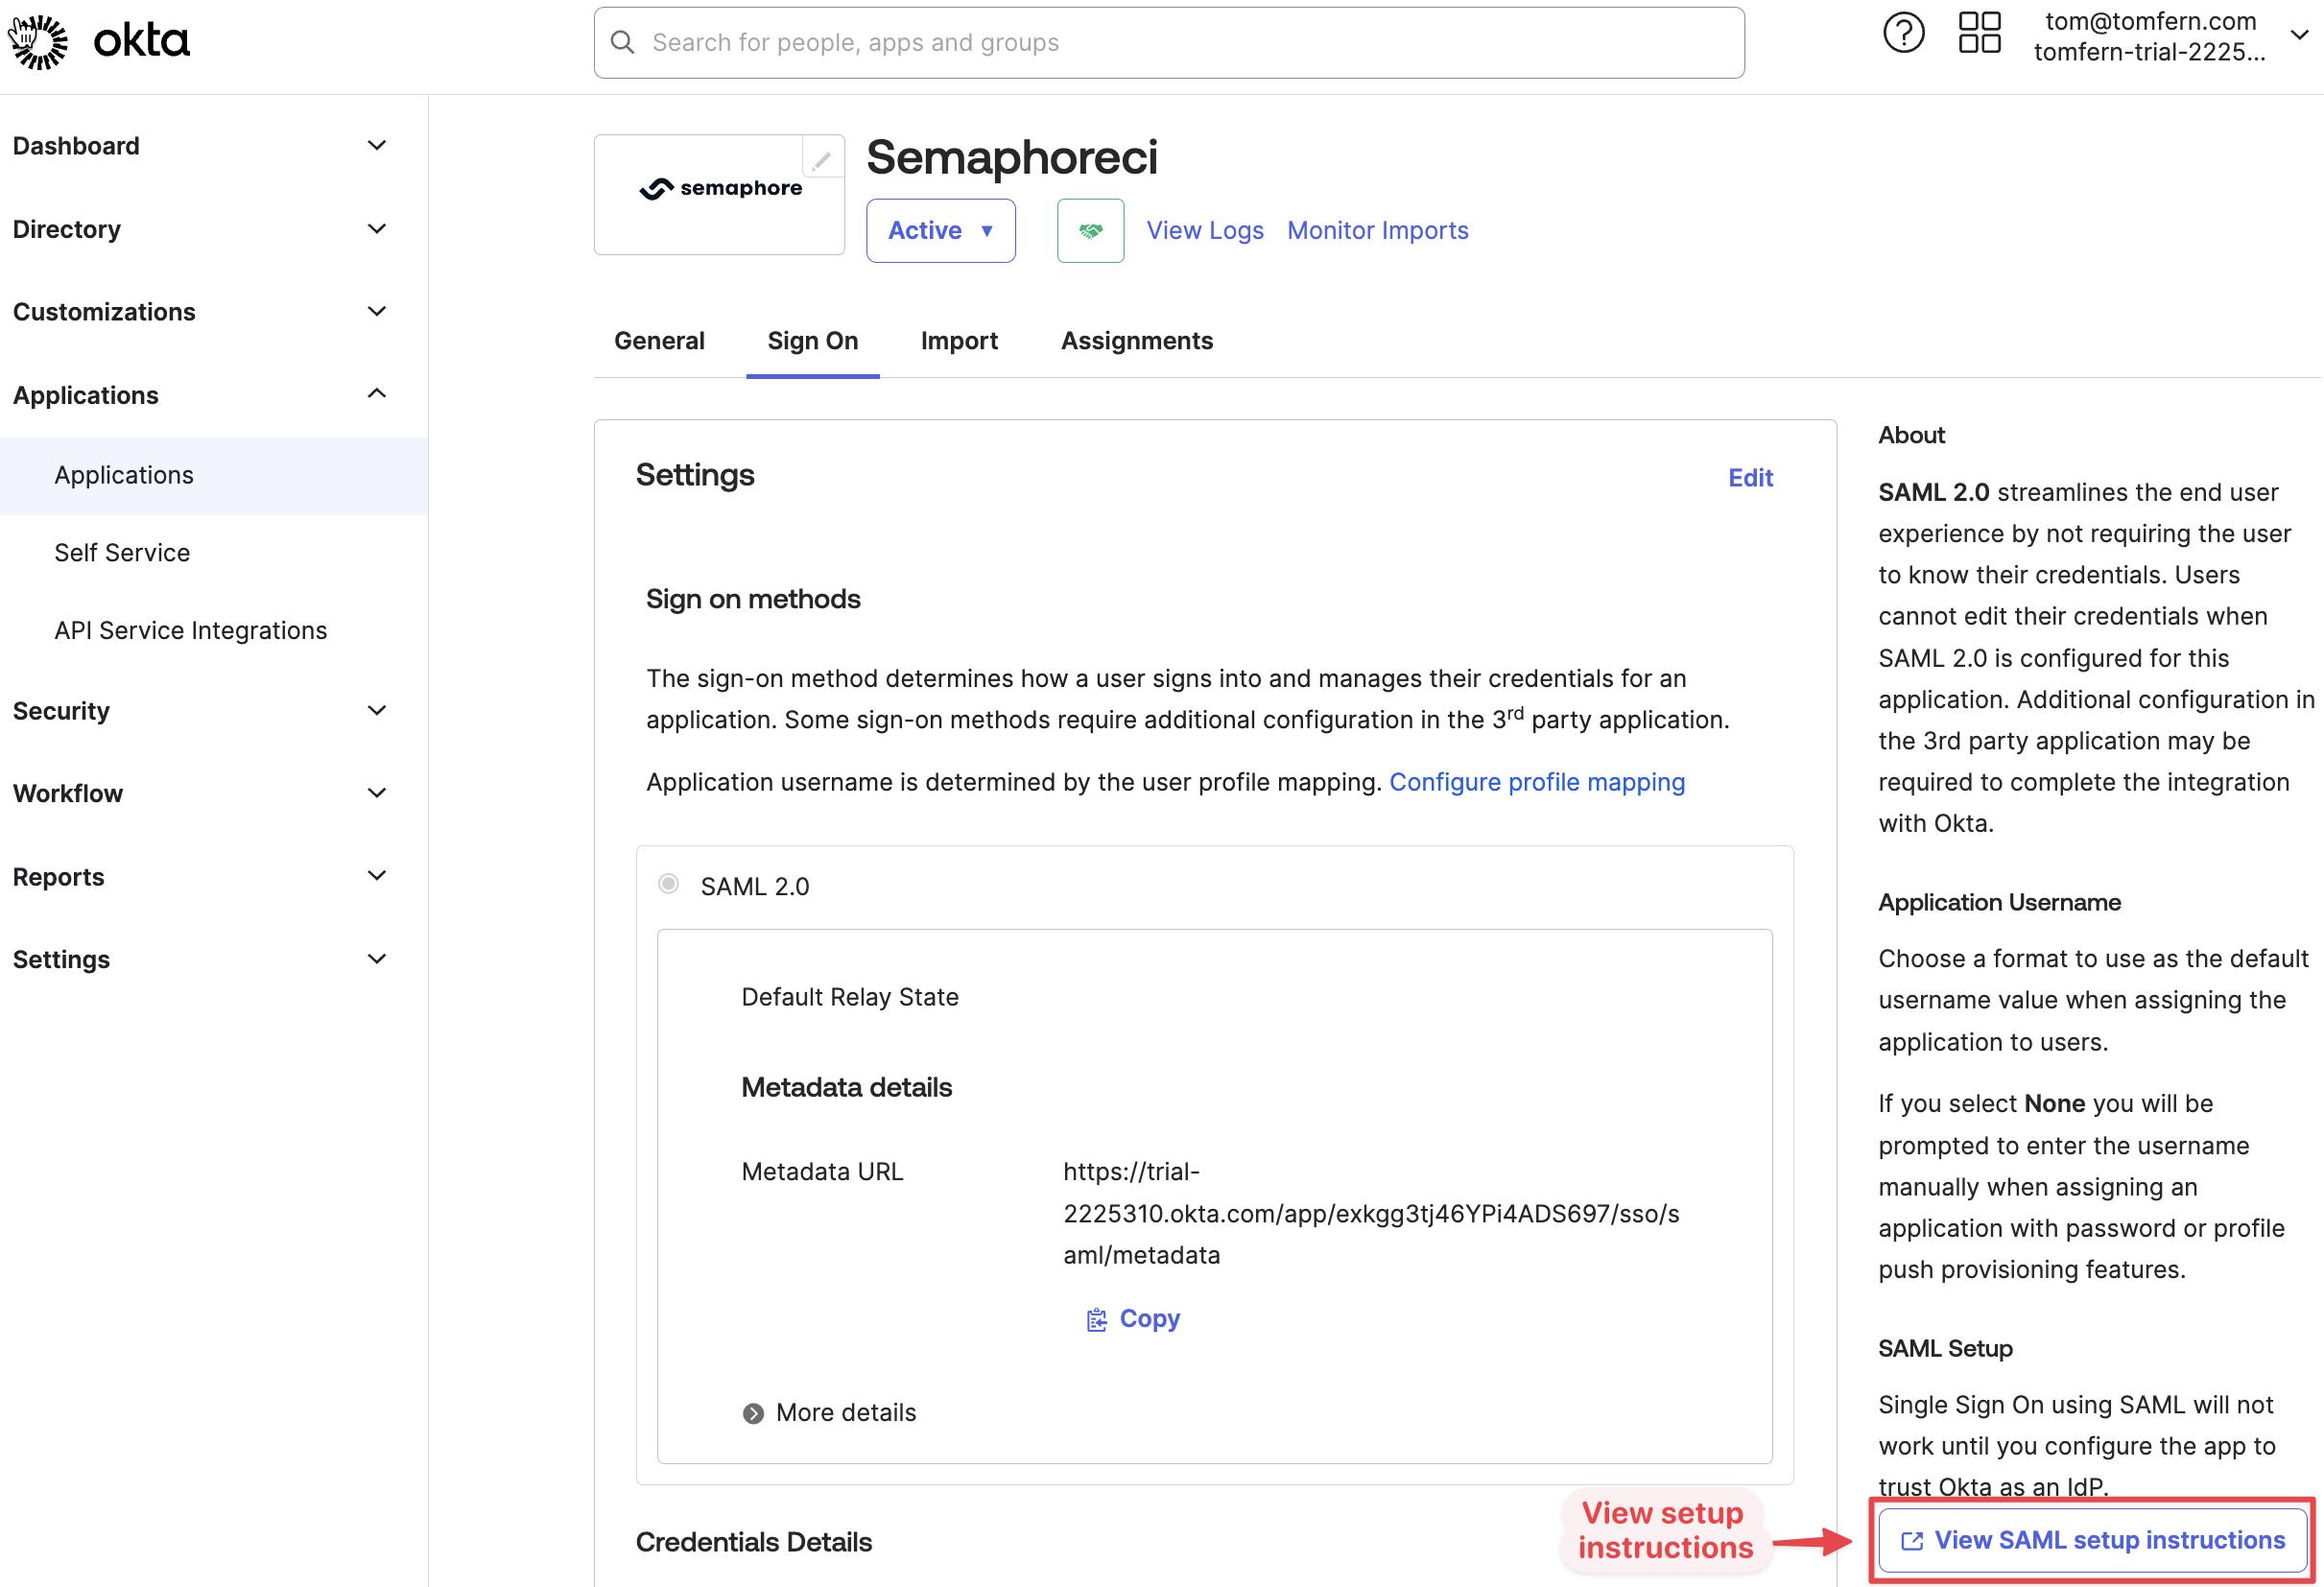
-
Copy the values shown on the screen. You will need them next.
To create the connection between Semaphore and Okta, follow these steps:
-
Log in your Semaphore organization using an admin account
-
Open the organization menu on the top-right corner and select Settings
-
Go to Okta Integration and press Set up
-
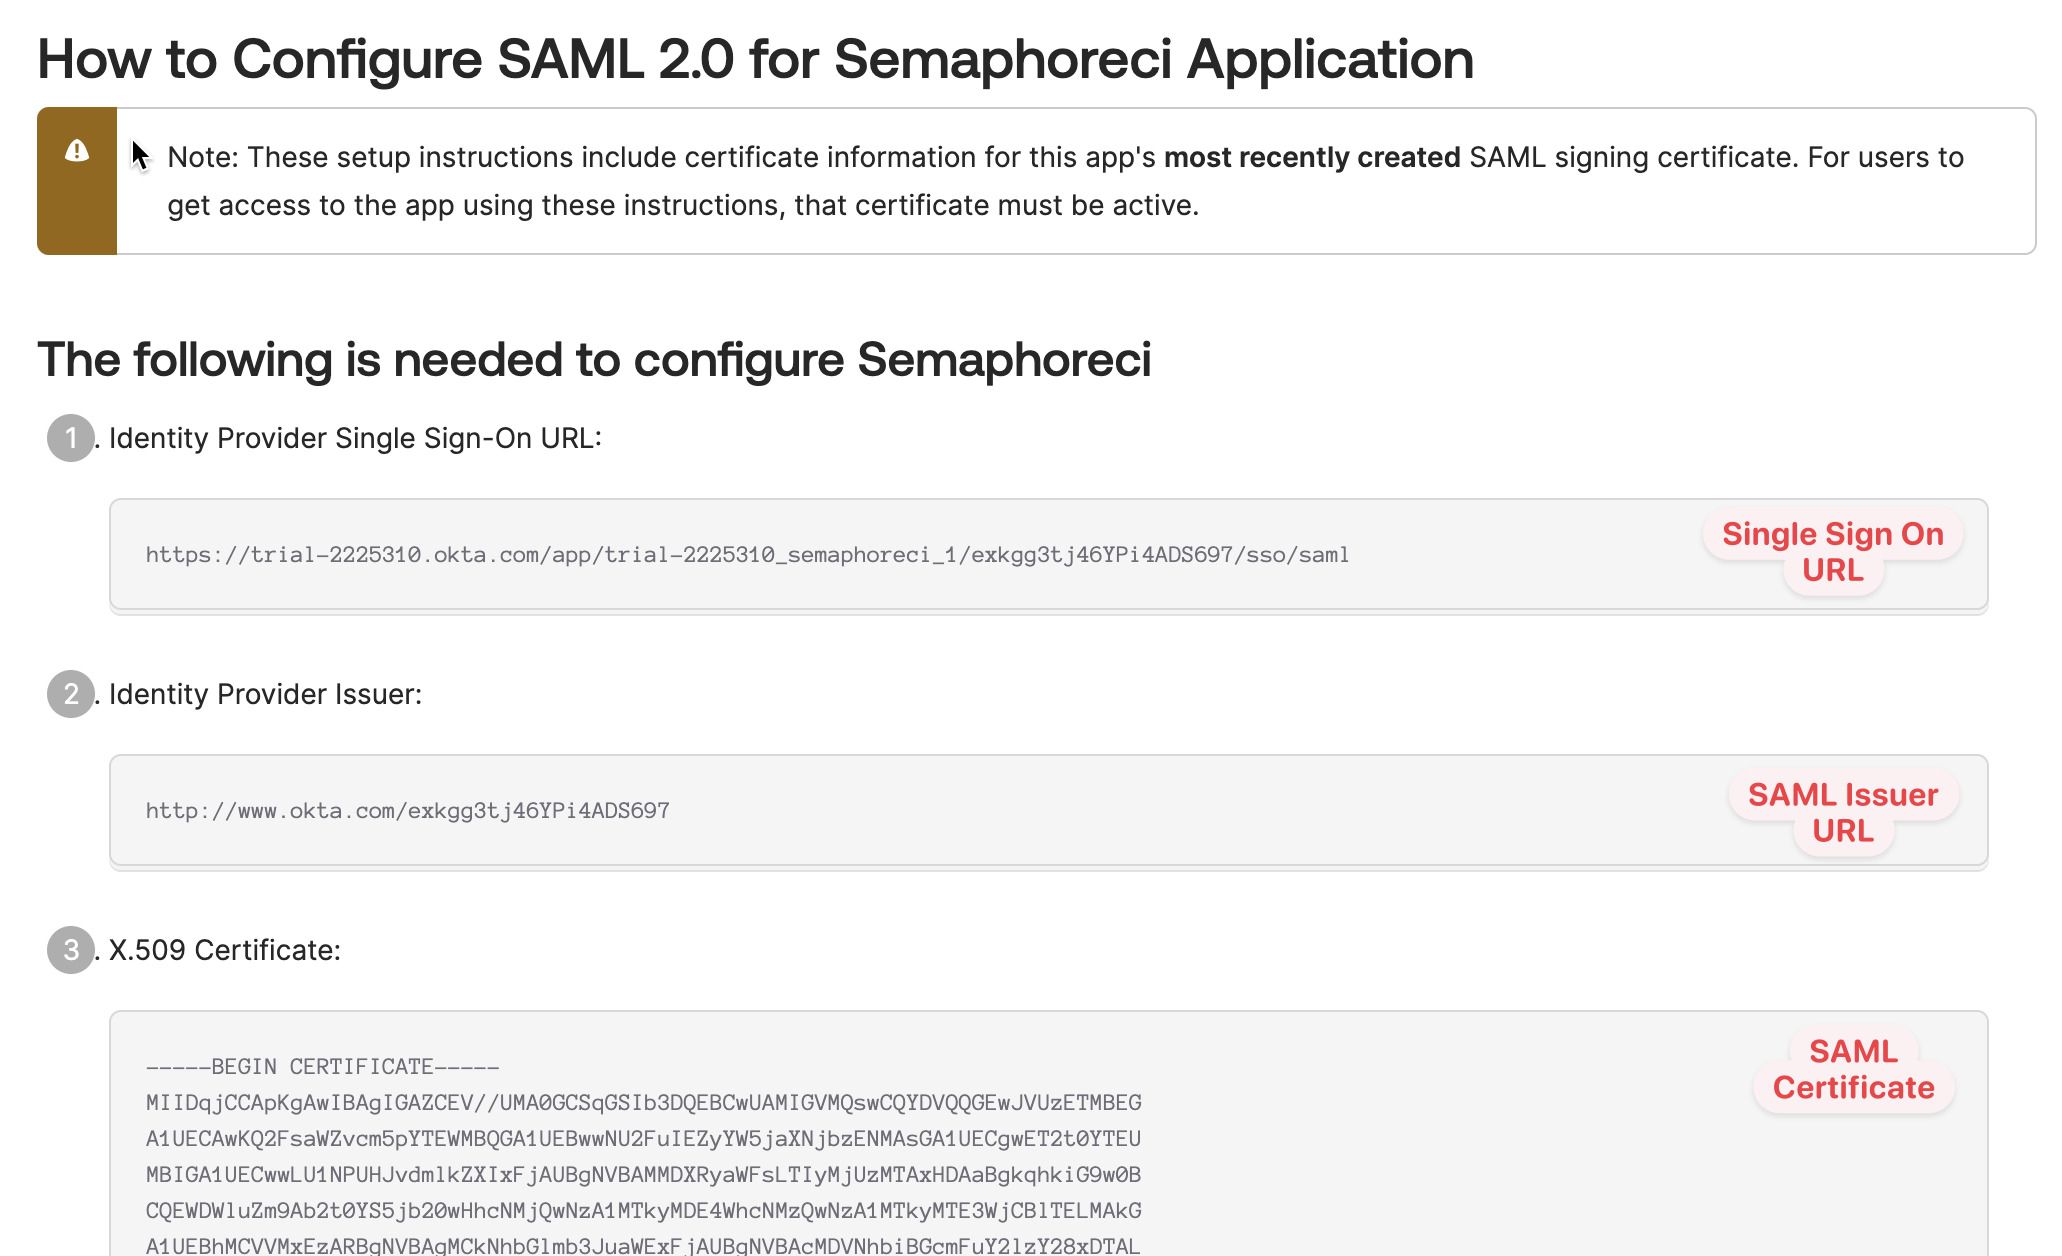
Paste the Single Sign On URL, SAML Issuer and SAML Certificate values from the Okta SAML setup instructions
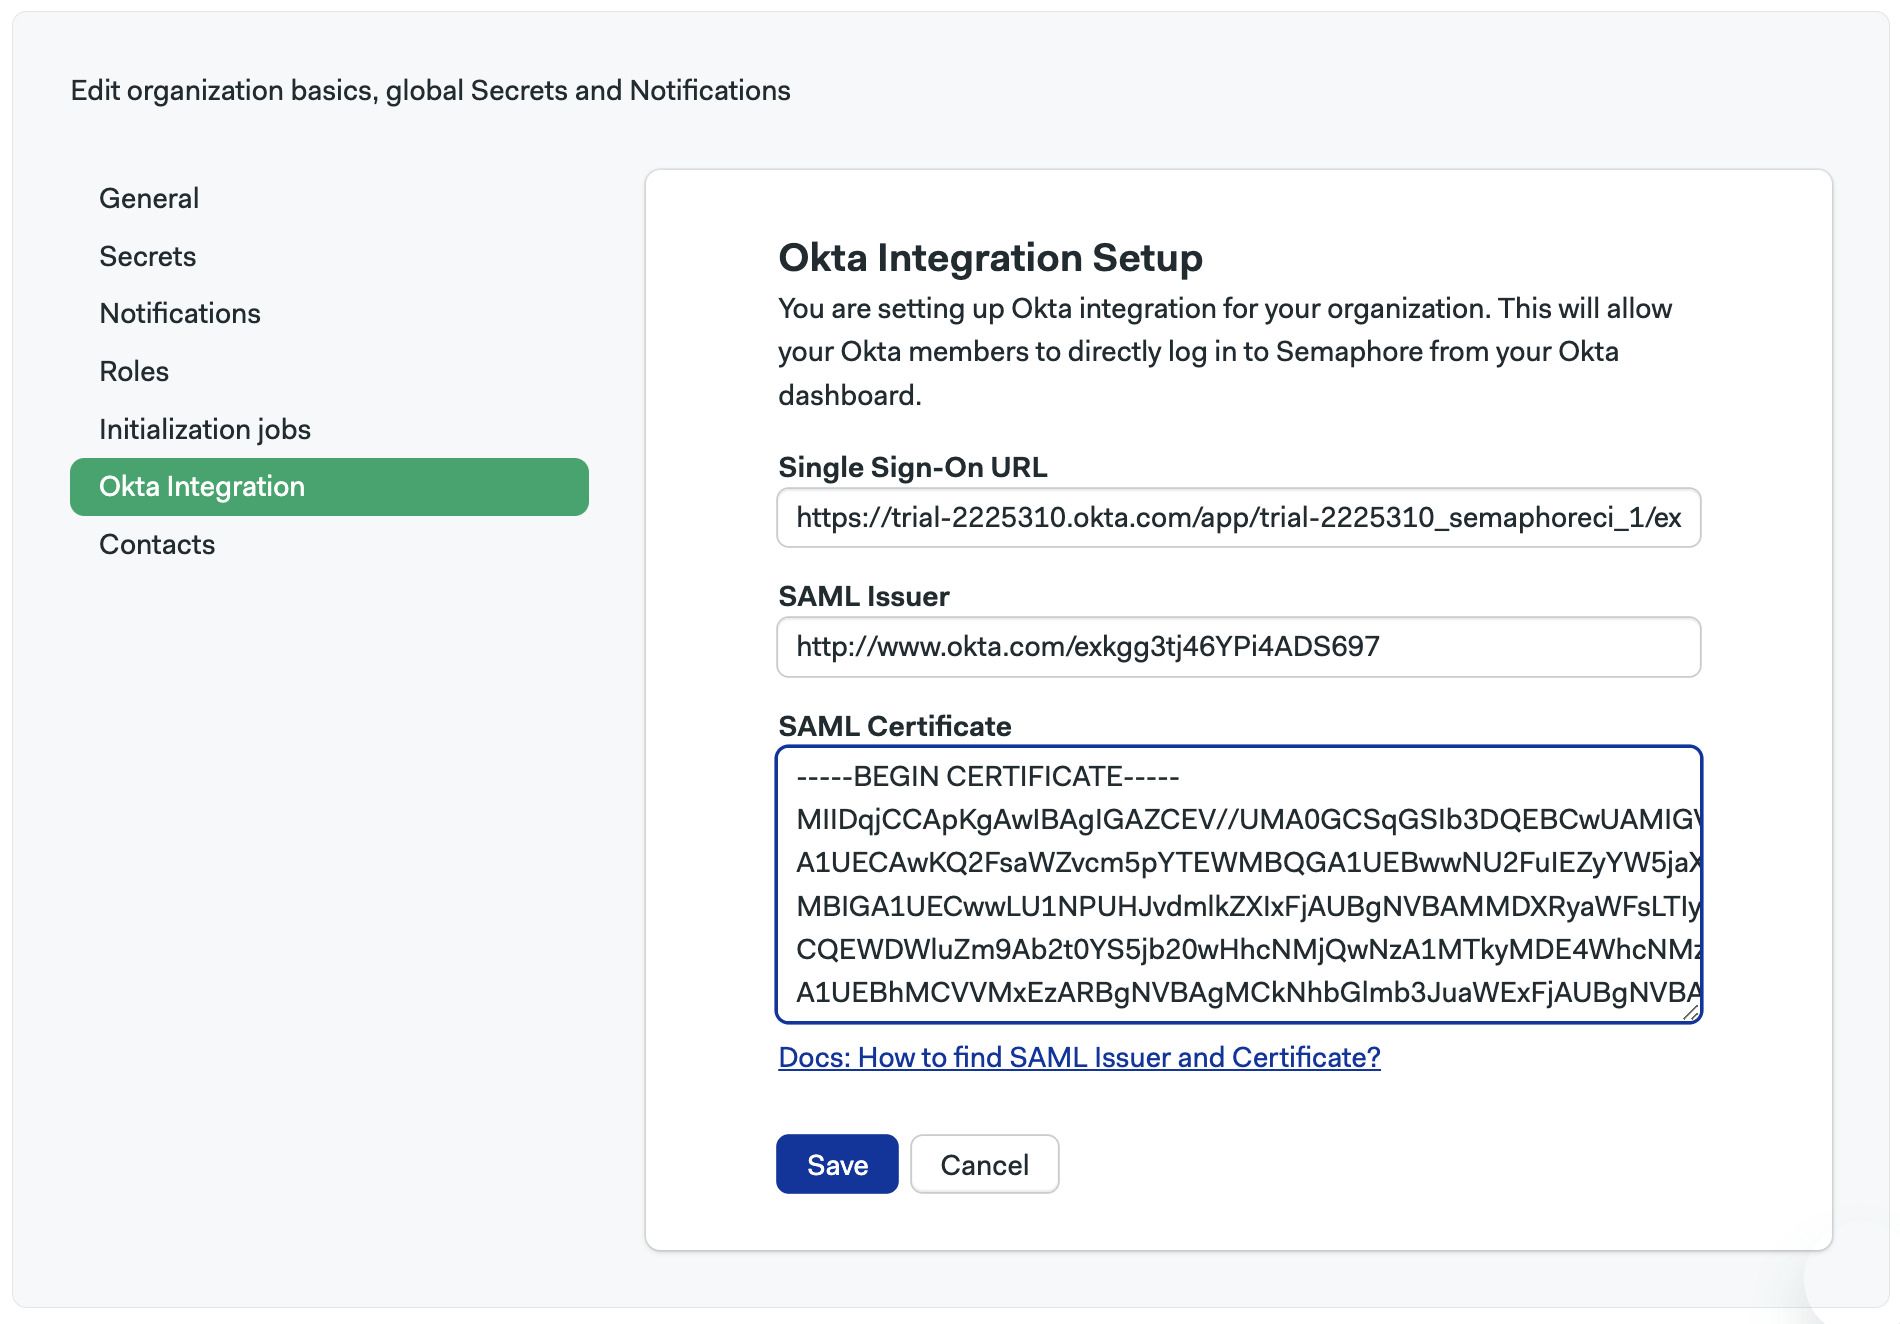
-
Once you press Save, Semaphore shows your SCIM Authorization token.
This value is only shown once, so be sure to copy and store it in a safe place as you will need it during the next step.
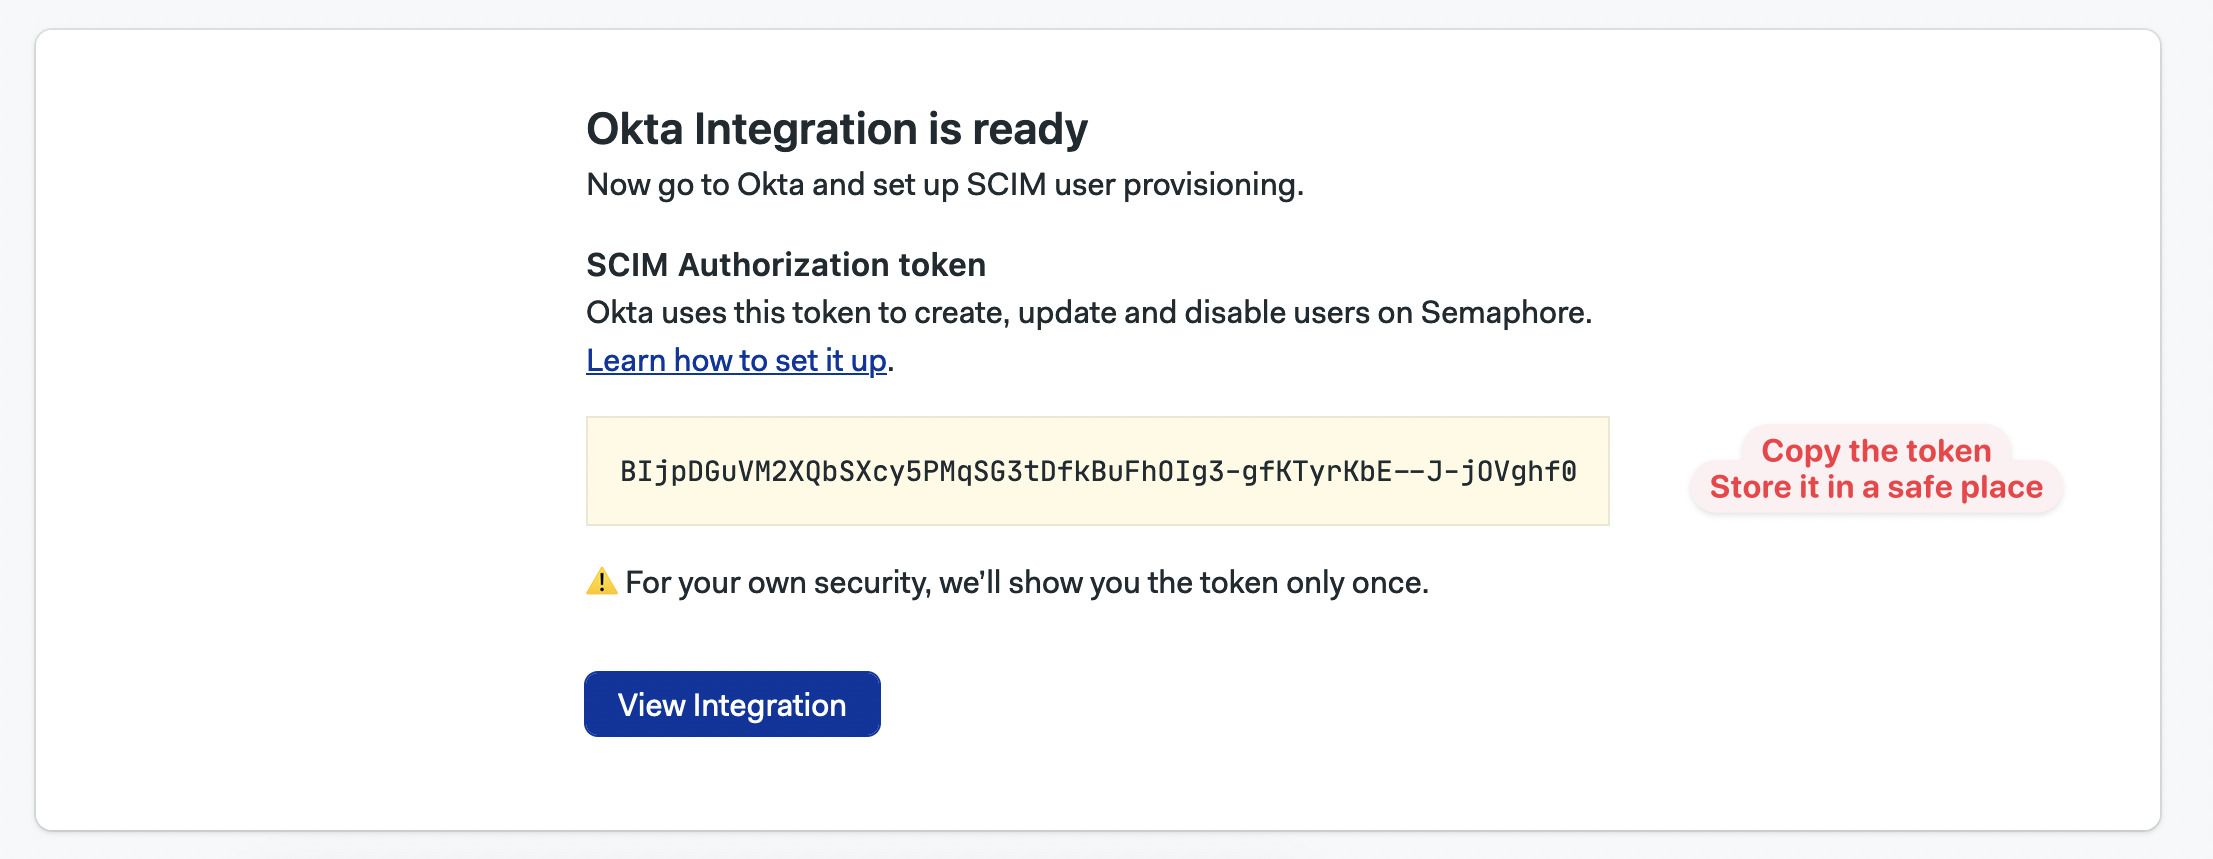
Semaphore is now connected to Okta. You can enable user provisioning in the next step.
Step 3: Configure user provisioning
Before you can manage users from Okta, you need to enable user provisioning in the Okta application.
To enable user management in Okta, open the Okta application you created earlier.
-
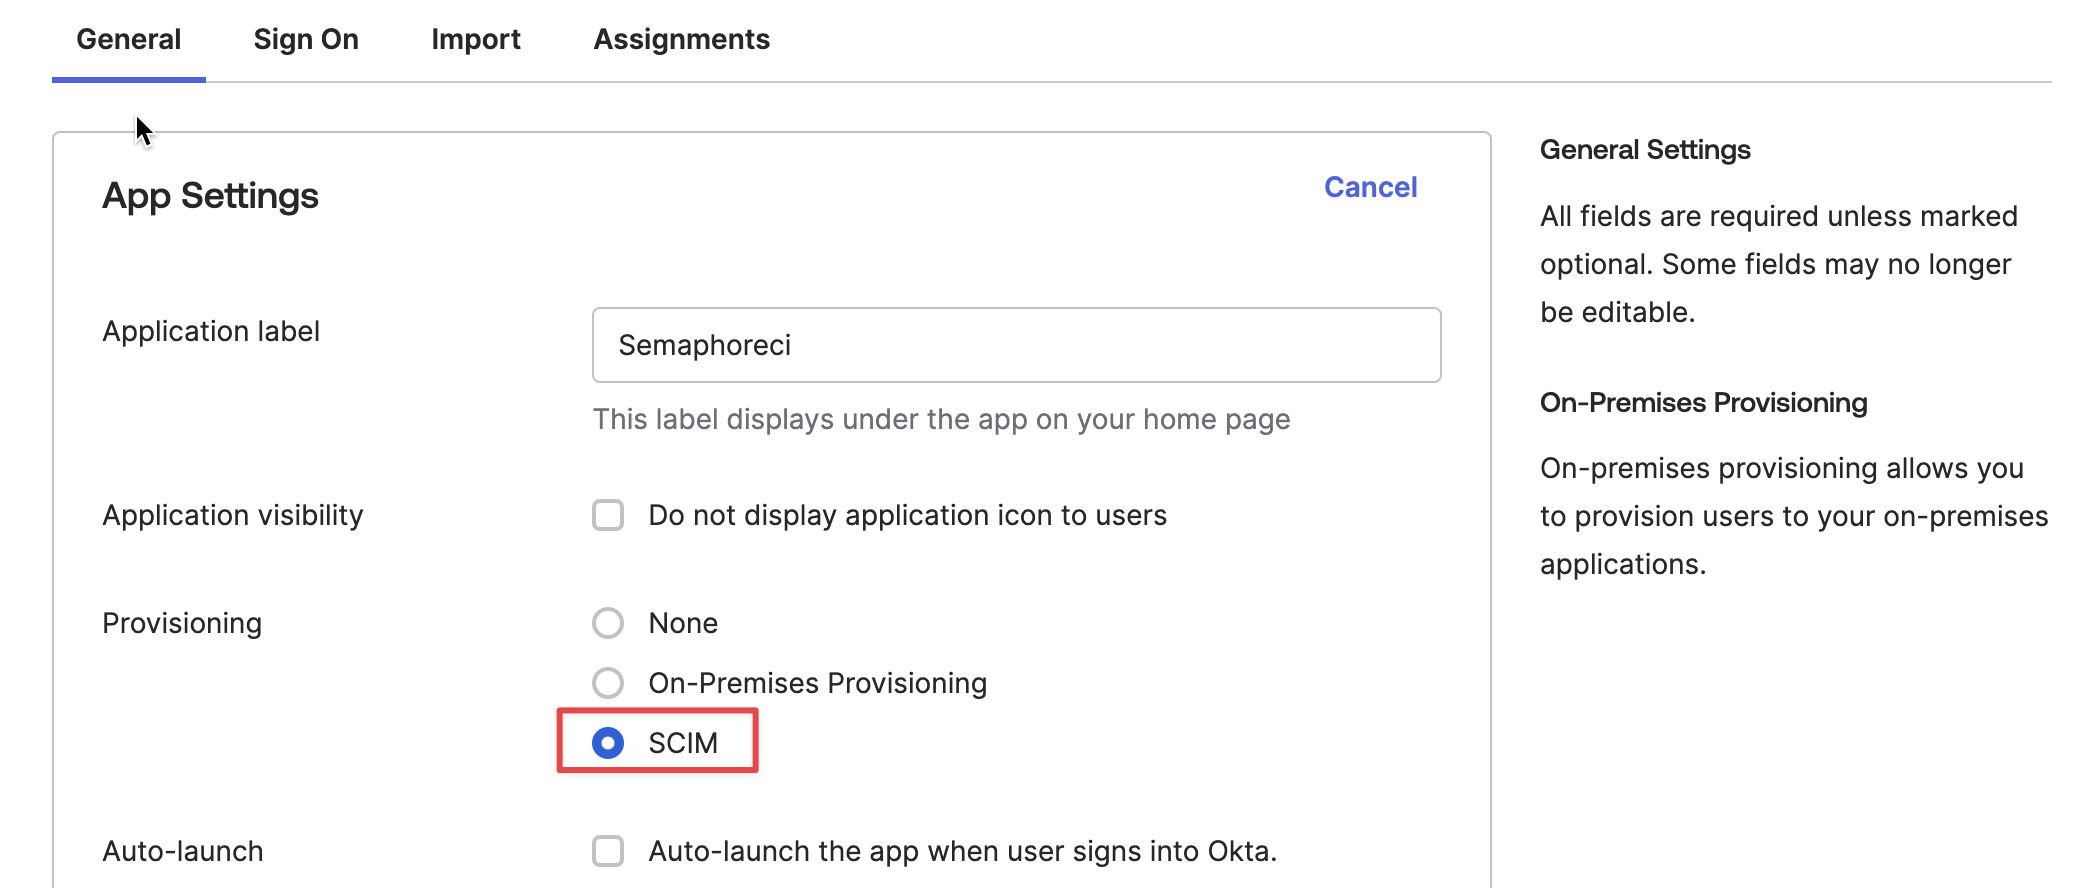
Under General tab, click on Edit.
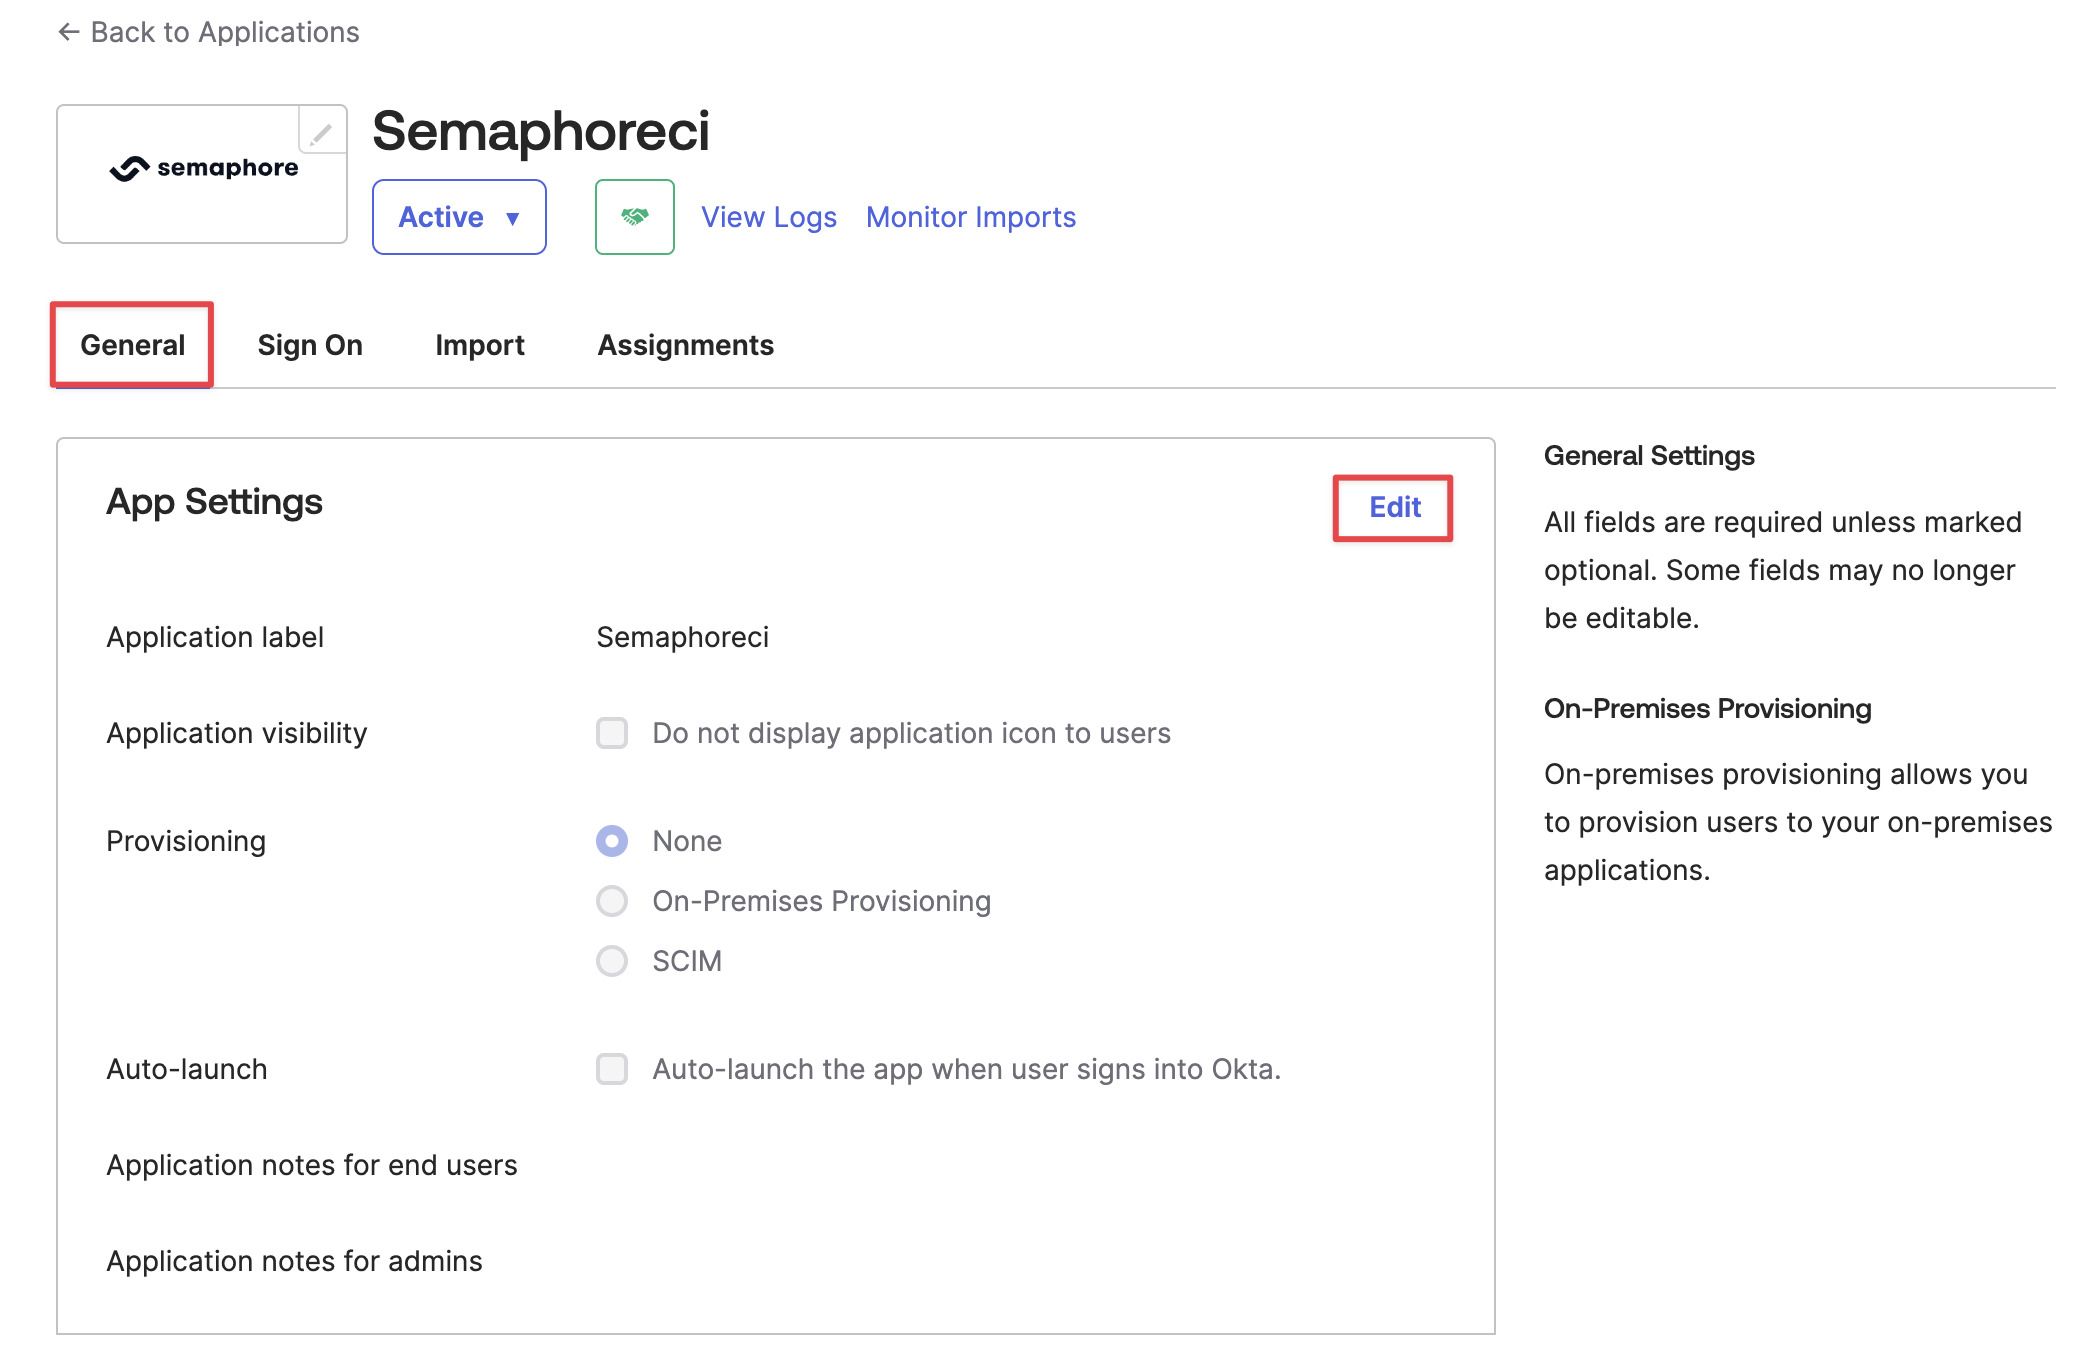
-
Choose SCIM as the provisioning option. Press Save
-
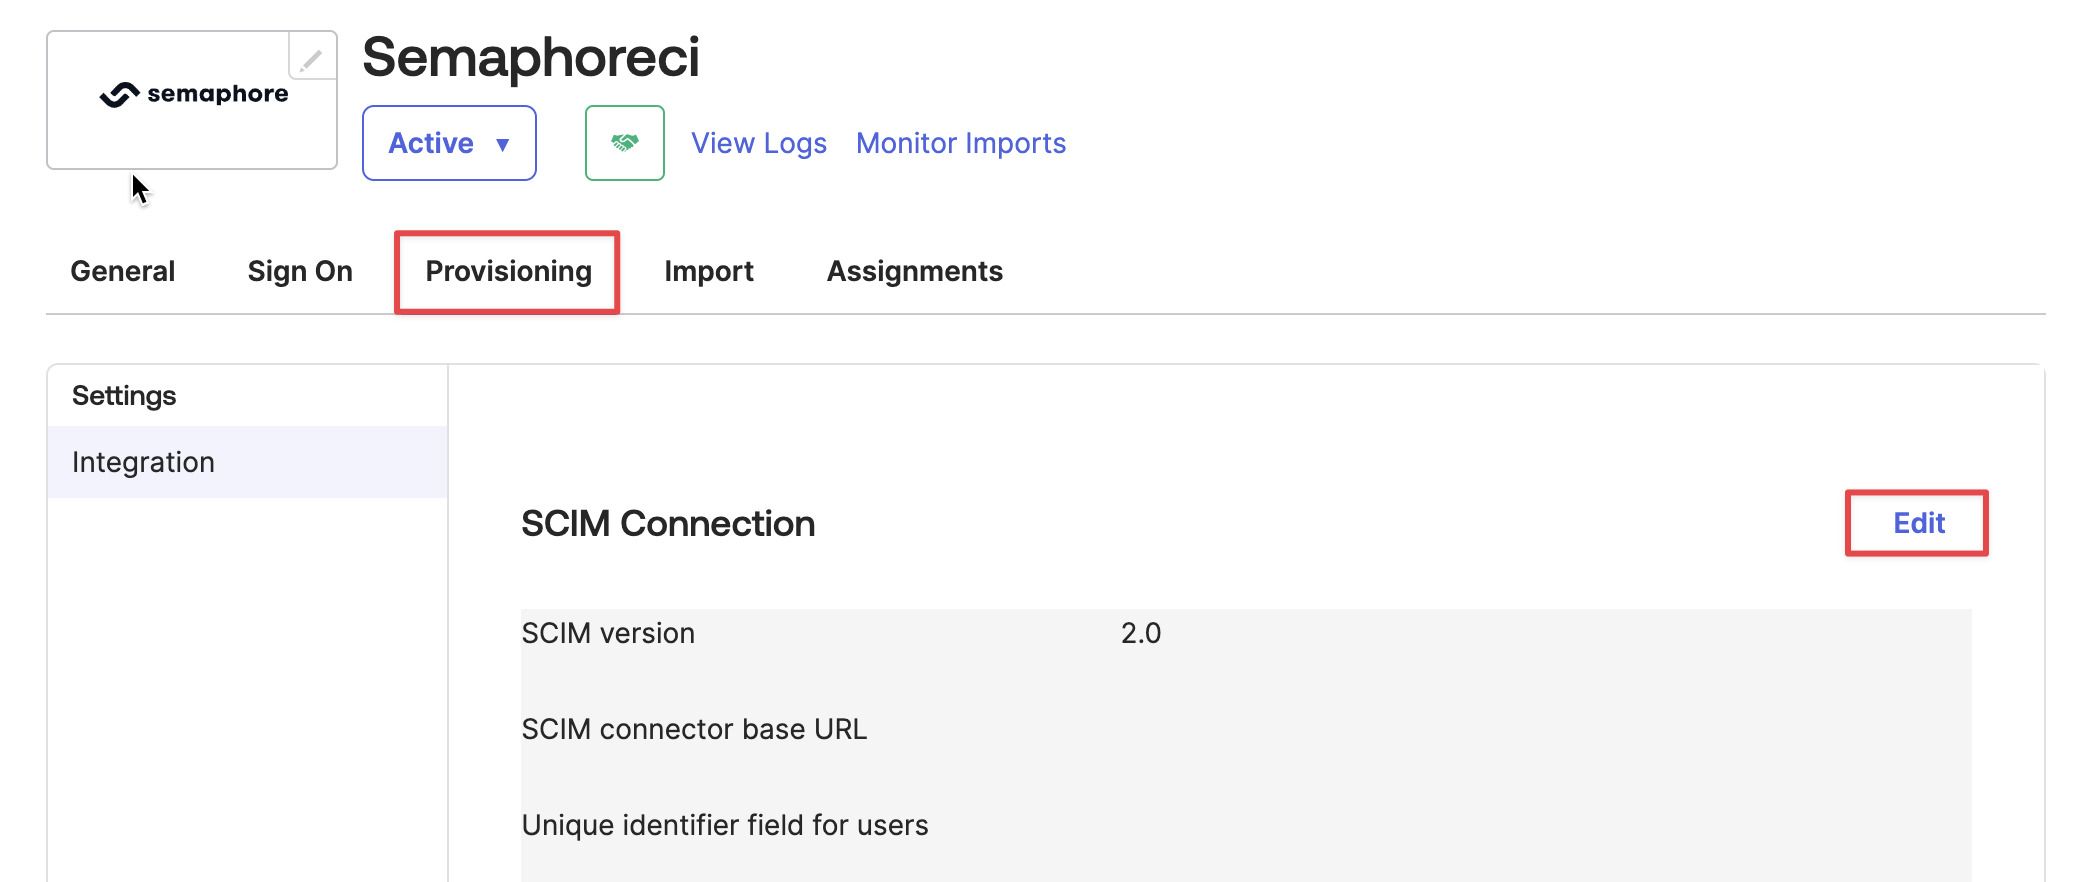
A new tab should have appeared called Provisioning. Open that tab and click on Edit.
-
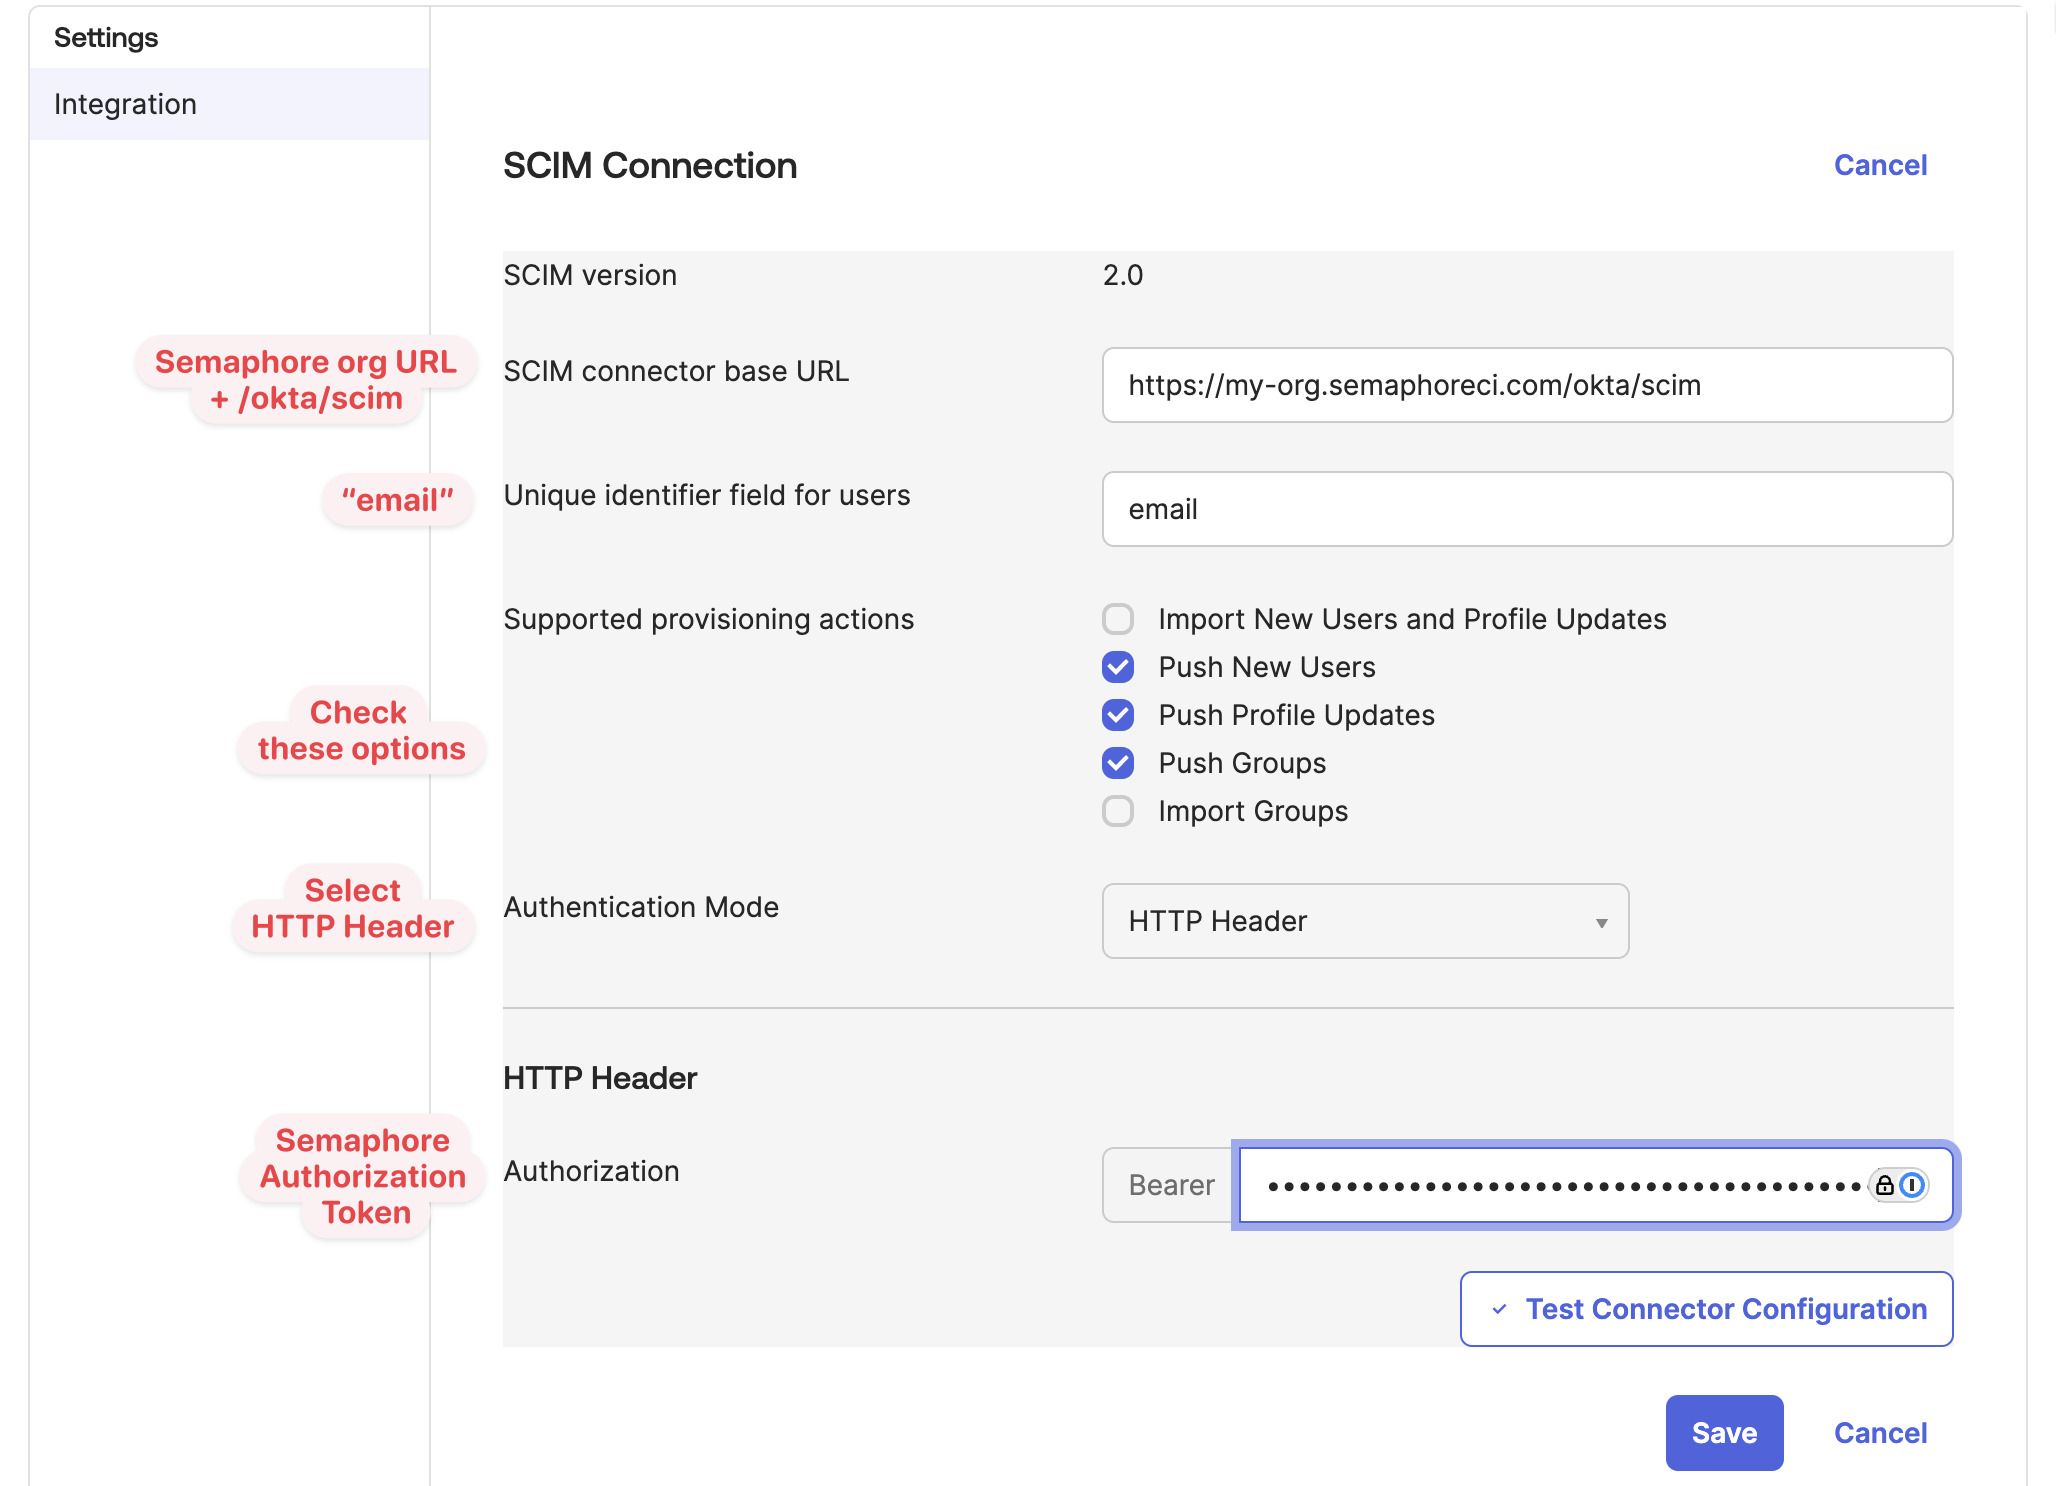
Fill in the following values:
- SCIM connector base URL: this is your organization URL followed by
/okta/scrim. For example, if your organization URL ishttps://my-org.semaphoreci.com, the value for this field ishttps://my-org.semaphoreci.com/okta/scim - Unique identifier field for users: type the string "email"
- Supported provisioning actions: select Push New Users, Push Profile Updates, and Push Groups
- Authentication Mode: select HTTP Header
- Authorization: paste the token that Semaphore showed earlier
- SCIM connector base URL: this is your organization URL followed by
-
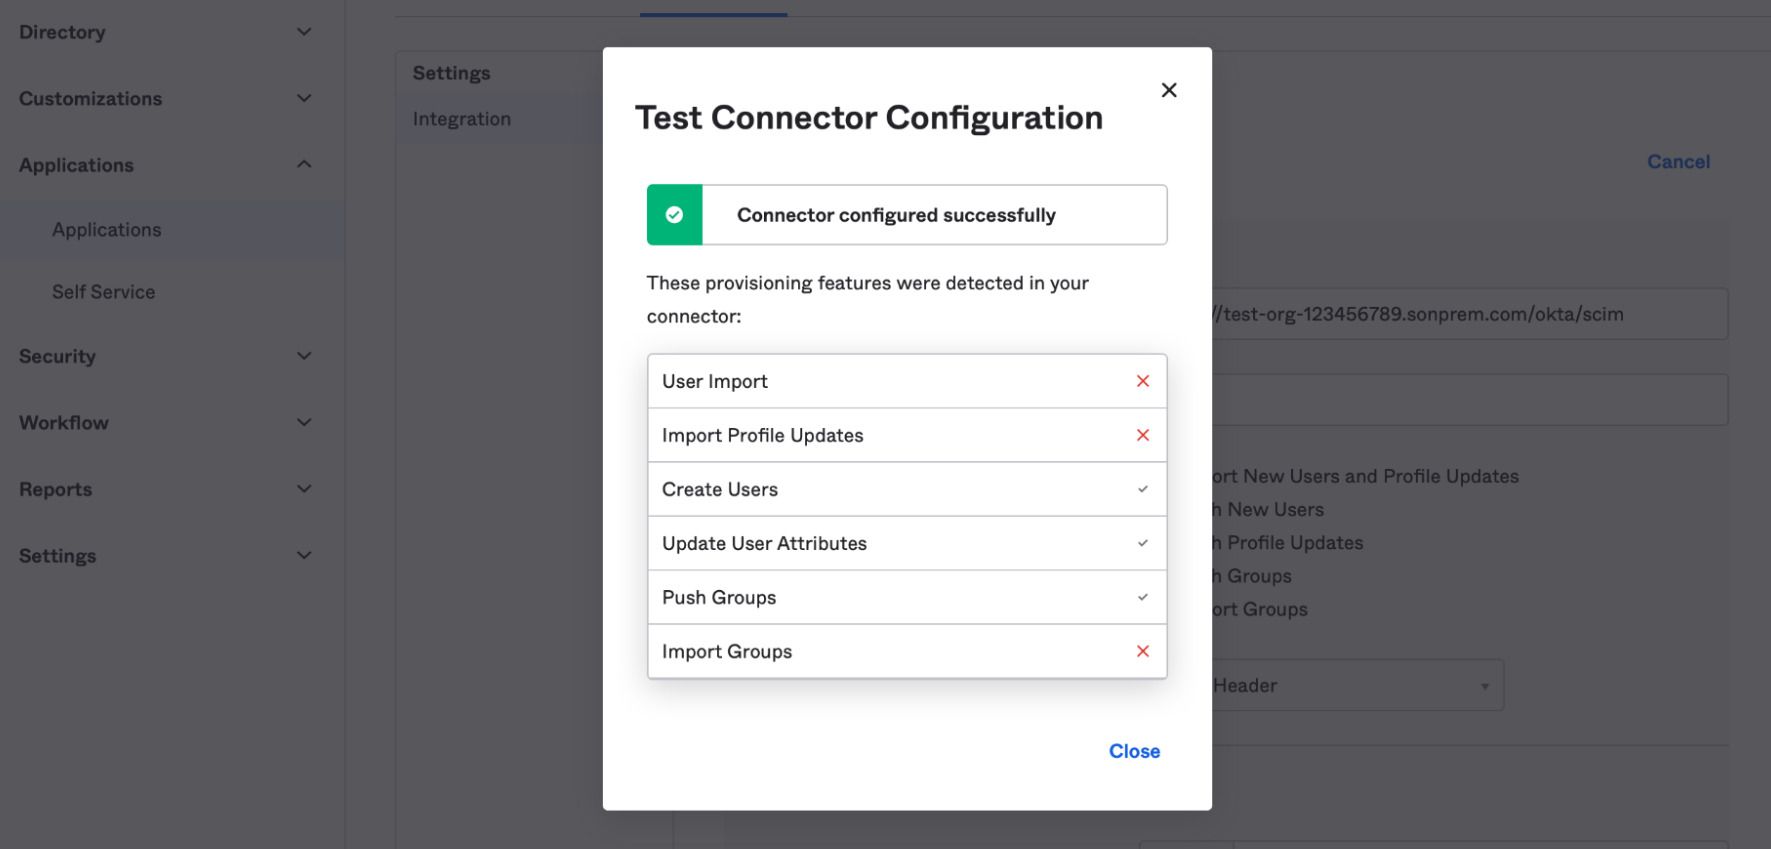
Press the Test Configuration button to test the connection. Press Save to save your changes.
The test connection screen should show green checkmarks next to Create Users, Update User Attributes, and Push Groups
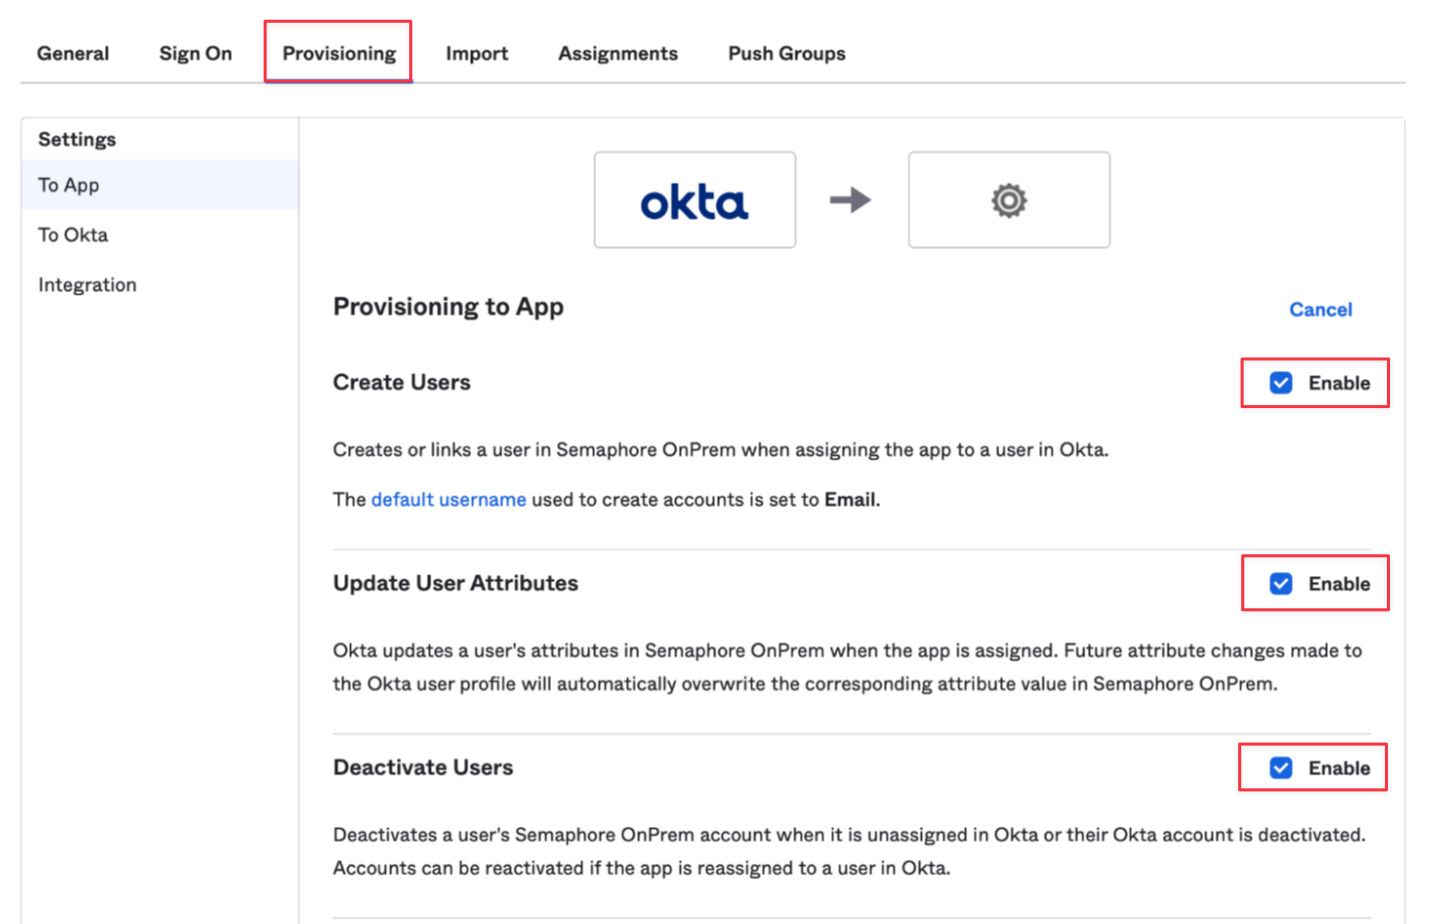
The last step is to enable provisioning on Okta. Follow these steps:
-
Select the Provisioning tab
-
Click on Edit
-
Check Enable next to Create Users, Update User Attributes, and Deactivate Users
-
Press Save
How to create users and groups in Okta
User creation is not immediate. There can be a few minutes of lag before an added user appears on Semaphore. On big organizations the sync process can take up to one hour.
To create a user or a group in Semaphore using the Okta integration, follow these steps:
-
Go to your Okta organization and enter the admin dashboard
-
Select Applications from the left menu
-
Open the Semaphore application
-
Select the Assignments tab
-
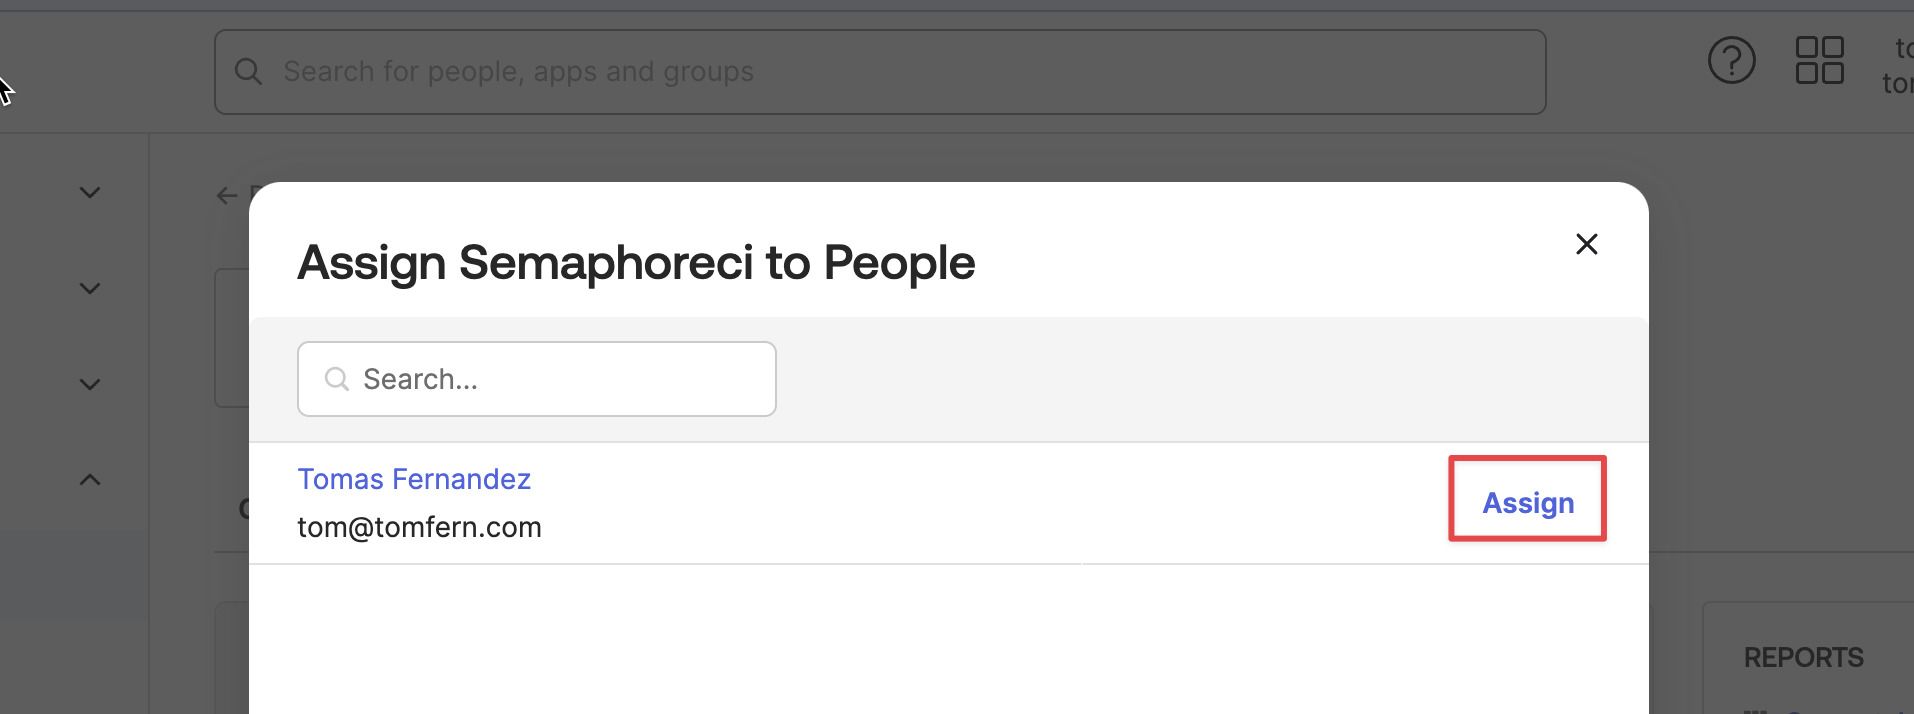
Press the Assign button
-
Select People or Groups from the selection menu

-
Press Assign next to the People or Groups you wish to add to Semaphore.
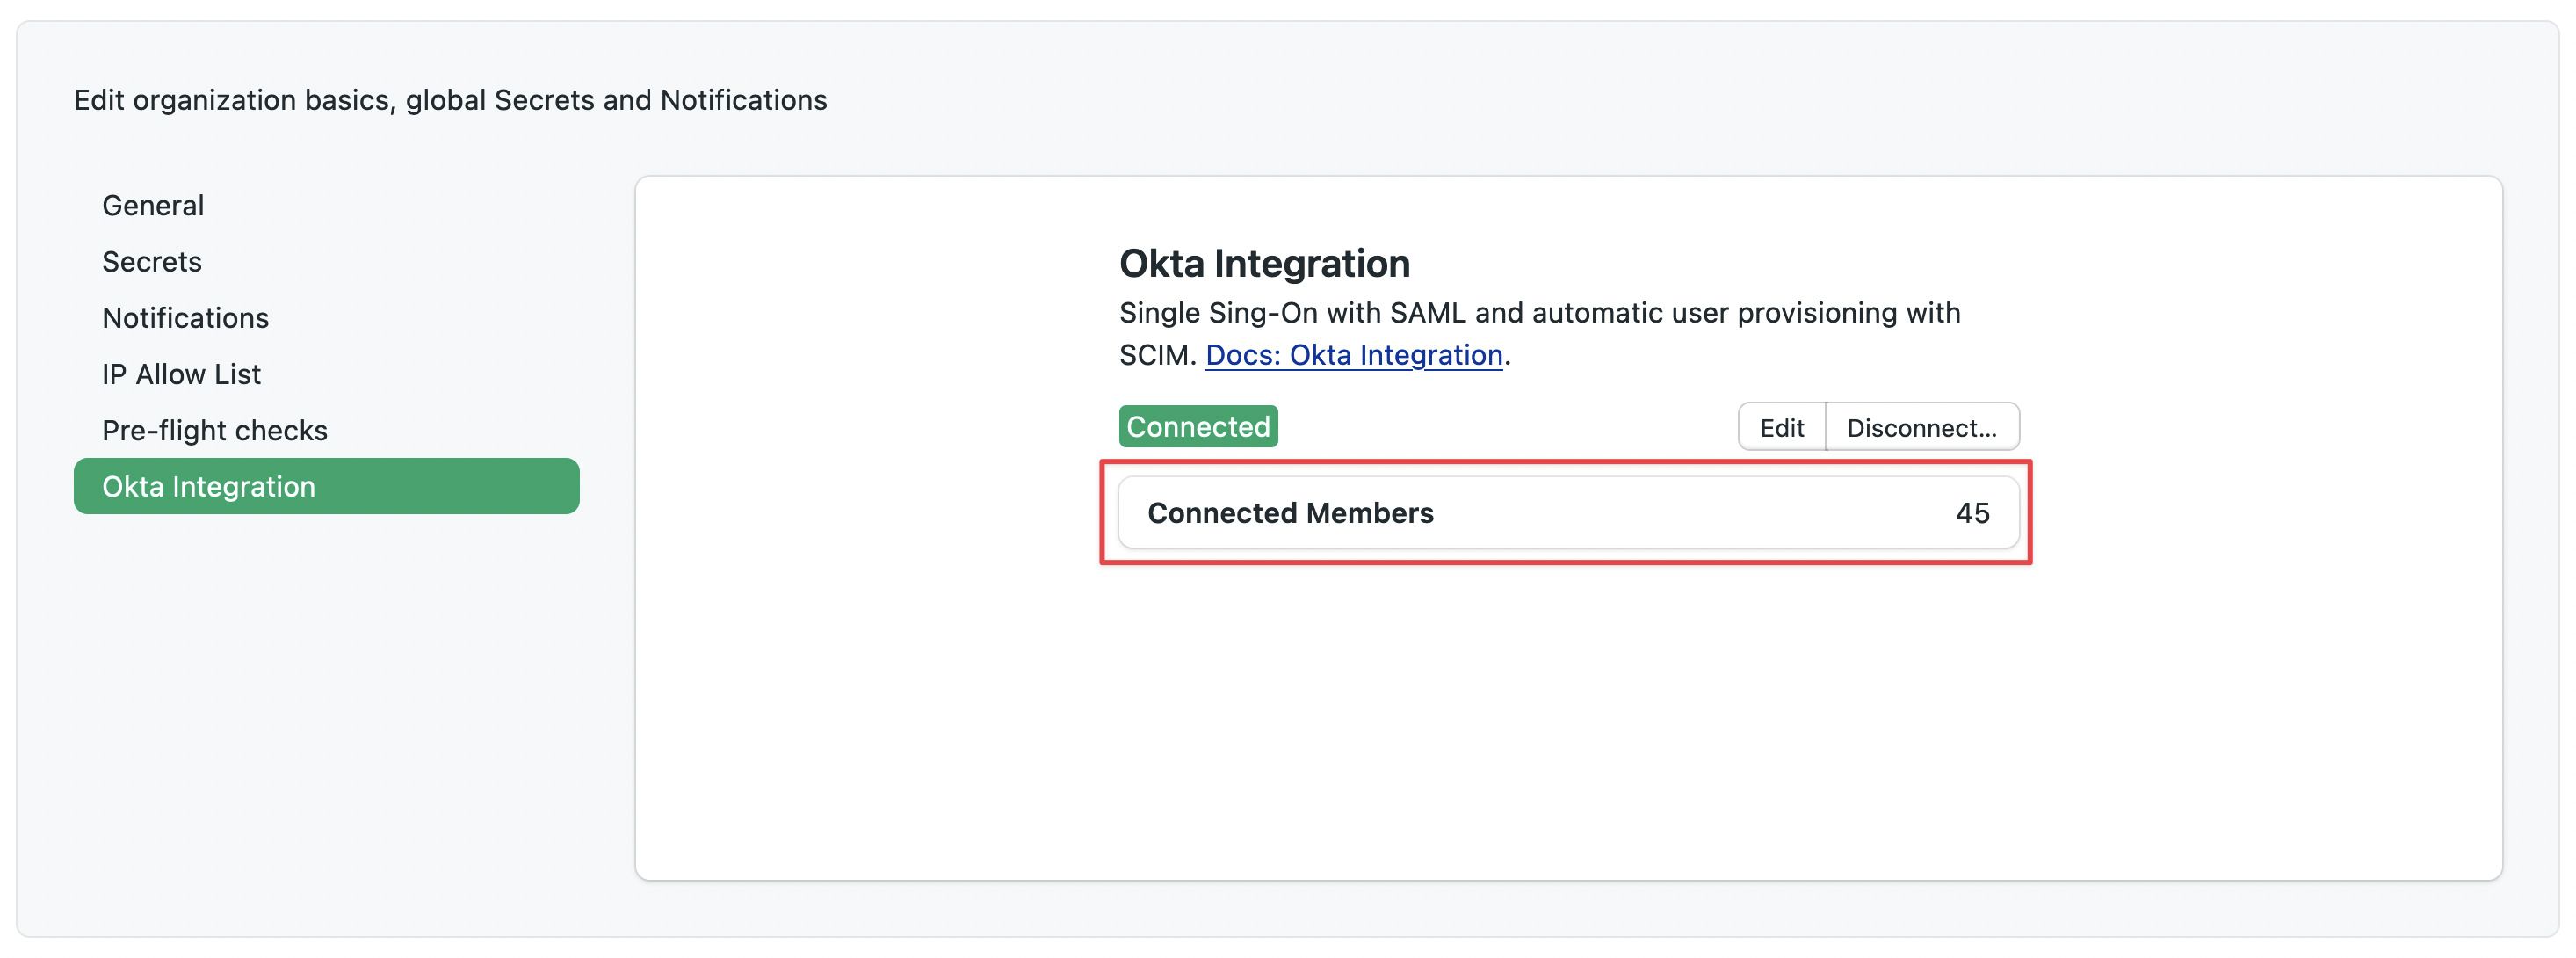
You can see the number of connected users in the Okta integration settings page in Semaphore.
Okta can lead to duplicate users when the integration is added on an organization that already had users. To solve the duplicated users, see the troubleshooting section.
How to use Single Sign On
Your users can now log in to Semaphore via Okta Single Sign On (SSO).
The process for SSO login is as follows:
- The user logs in to Okta
- The user opens the Semaphore Application in Okta
- The user is redirected to their Semaphore account
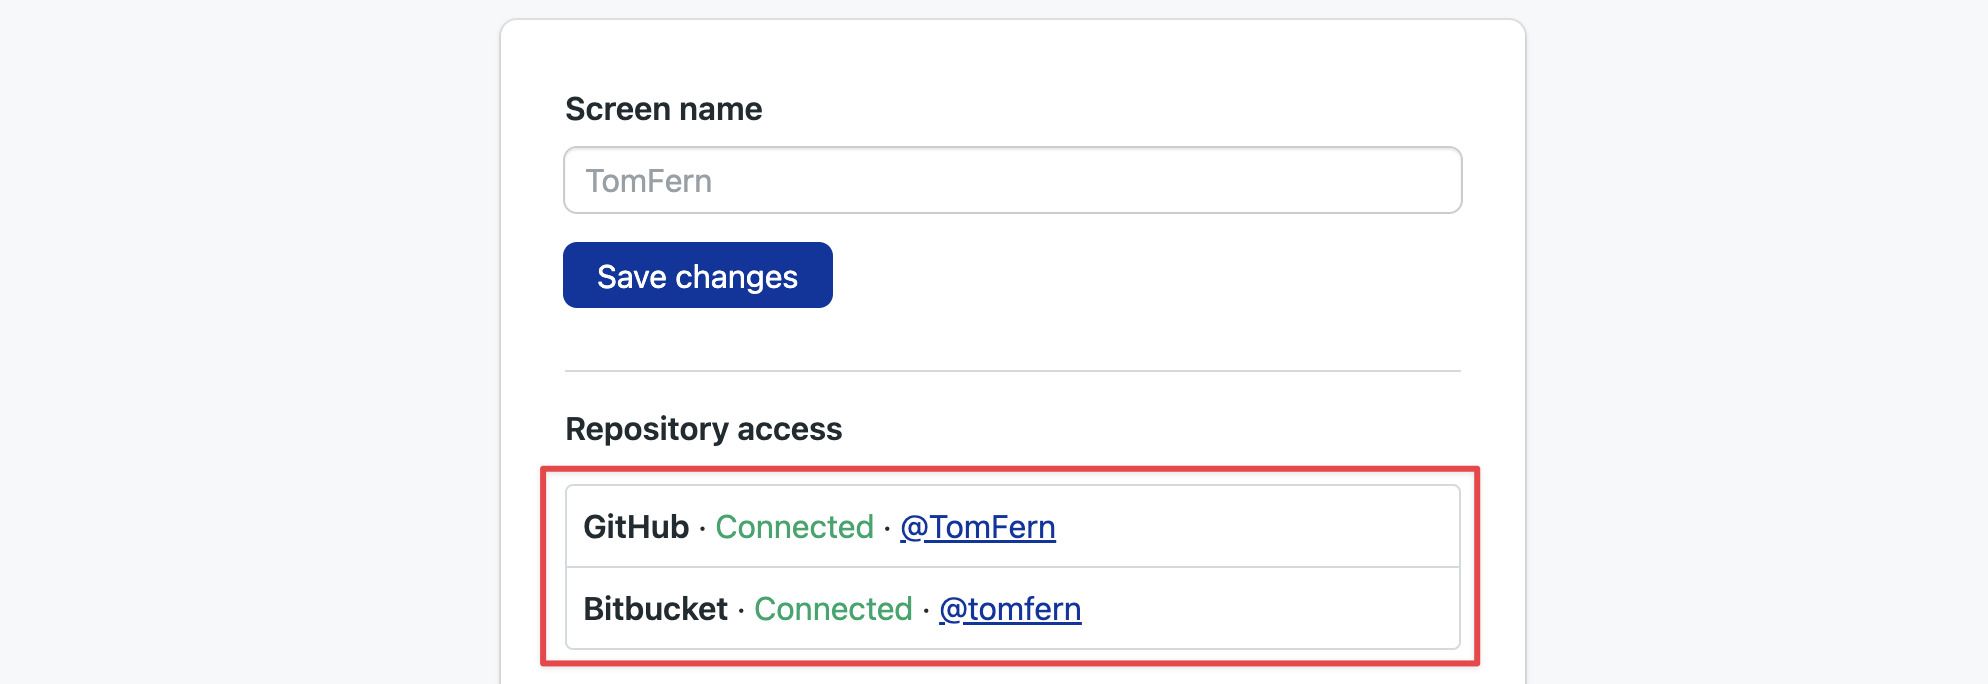
Semaphore asks new users logging in via SSO to connect their GitHub or connect their BitBucket accounts. This is an optional step. Users can click on Connect to link their BitBucket or GitHub accounts to Semaphore.
Once enforced, Okta is the only login method allowed for all users in the organization. Dual authentication methods like Okta + GitHub/BitBucket/GitLab are not supported.
Troubleshooting duplicated users
Semaphore tries to match new users provisioned via SCIM to existing Semaphore users by email address. If the email address associated with the SCIM request matches the email address of existing Semaphore users, the two accounts will be connected, and no new account will be provisioned. Email associated with Semaphore is the primary email from GitHub or BitBucket.
If you are not sure how many organization members have corporate email accounts, or have any other question, feel free to contact our support team at support@semaphoreci.com and we will help you update user emails and smoothly integrate our app with your SCIM/SAML provider.