Projects
Projects are codebases developed and managed through Semaphore Continuous Integration. A project links your Git repository with Semaphore, so it can run jobs to test, build, or deploy your application.
This page explains how to set up projects and what settings are available.
Create a project
Video Tutorial: Create a Project
To create a Semaphore project you need:
- A Semaphore account with an organization
- A repository with at least one commit
- A GitHub or Bitbucket account. For more information, see the connection guides
- UI
- CLI
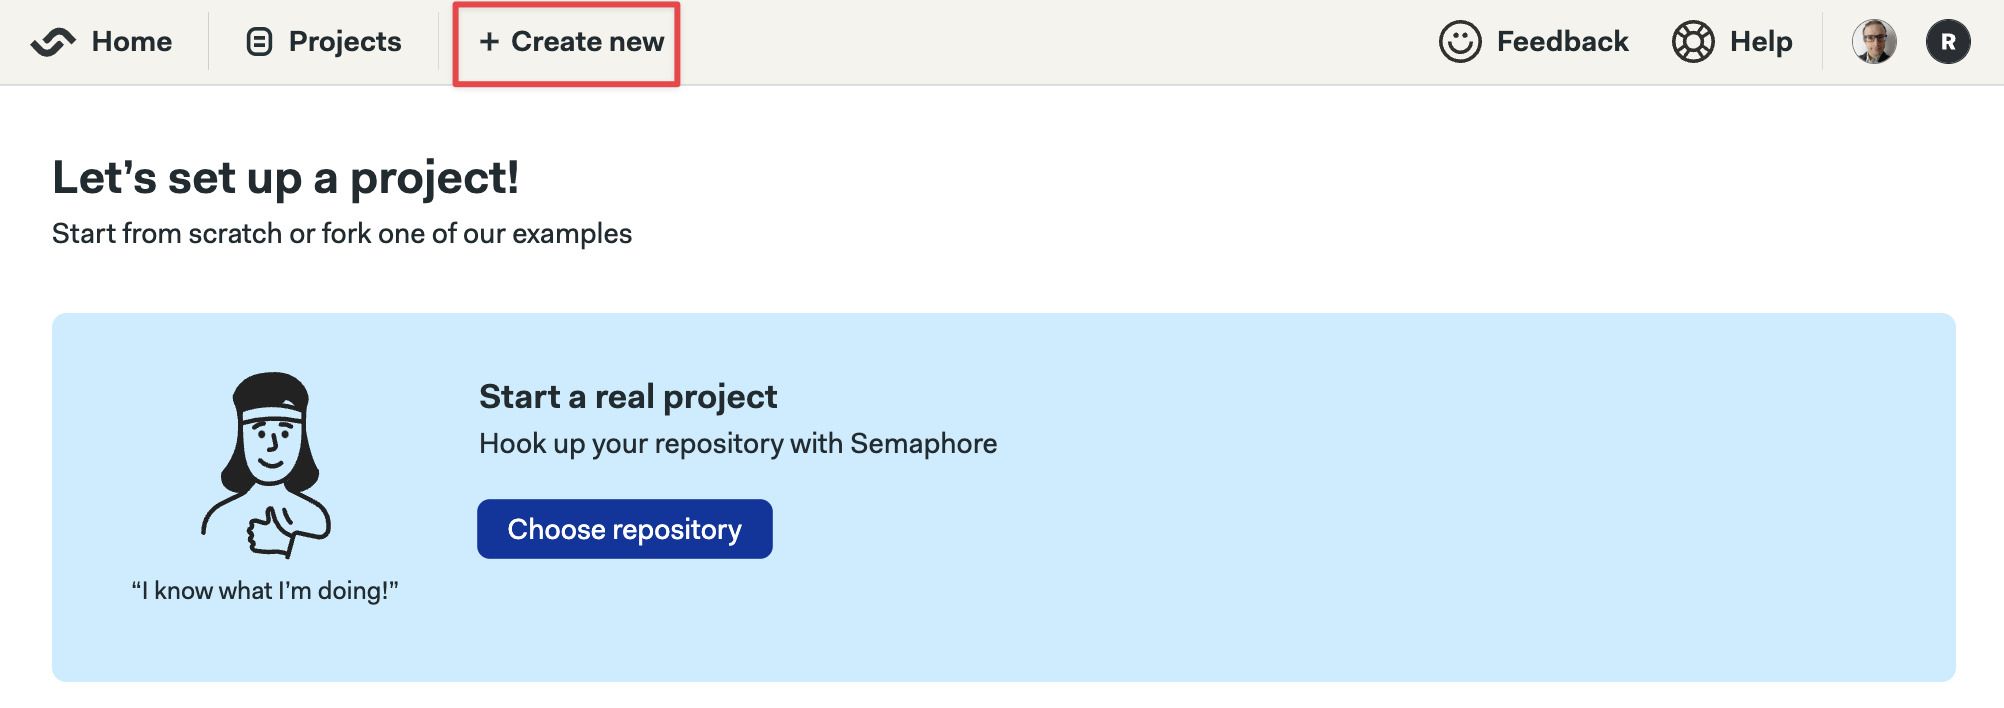
Go to Semaphore, press +Create New and then press Choose repository
-
Select the GitHub or BitBucket tab. You may need to press the Connect account button if this is the first time
-
Select the repository from the list and press on Choose
Show me

-
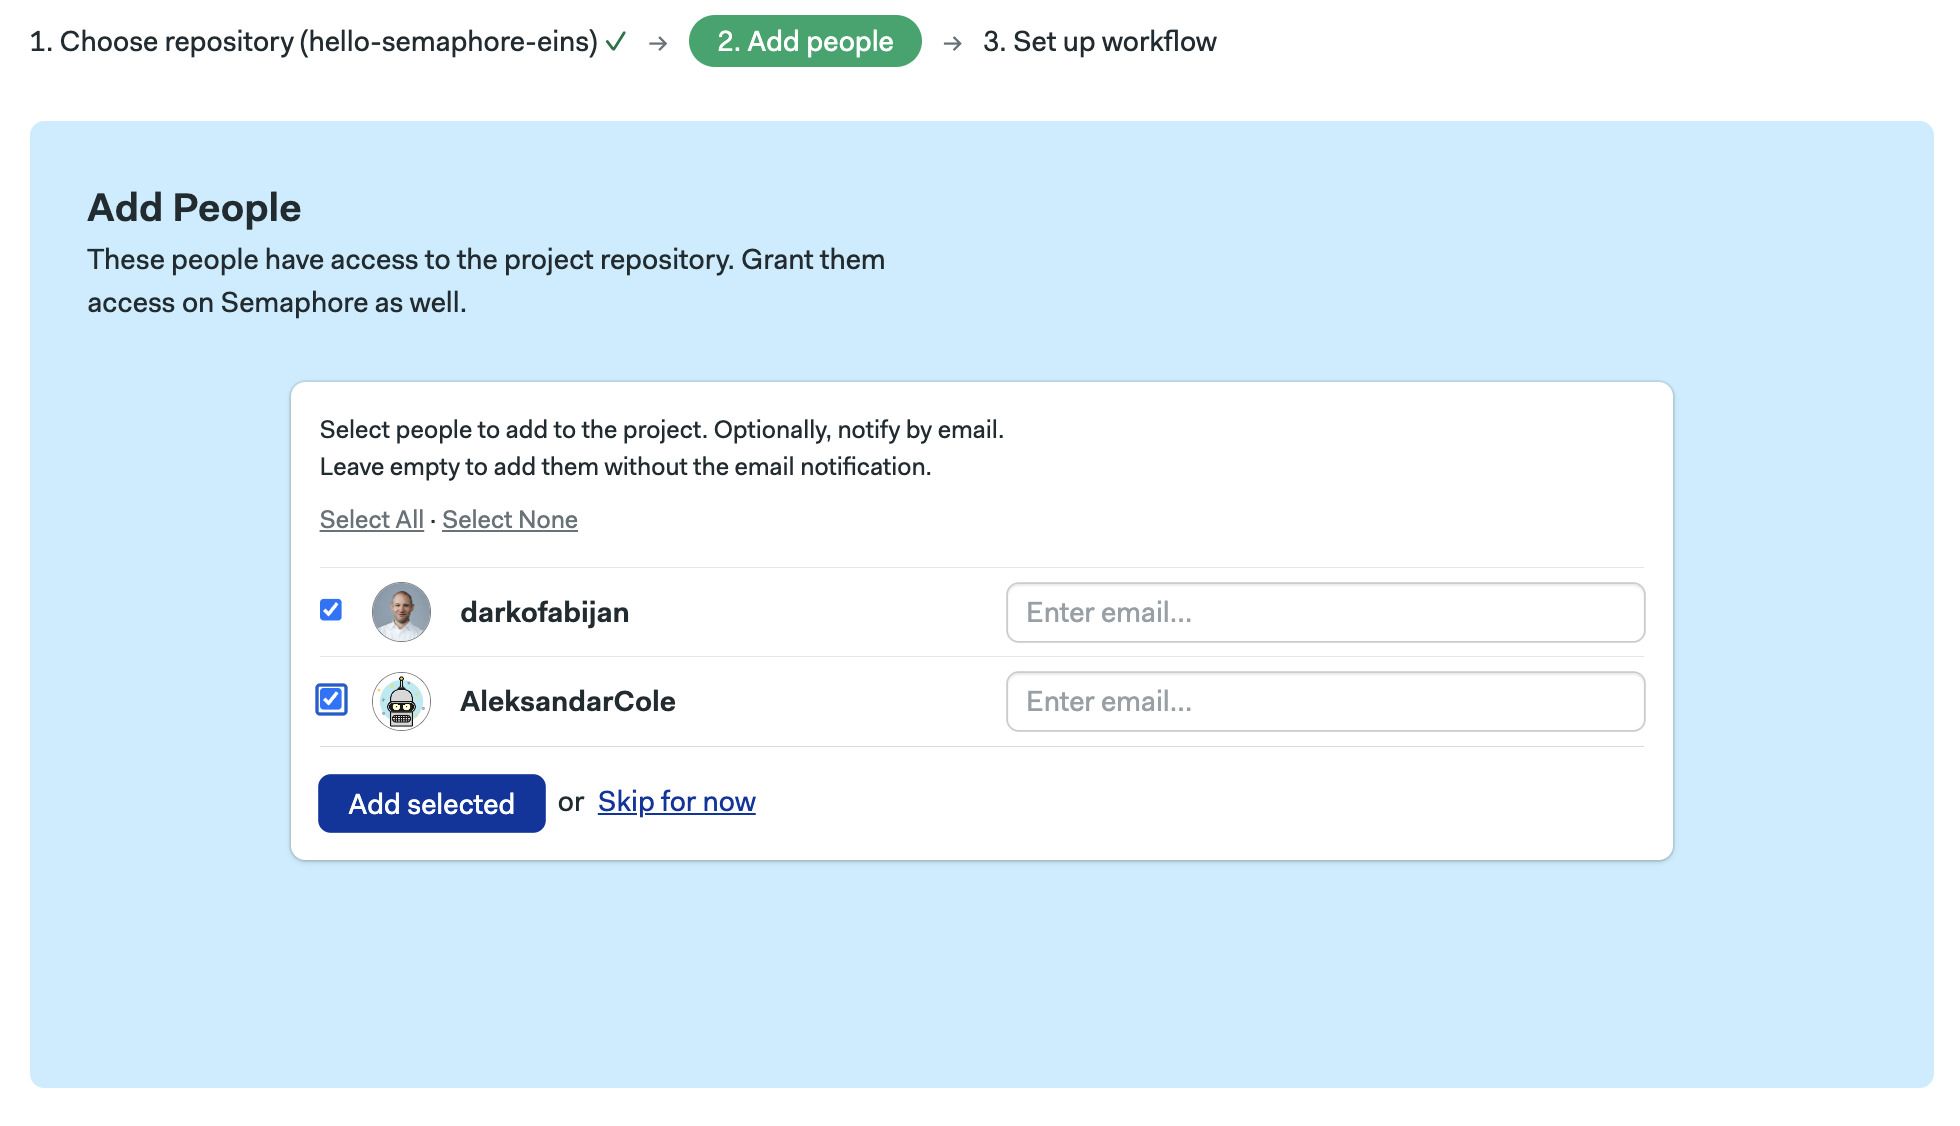
Optionally, add people to the project. Press Continue
Show me
-
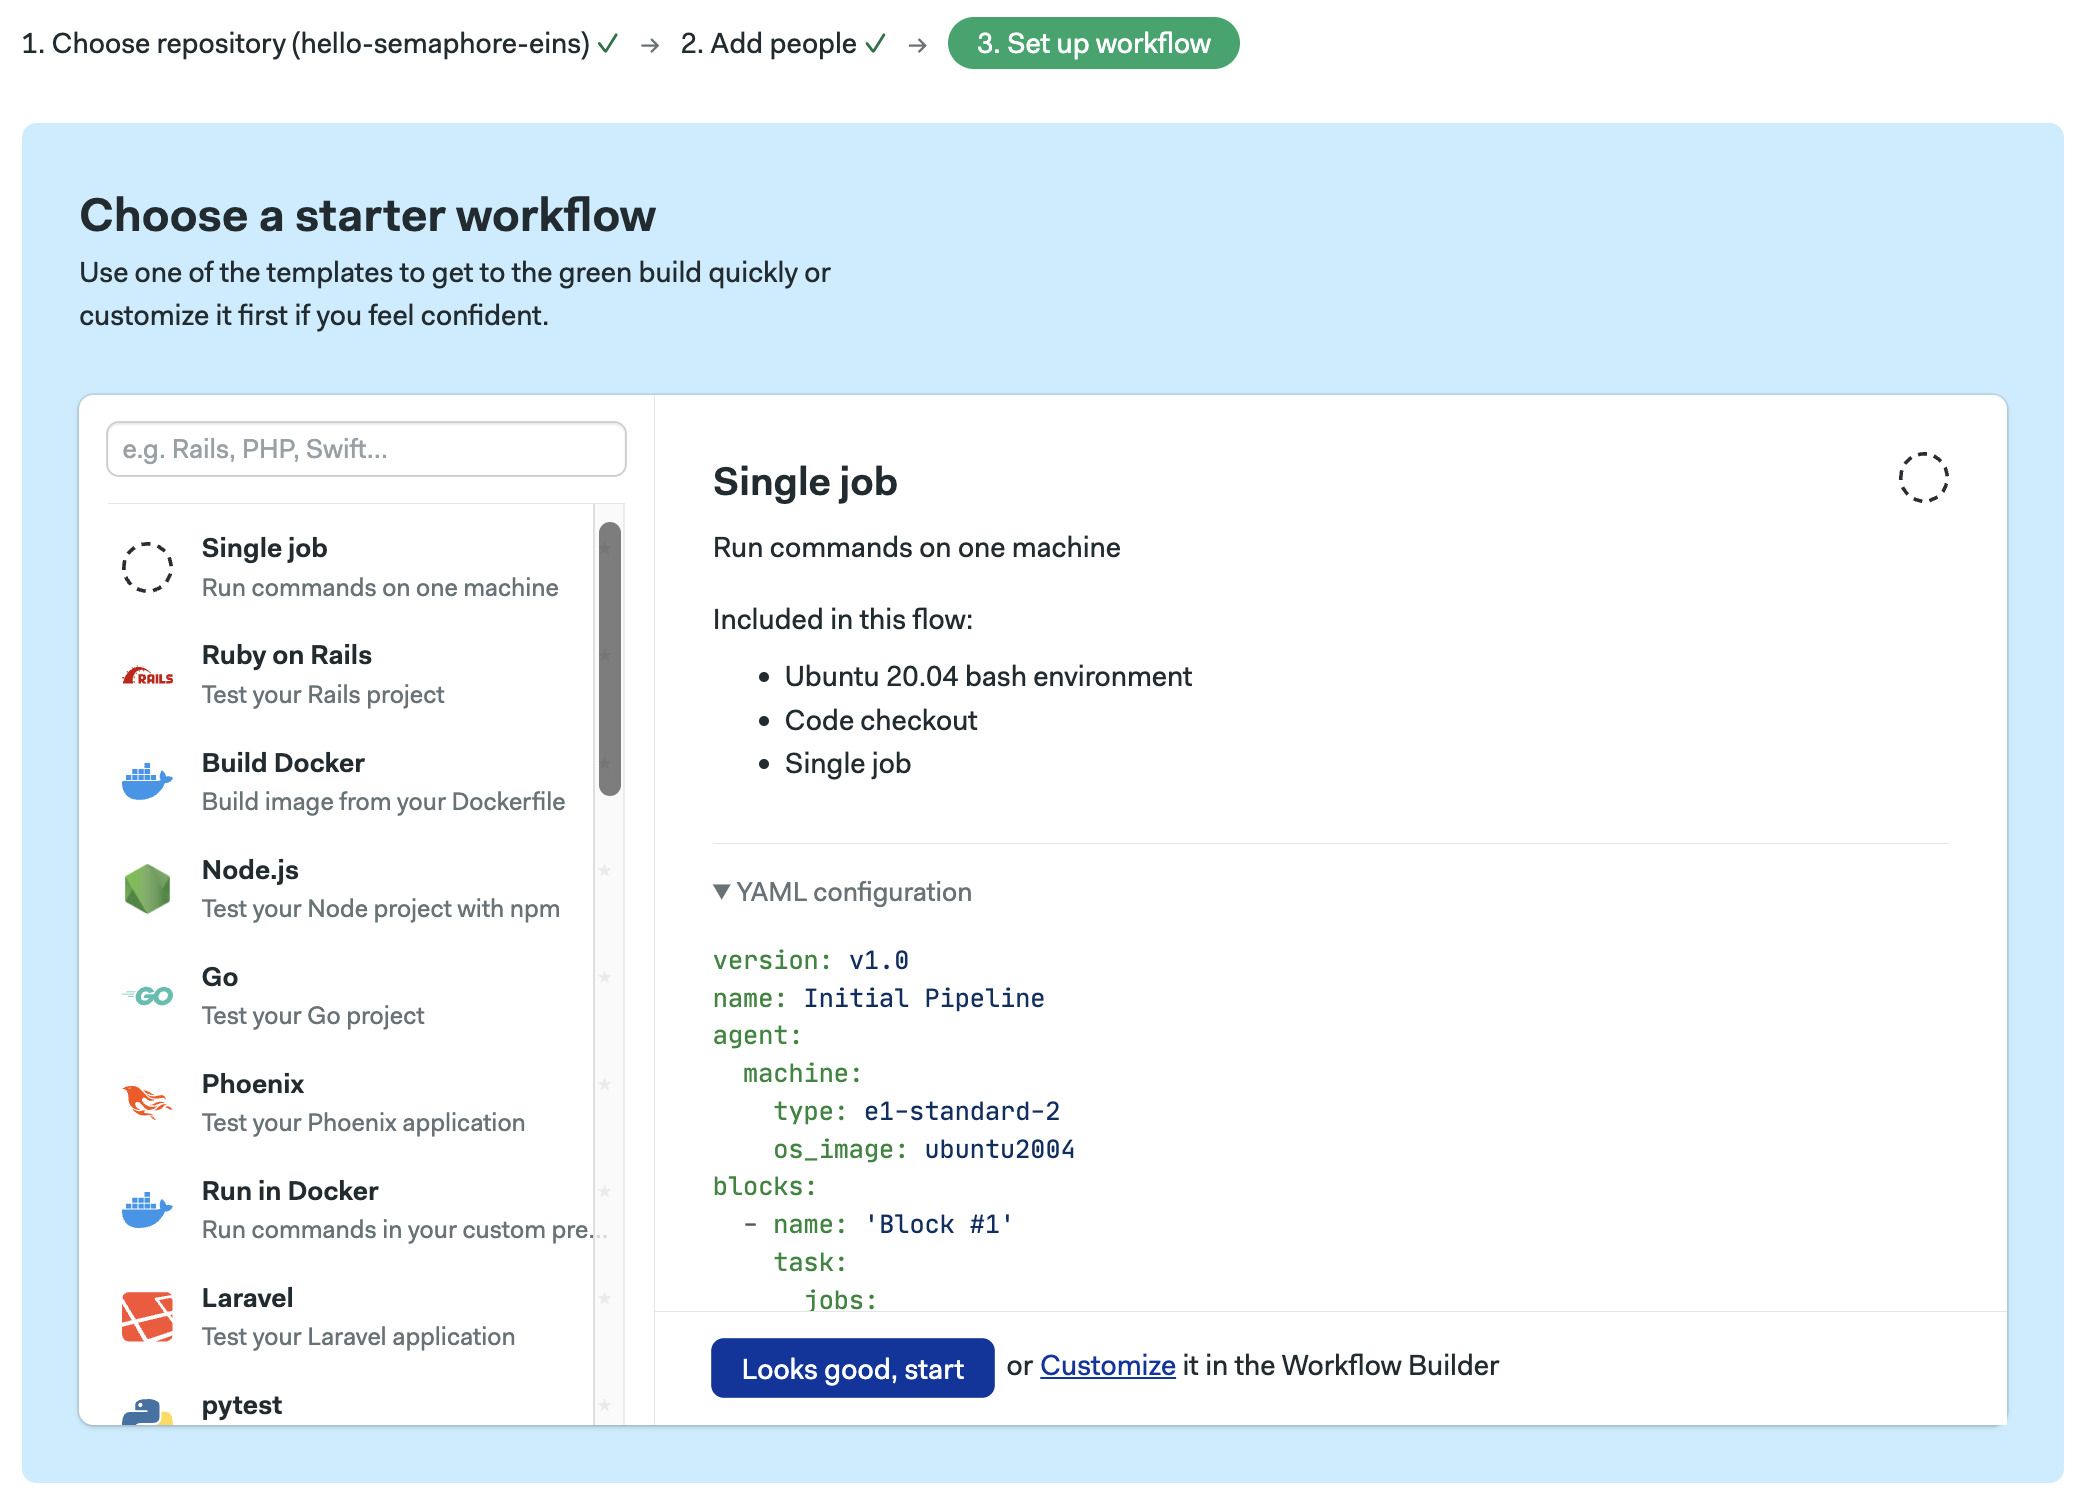
Select a started workflow. If in doubt, select Single Job and Start
Show me
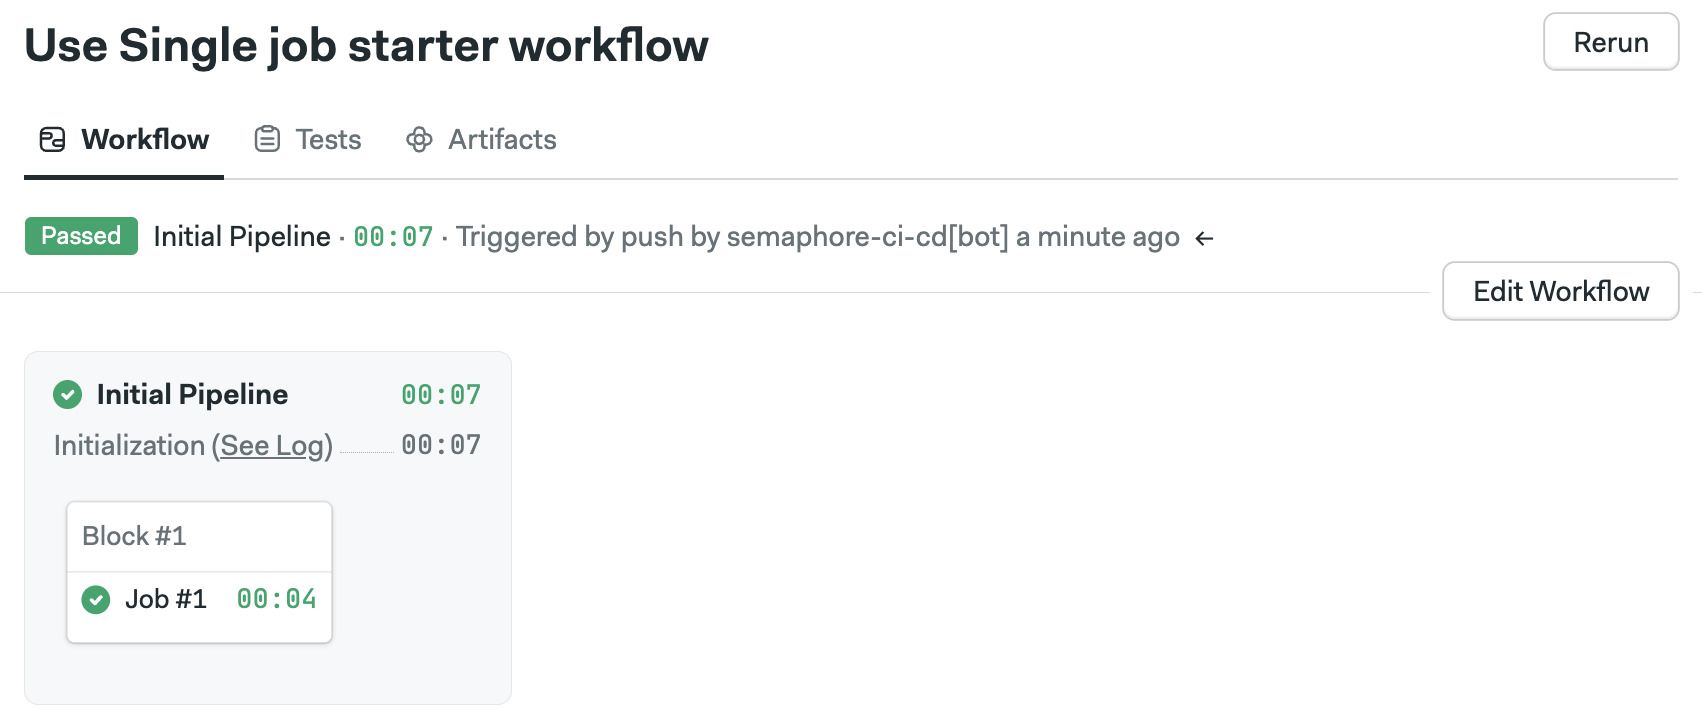
Semaphore creates a new pipeline file in the .semaphore folder in the repository and starts working.
After installing and connecting the Semaphore command line:
-
Clone the repository in your machine
-
Run
sem initat the root of the repository -
Push a change to get Semaphore working
git add .semaphore
git commit "Initalize Semaphore"
git push origin main
You can override the project name and URL by using additional options
sem init --project-name <project_name> --project-url <project_url>
If you get permission or not find error message, double check the connection between Semaphore and your Git provider:
View projects
- UI
- CLI
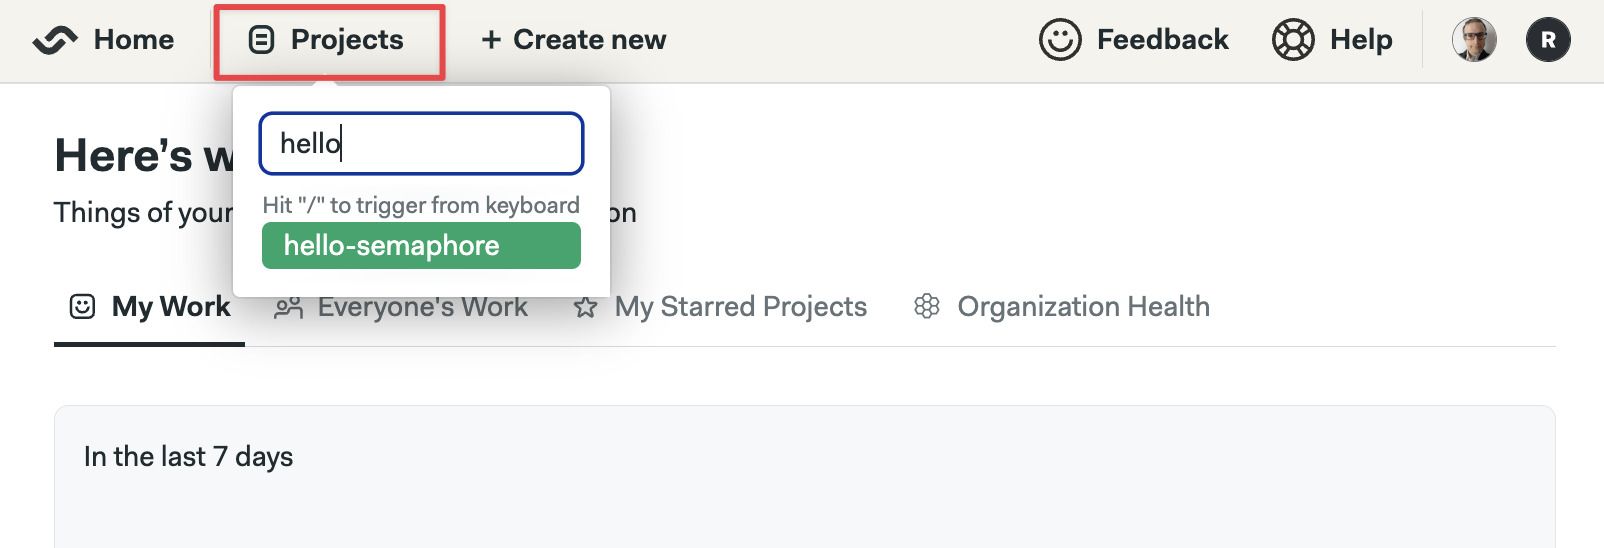
You can find your projects in Semaphore by pressing on the Projects tab and searching by project name.
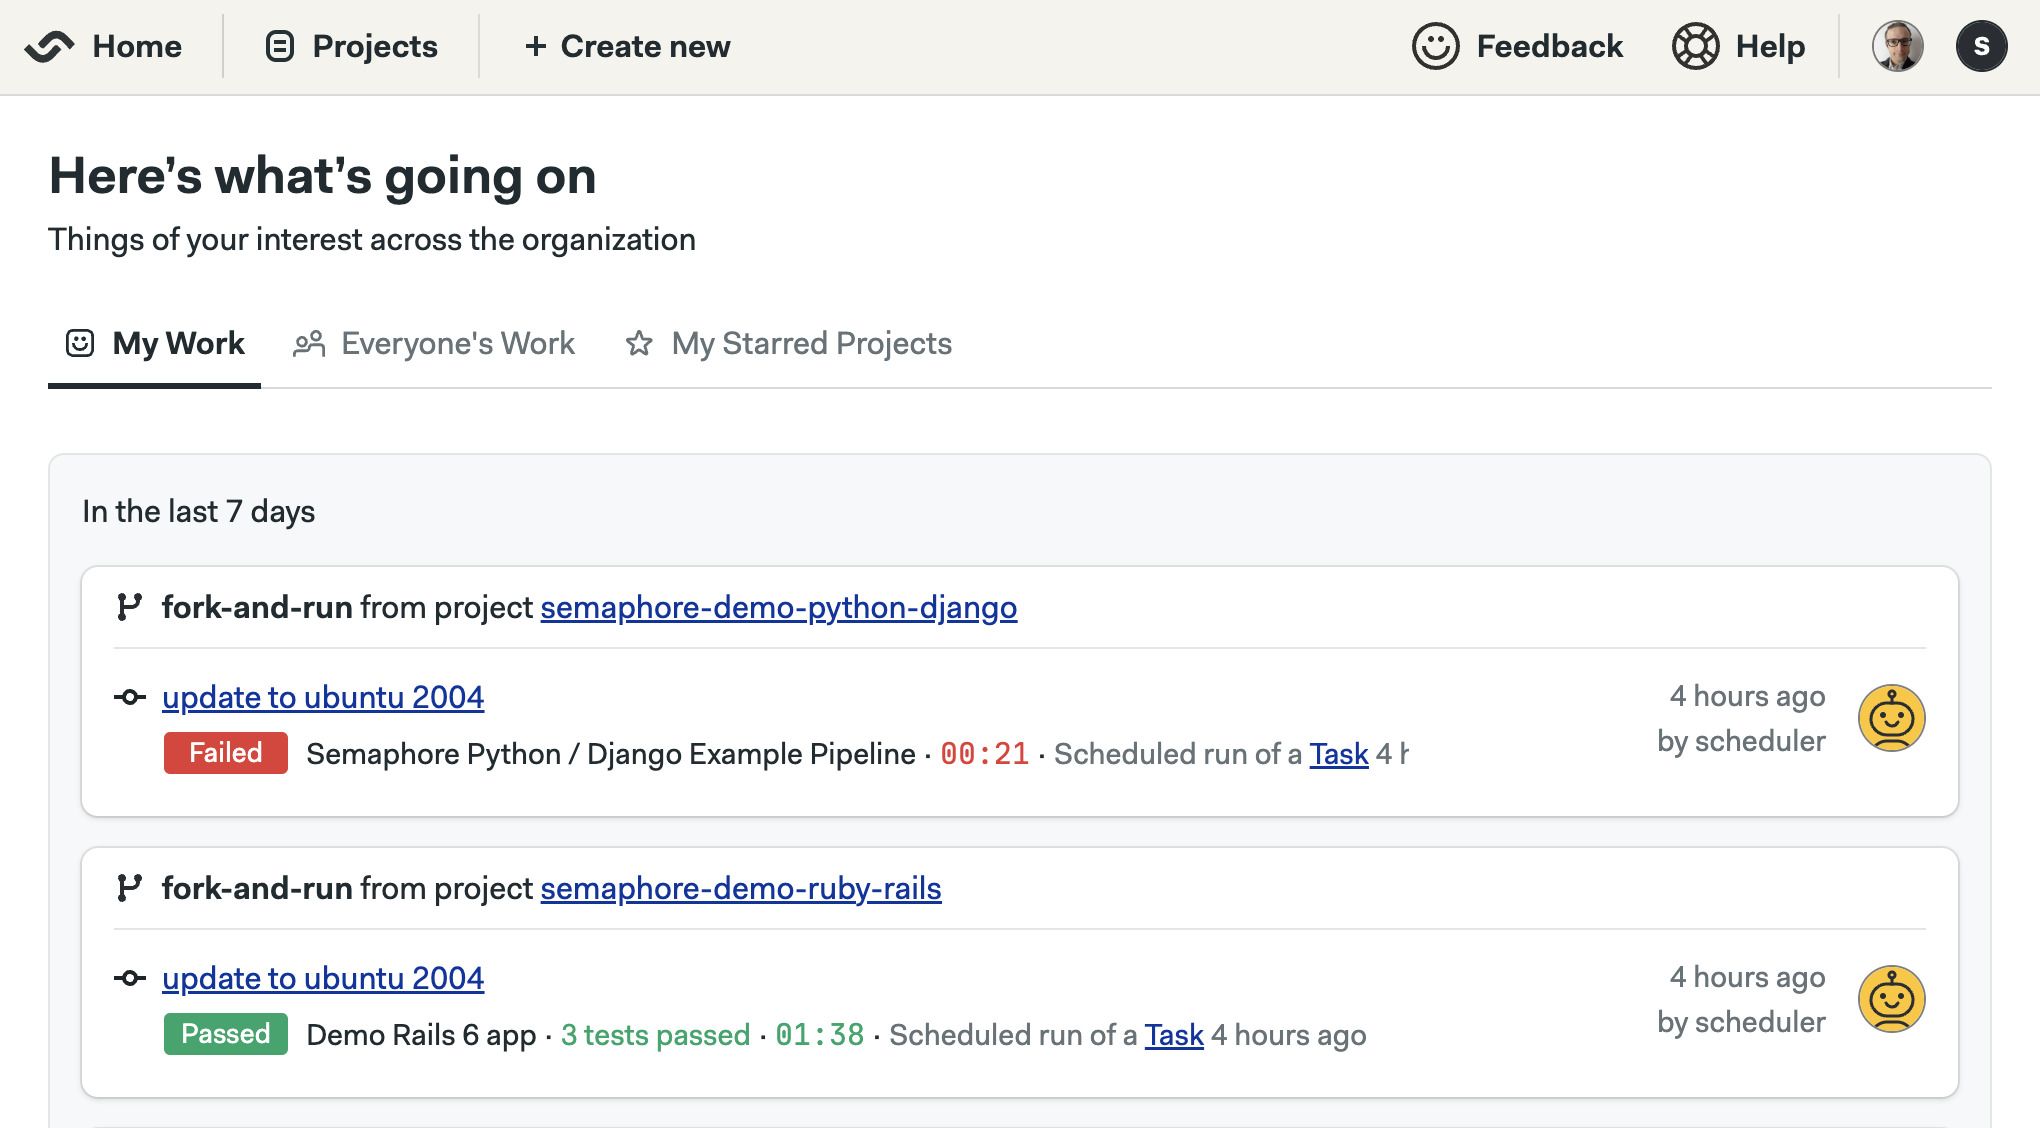
Semaphore shows the latest activity in the last few days when logging in.
To get the list of the projects in your organization:
-
If needed, switch the context to your organization
-
Run sem get to list your projects
$ sem get project
NAME                                 REPOSITORY
semaphore-demo-flutter               git@github.com:semaphoreci-demos/semaphore-demo-flutter.git
hello-semaphore                      git@github.com:semaphoreci-demos/hello-semaphore.git
Workflow triggers
The following actions in the repository can trigger Semaphore to start the project's pipelines.
- Pushing commits into any branch
- Pushing Git tags
- Creating pull requests from the same repository
- Creating pull requests originating from a forked repository
- Updating any of the project's pipelines using the [visual editor](./jobs#workflow editor)
- Pressing the Run button on the Semaphore website
- Request a re-run using the Semaphore API
- Scheduling workflows using Tasks
The reason for the trigger can be determined at runtime by examining the Semaphore environment variables in the job. See the environment variable reference page for more details.
How pull requests are handled
Semaphore starts a workflow for every push to a pull request originating from a forked repository. For security reasons, secrets are disabled in jobs triggered in this way. You can create an allow list with the secrets you want to expose in the project settings.
Instead of pushing the HEAD commit to the pull request, Semaphore uses the MERGE commit between the source and the upstream branch. You can find the SHA of the HEAD commit of the Pull Request in the SEMAPHORE_GIT_PR_SHA environment variable.
Project tabs
Project members can view or manage the following project elements:
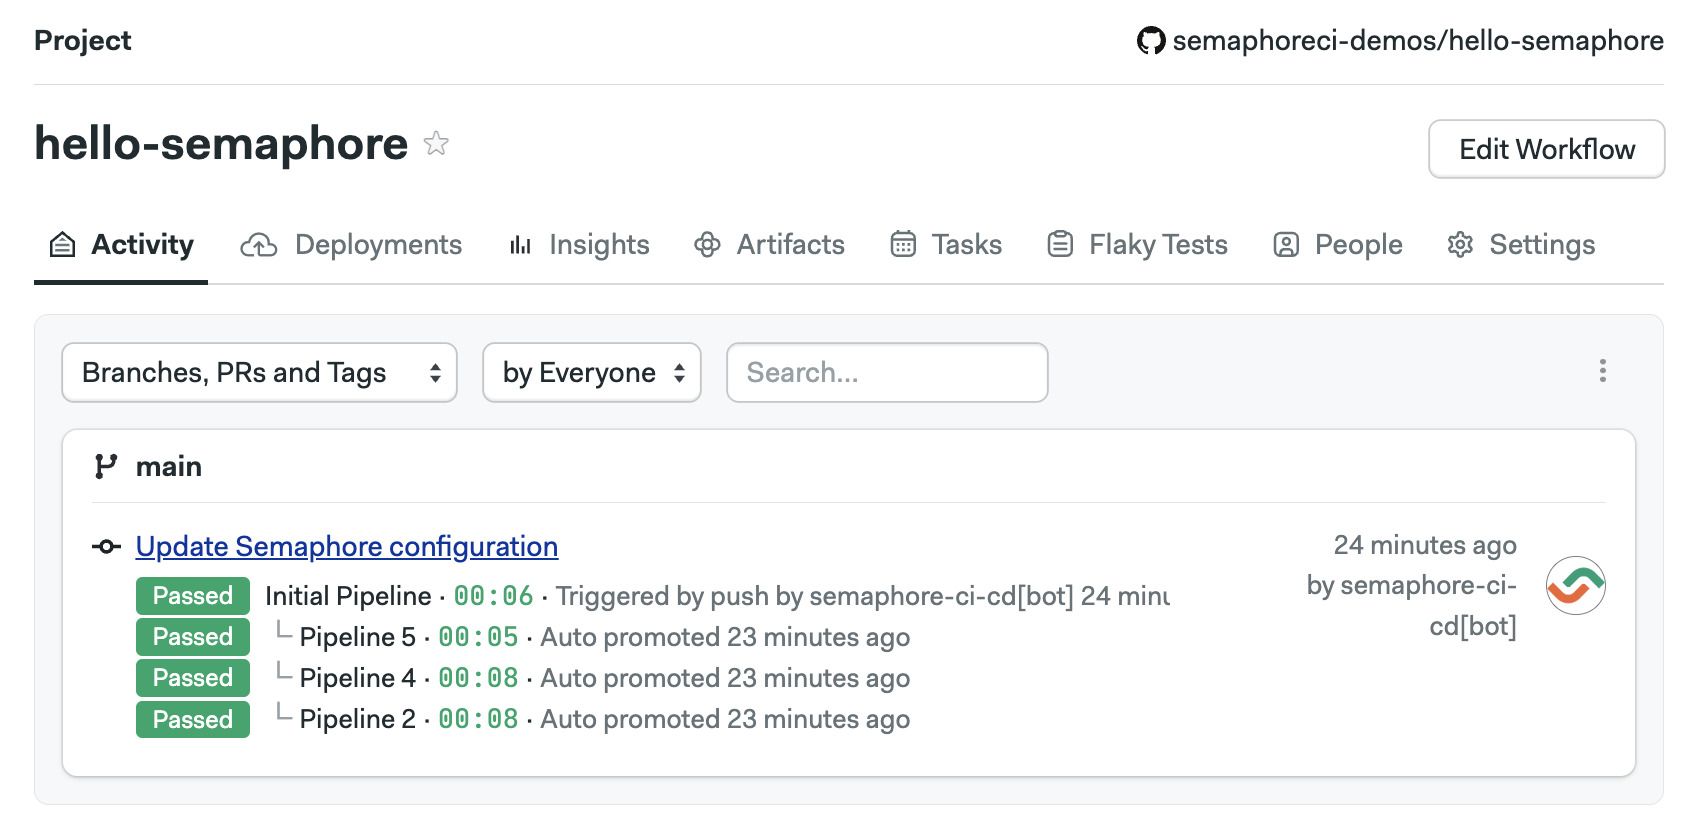
- Activity: shows the latest pipeline runs
- Deployments: access the project's environment (formerly deployment targets)
- Insights: shows the insights
- Artifacts: shows the project-level artifacts and retention policy
- Tasks: shows the tasks
- Flaky Tests: shows the flaky tests detected in the project
- People: shows or changes the project members
- Settings: shows the project-level settings
How to manage access to projects
Semaphore periodically syncs users from GitHub. You can add and remove people from the project by inviting or removing them from the related repository.
Users with Admin or Owner roles can access every project in their organizations — even if they don't have access to the related repository.
About project permissions
Users can be granted access and permissions on a project by different means:
- Repository-level access: Semaphore automatically syncs user permissions from GitHub. See project roles to learn how repository permissions are mapped to project permissions
- Direct access: users can be directly added to and removed from the project. Their permissions are managed with project roles
- Role access: users with Admin or Owner roles can access every project in their organizations
- Group access: groups can grant their members access to projects, provided the group itself has been given access to those projects
How to manually add/remove members to projects
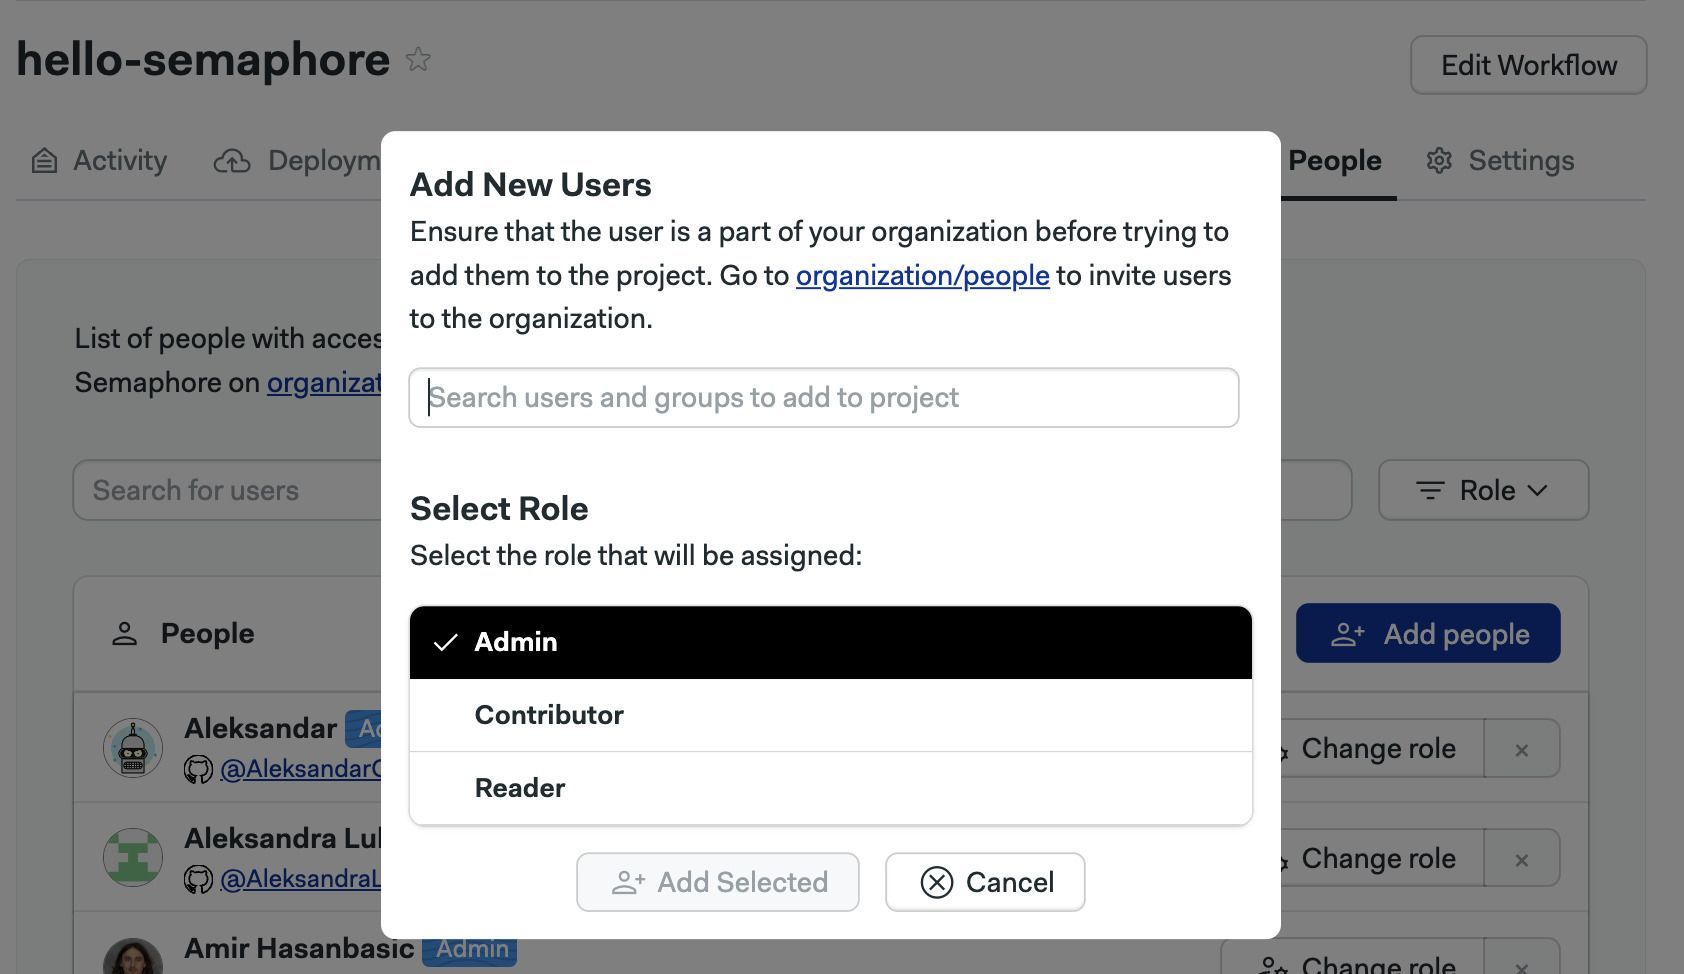
Scaleup plan users can manually add and remove people from a project. To manage users, open your project and go to the People tab
-
Press Add People
-
Select the user from the list of options
-
Select the role
-
Press Add Selected
See project roles for more information on what actions can each role perform.
How to change permissions
Open your project and go to the People tab
-
Press the Change role next to the project member
-
Select the new role
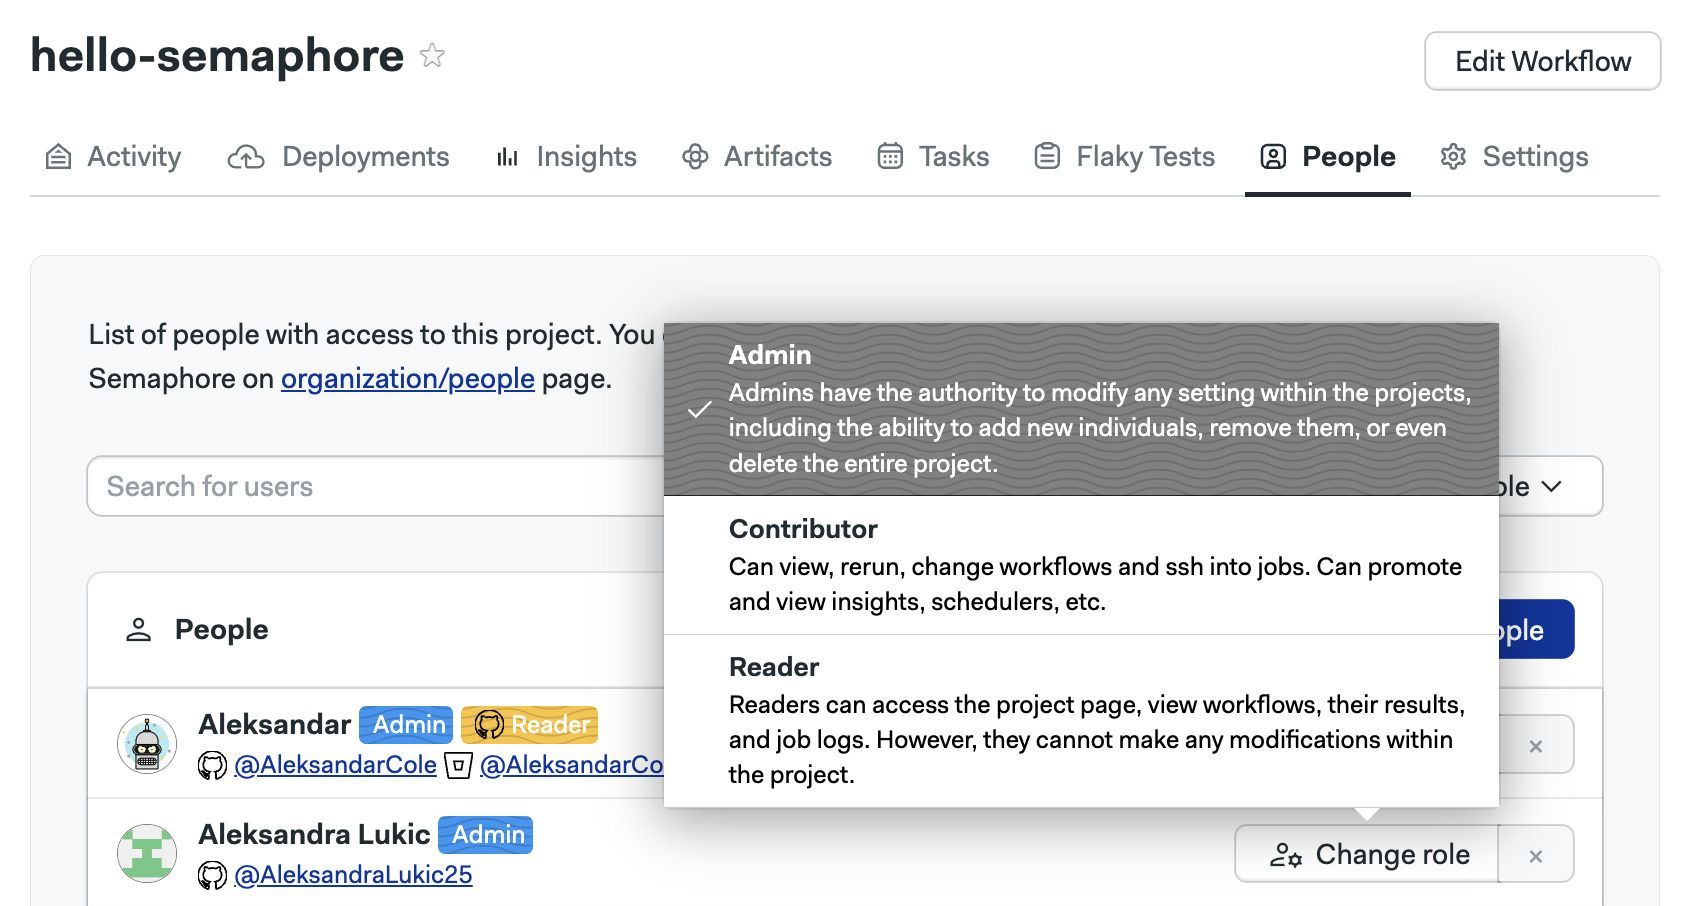
How to view pre-defined roles
Semaphore provides pre-defined roles for projects. You can see what actions each role can perform by following these steps:
- Open the Organization Settings menu
- Select Roles
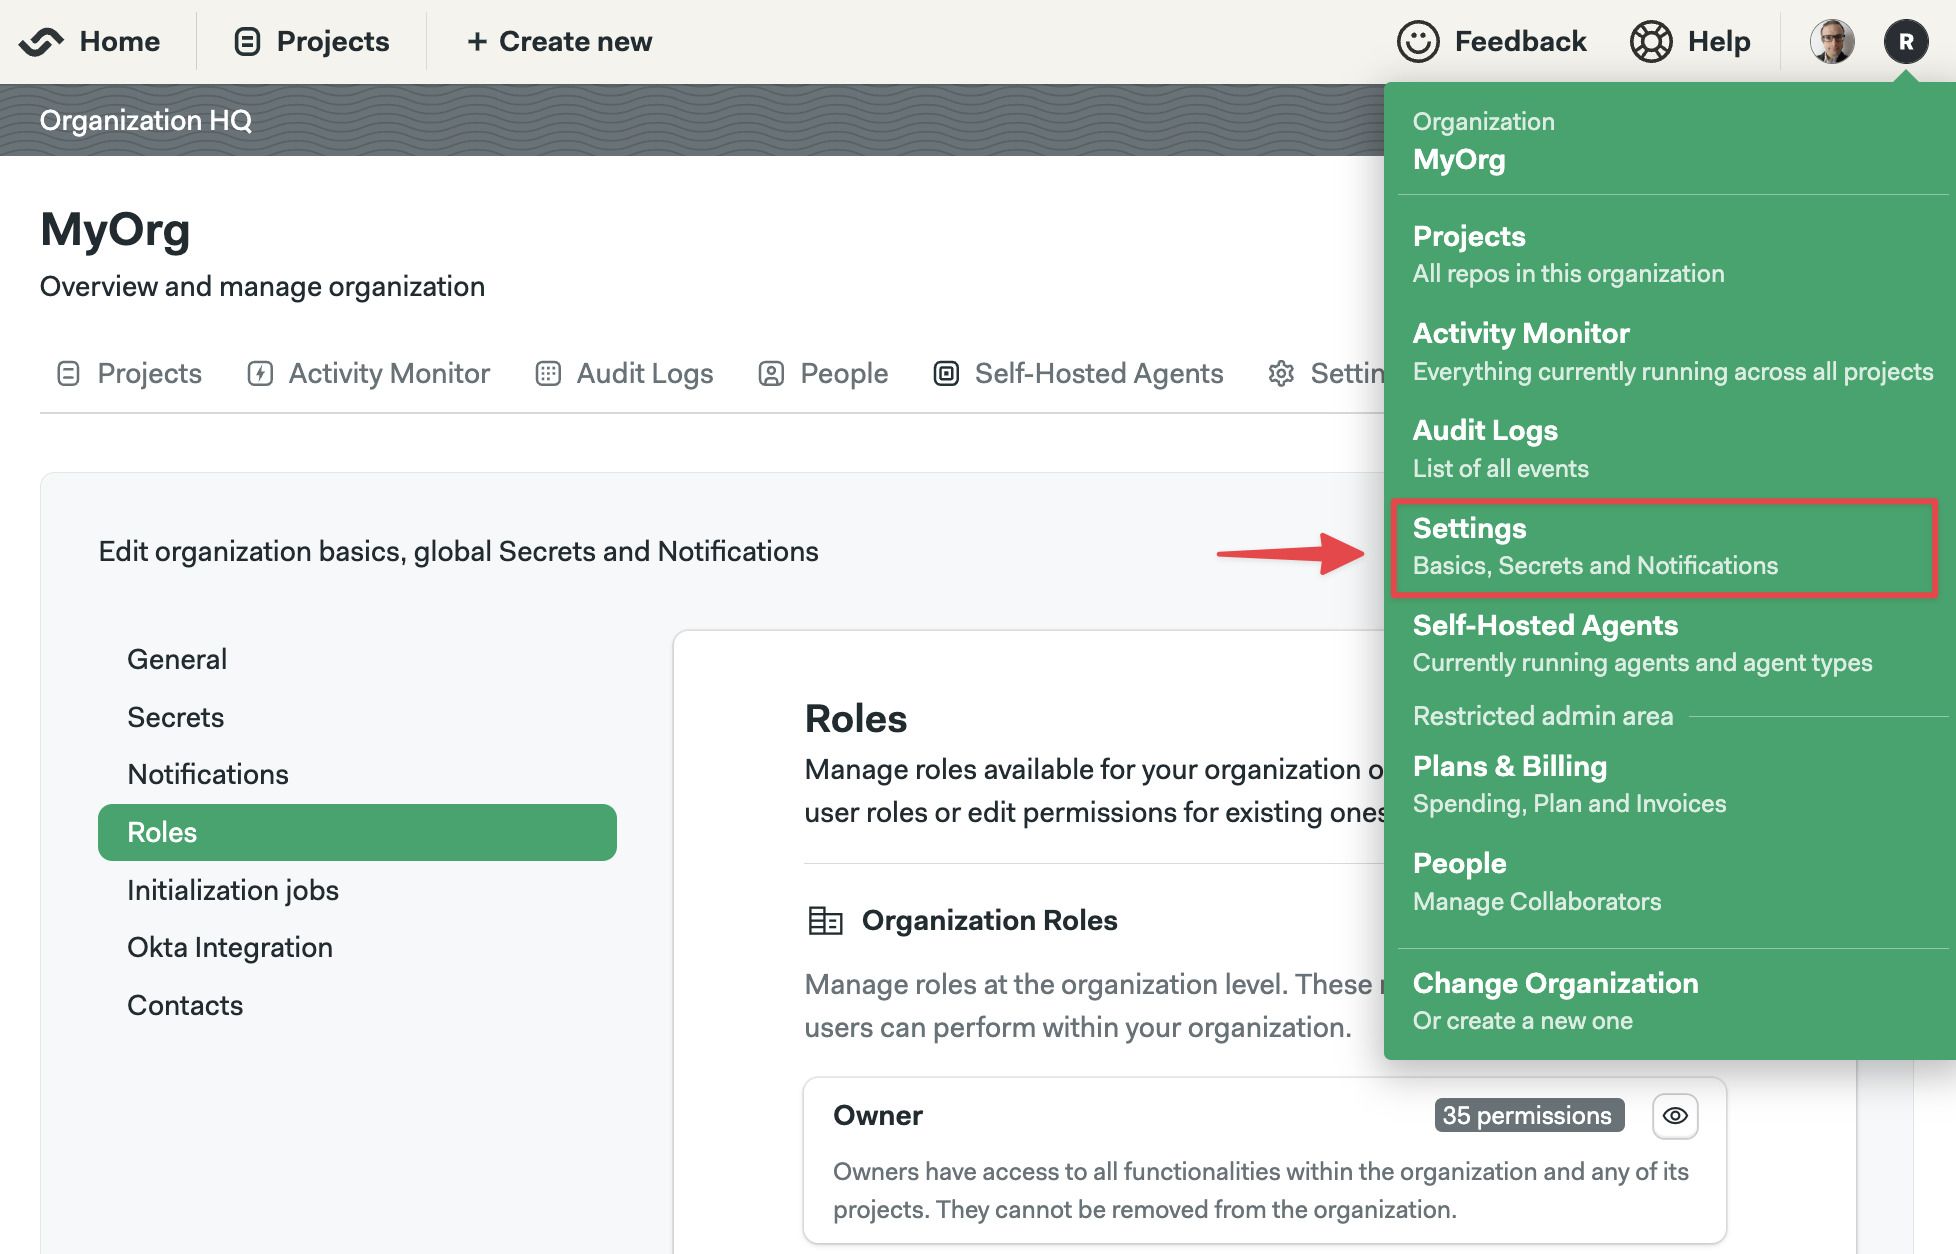
- Scroll down to Project roles
- Press the eye button next to the role you want to examine
The actions with enabled checkbox are allowed for that role.
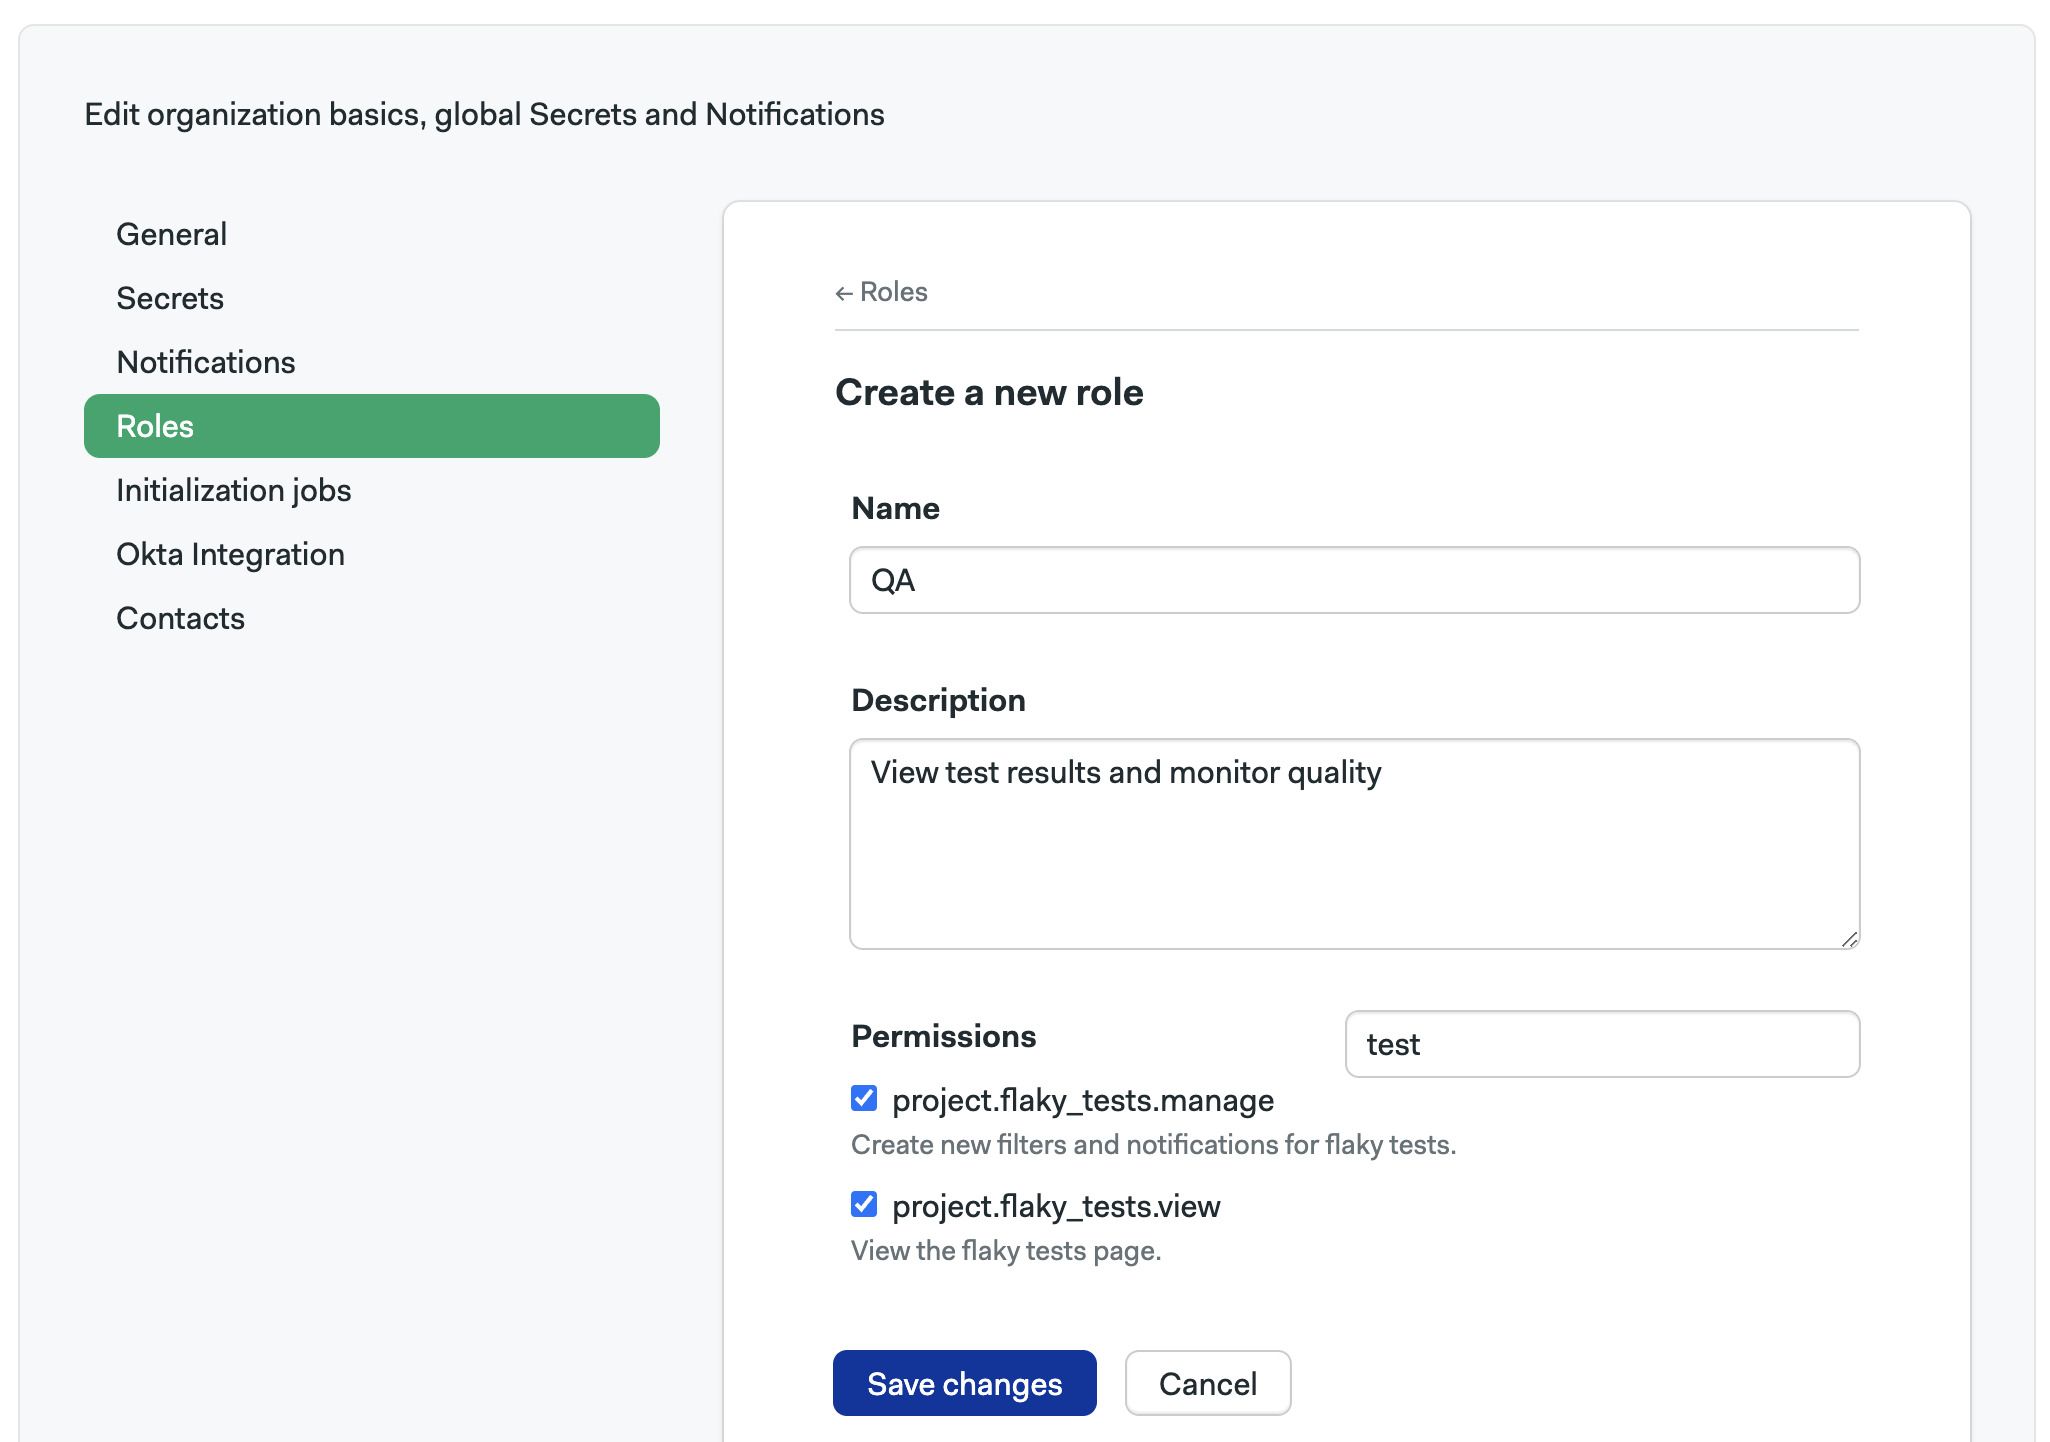
How to create custom roles
Create custom roles to give your users the precise permissions they need.
-
Open the Organization Settings menu
-
Select Roles
-
On the Project Roles section, press New Role
-
Give a name a description to the new role
-
Enable the permissions allowed to the role. You can use the search box to narrow down options
-
Press Save changes
How to change the project's owner
Open the project settings, under Project Owner type the username and press Change. The user must already have been invited to the organization.
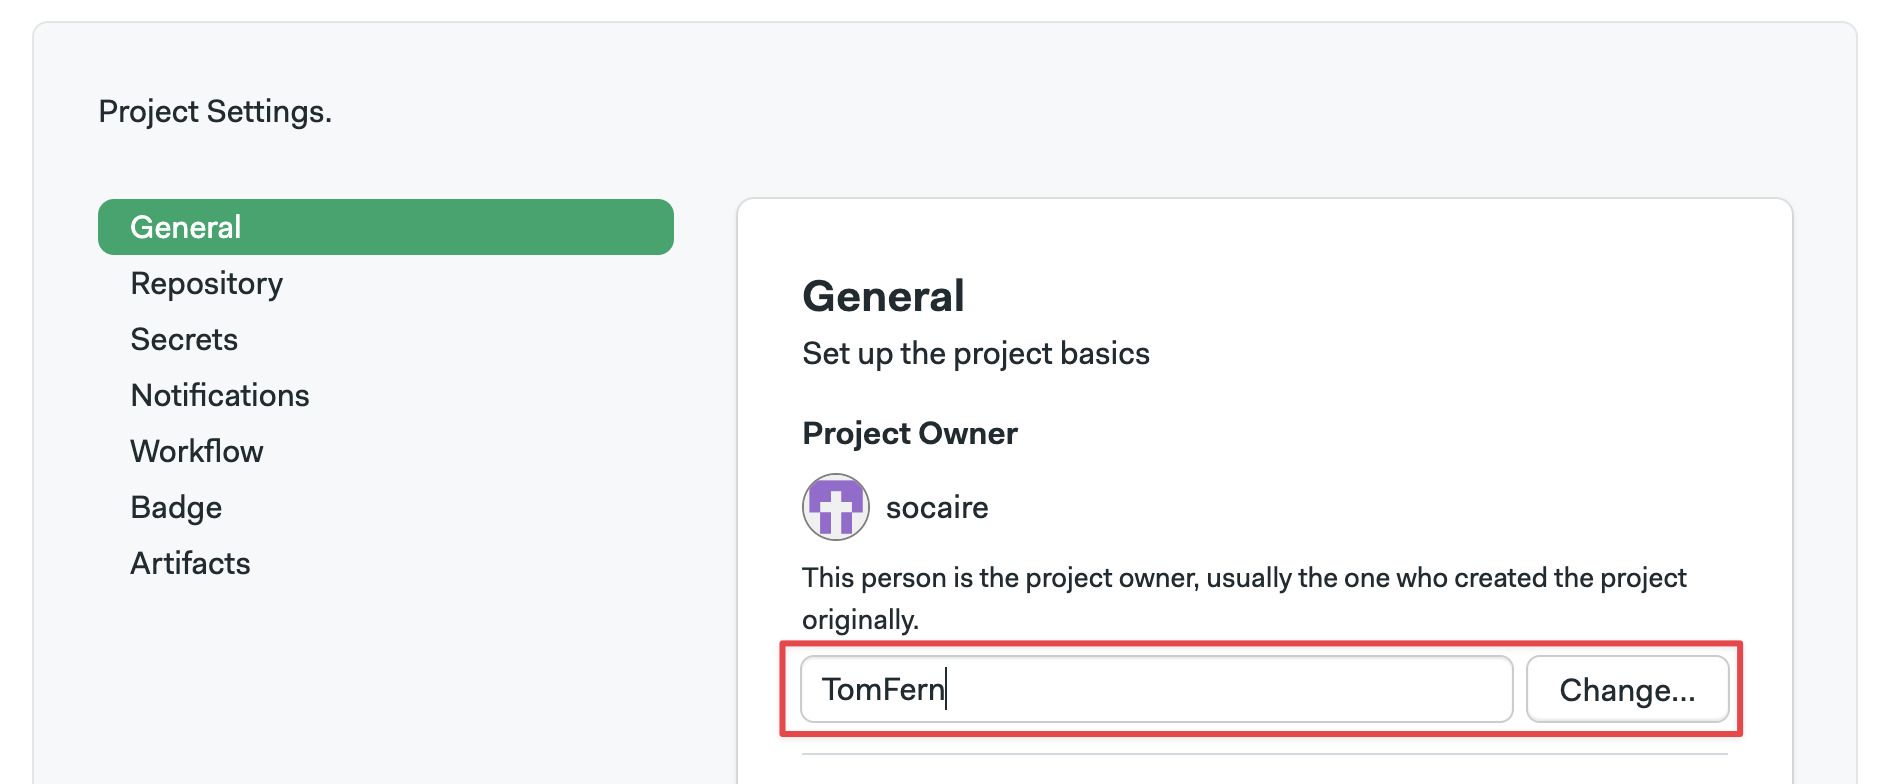
After project ownership has been transferred, you need to push a new commit. Re-running old builds no longer works once the ownership of a project has changed.
Transferring ownership does not automatically grant project roles on the project. You must still manually grant the admin role to allow the new owner manage the project.
Settings
The Settings tab in your project allows you to customize your project settings, add project-level secrets, and manage artifacts
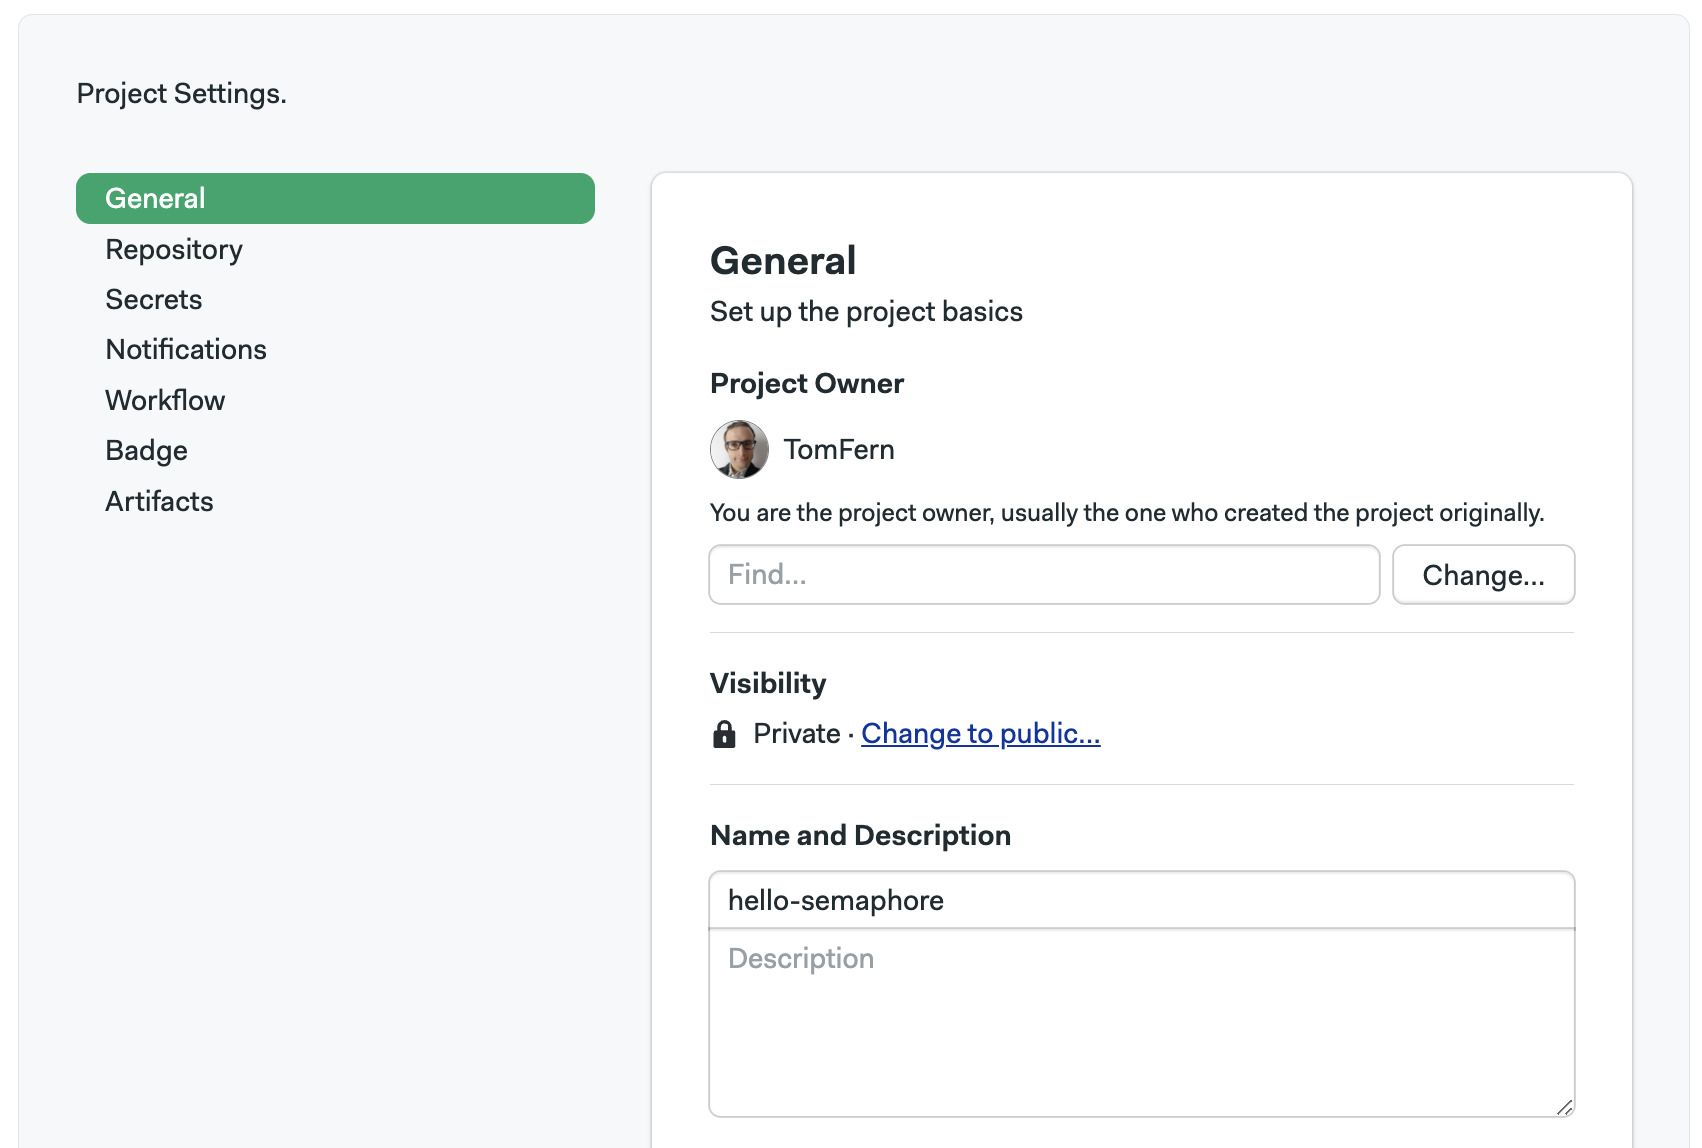
Project settings
In the general project settings, you can:
- Change the owner of the project
- Change the visibility of the project
- Change the project name or description
- Delete the project
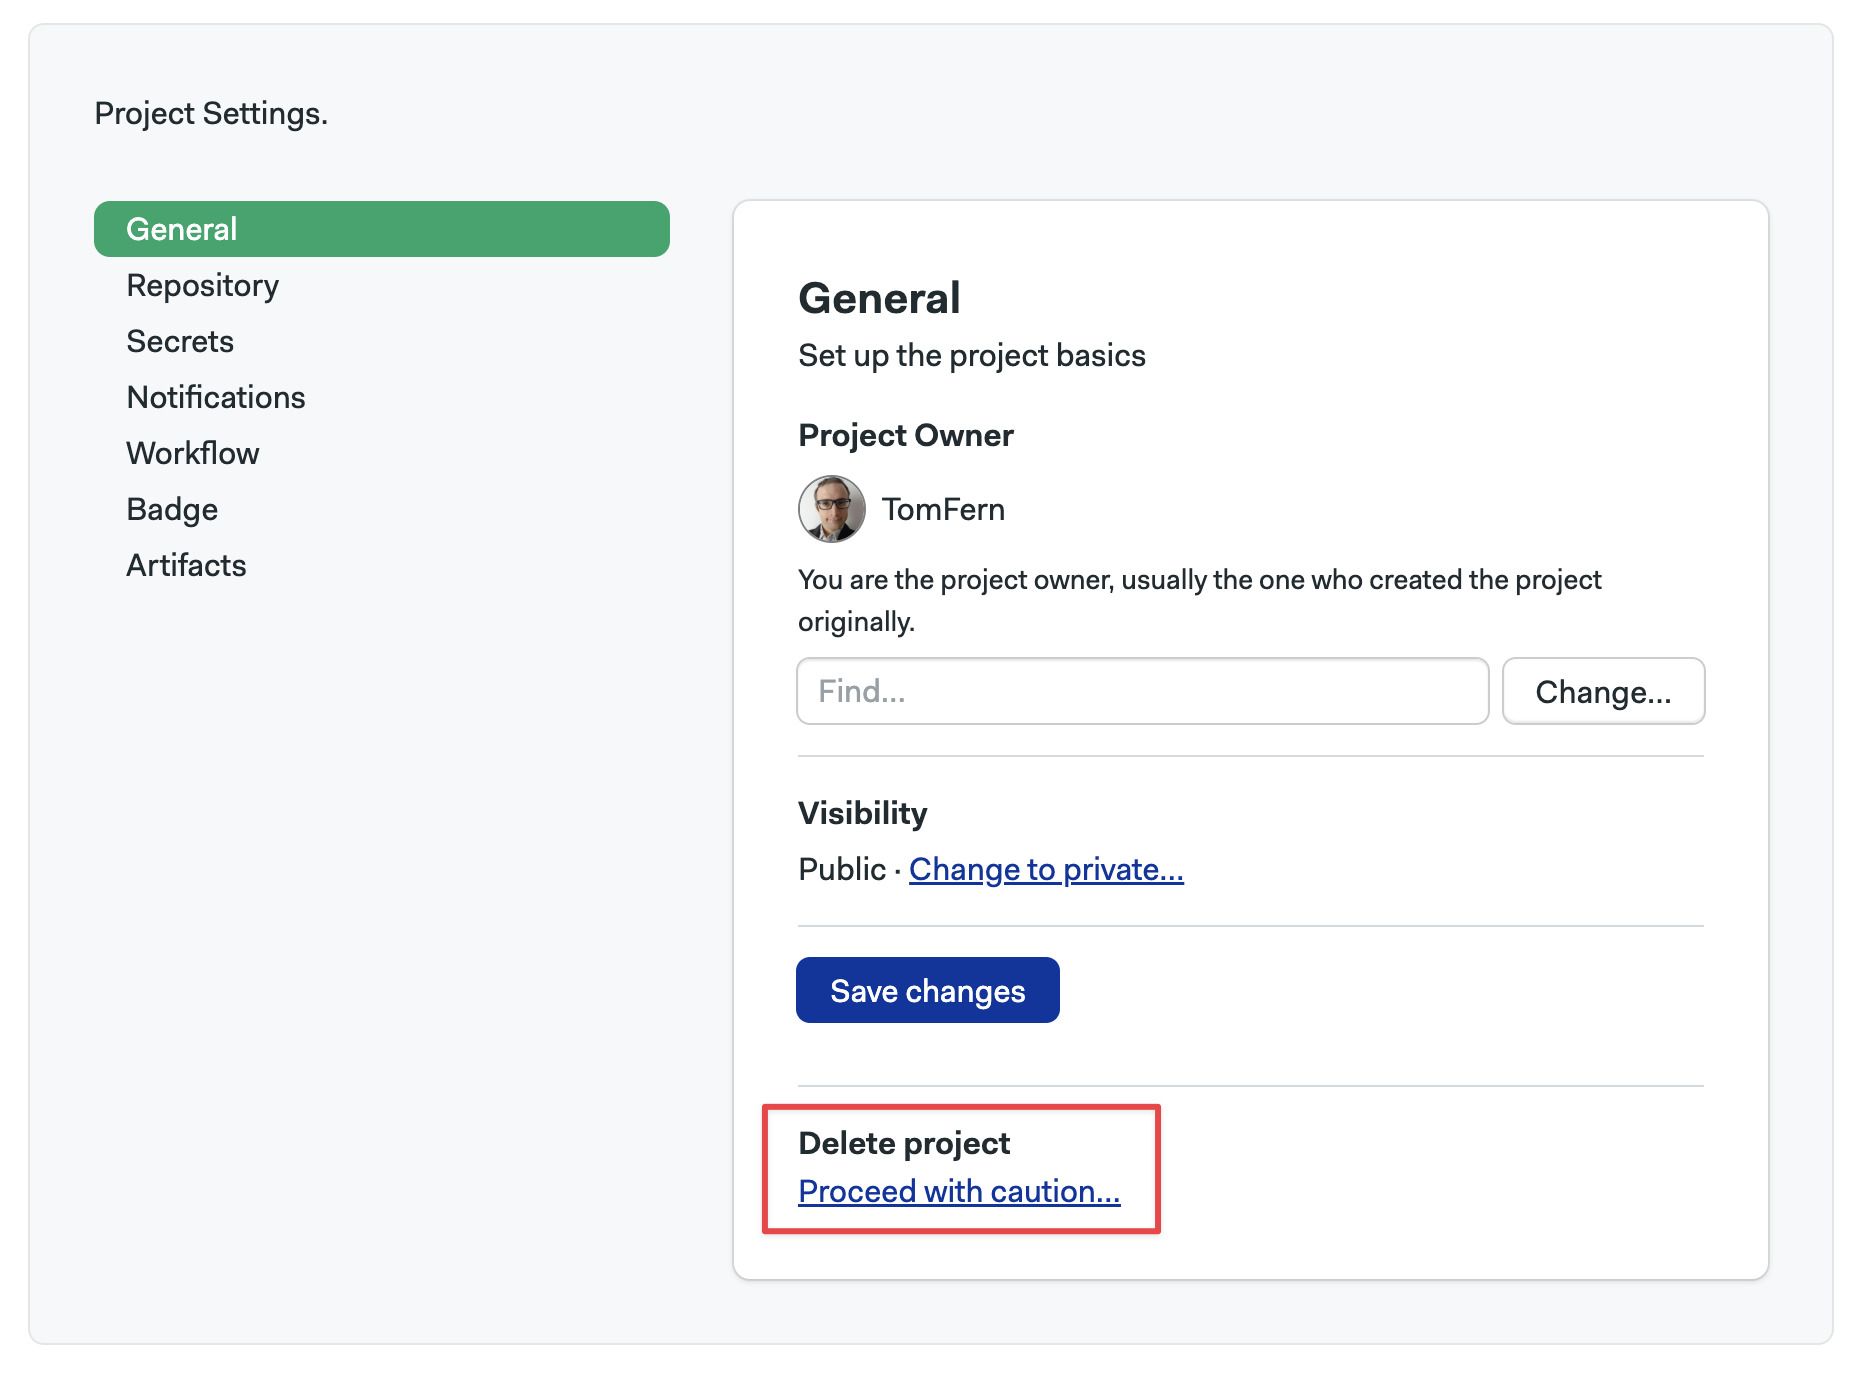
How to delete a project
Deleting a project is irreversible. All the pipelines, jobs, and artifacts associated with the project will be lost.
Go to the general settings of your project and follow these steps:
-
At the bottom of the page, press "Proceed with caution" under Delete project
-
Select a Reason for deleting the project
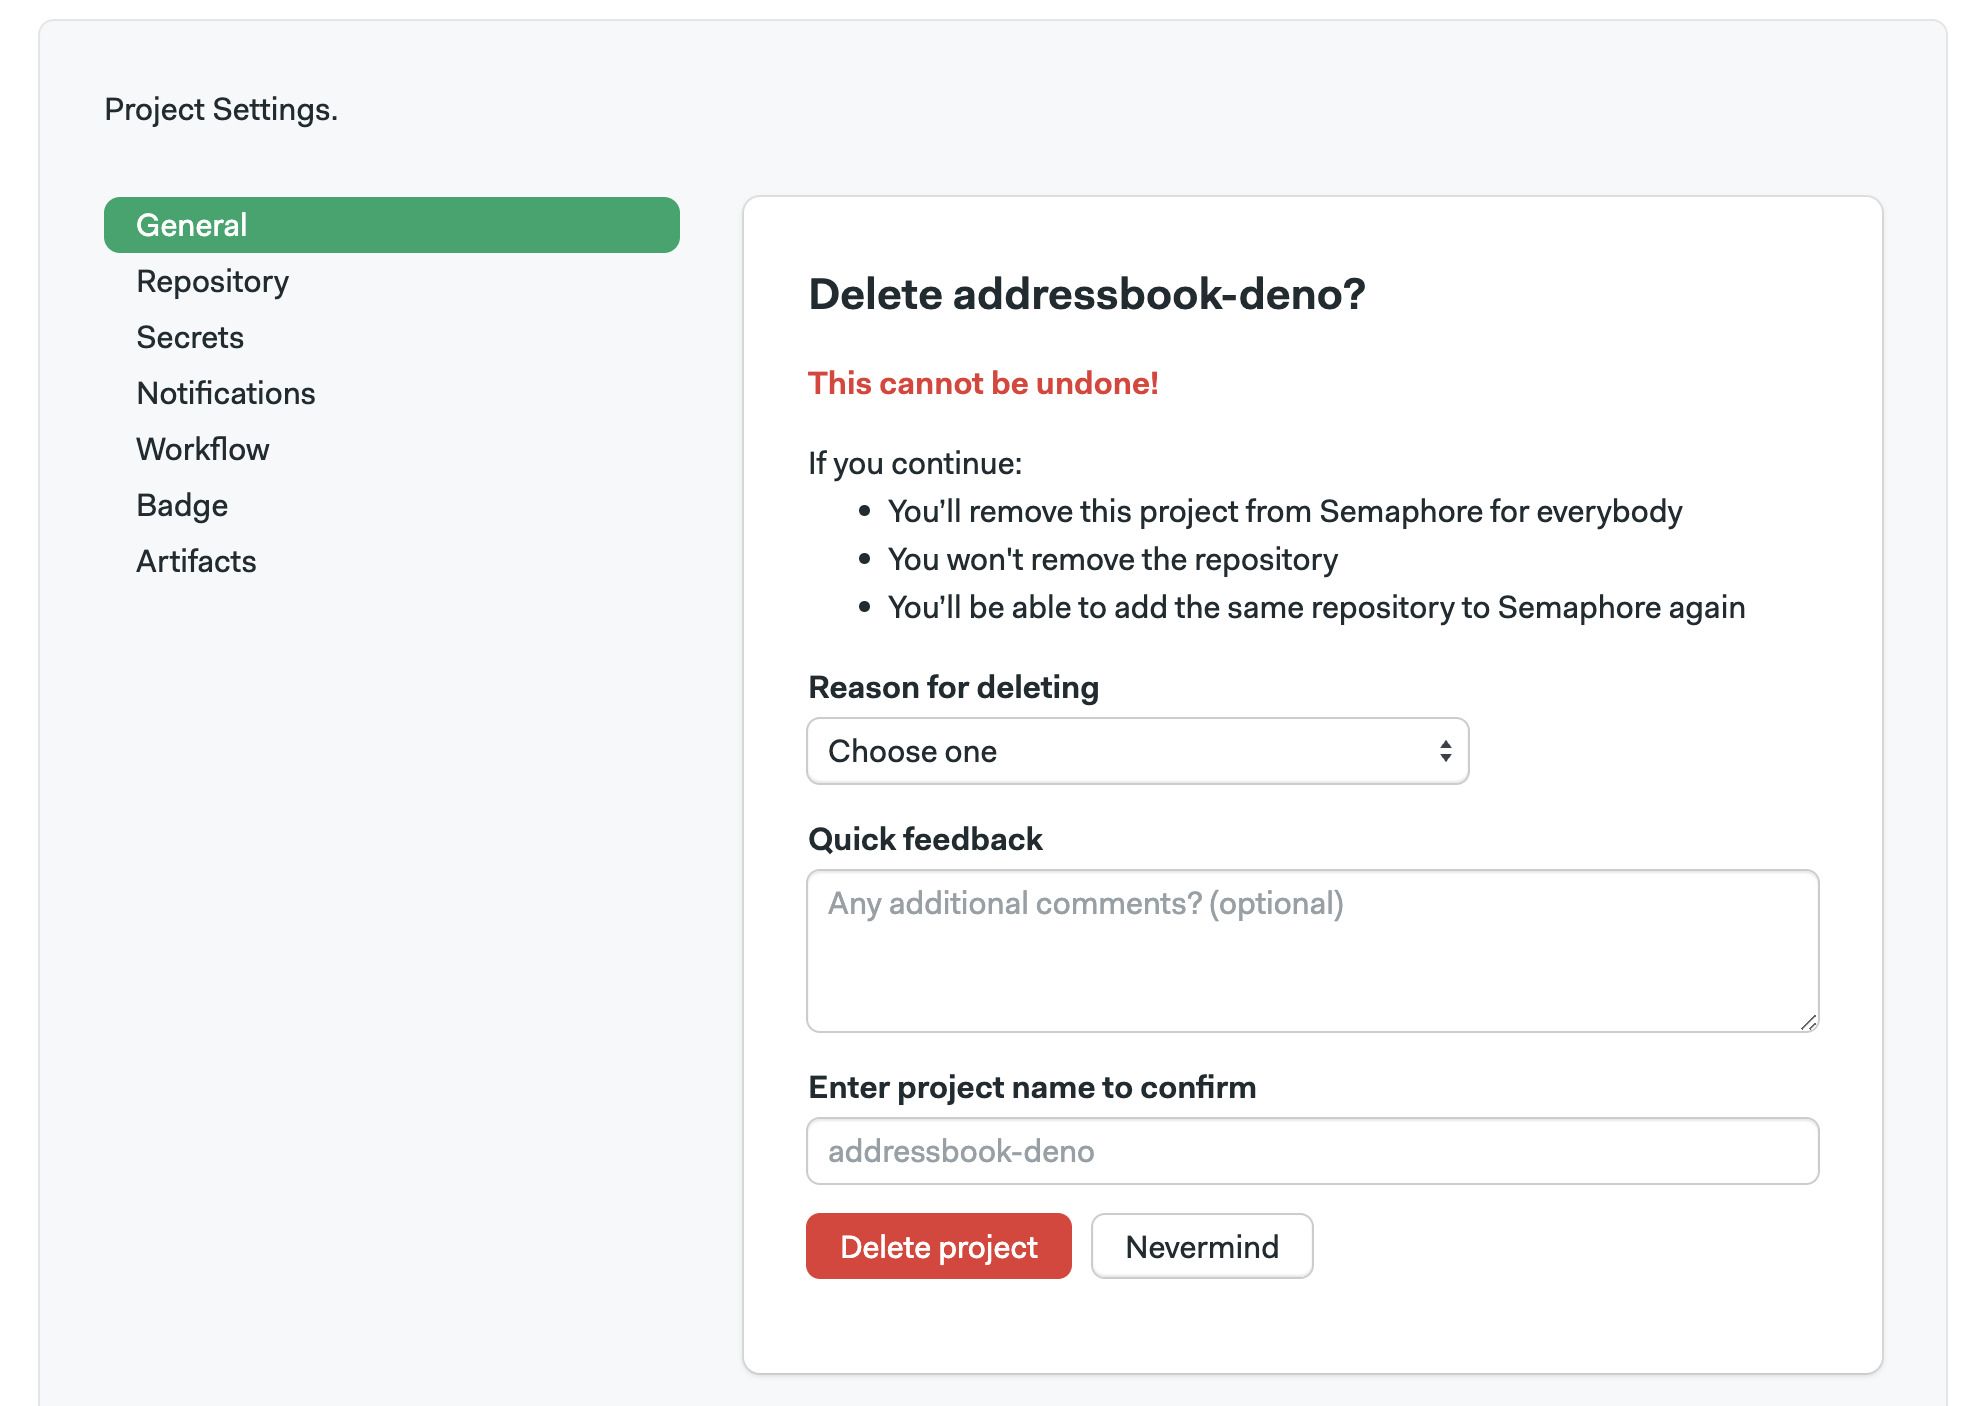
-
Optionally, you may leave some feedback
-
Enter the name of the project to confirm the deletion
-
Press Delete project
You may also delete a project using the Semaphore CLI.
Workflow triggers
See workflow triggers to learn how to customize what actions trigger a workflow.
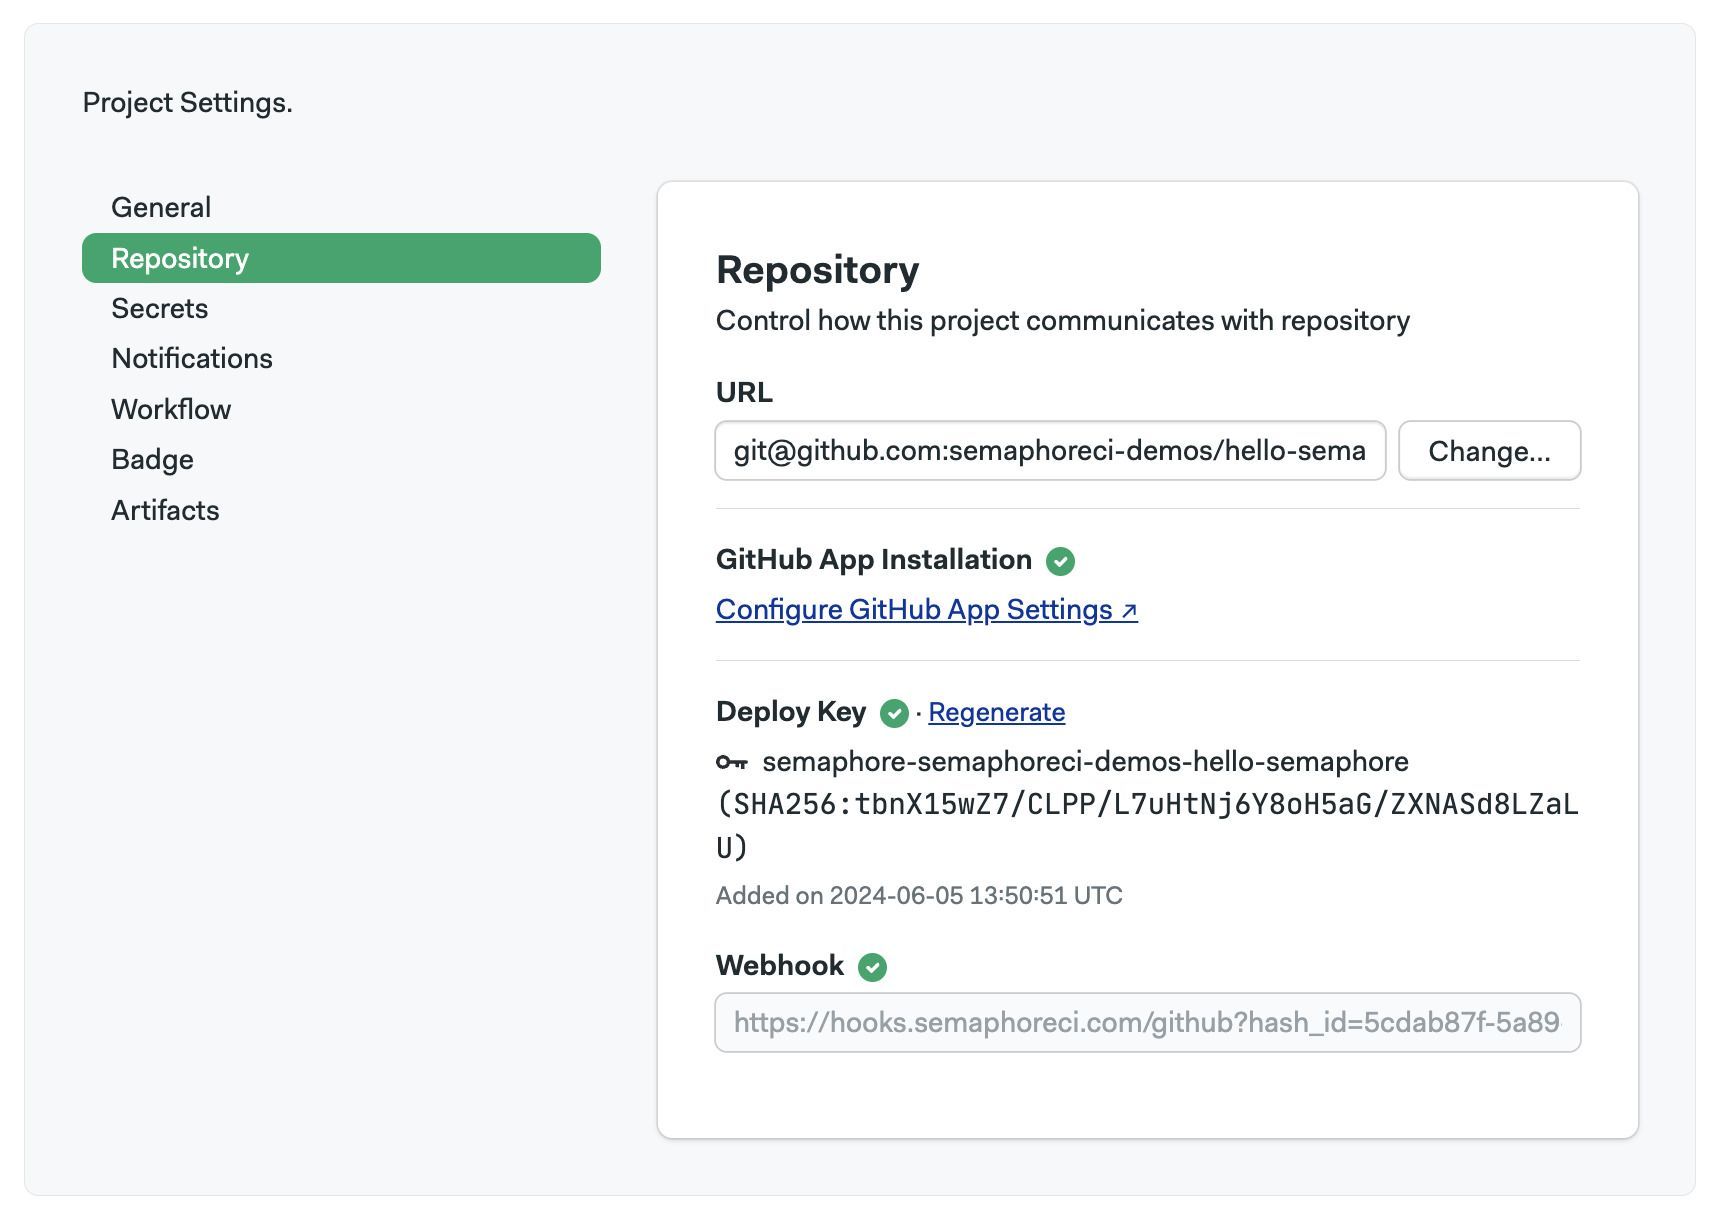
Repository
In Repository settings page you can:
- change the URL of your Git repository if you moved it
- configure or reinstall the GitHub or Bitbucket connections
- regenerate the git webhook if Semaphore is not picking up on the remote changes
Project secrets
In Secrets page, you can create project-level secrets. These are only accessible for this project and not globally to all the organizations.
To learn how to create project secrets, see the secrets documentation page.
Badges
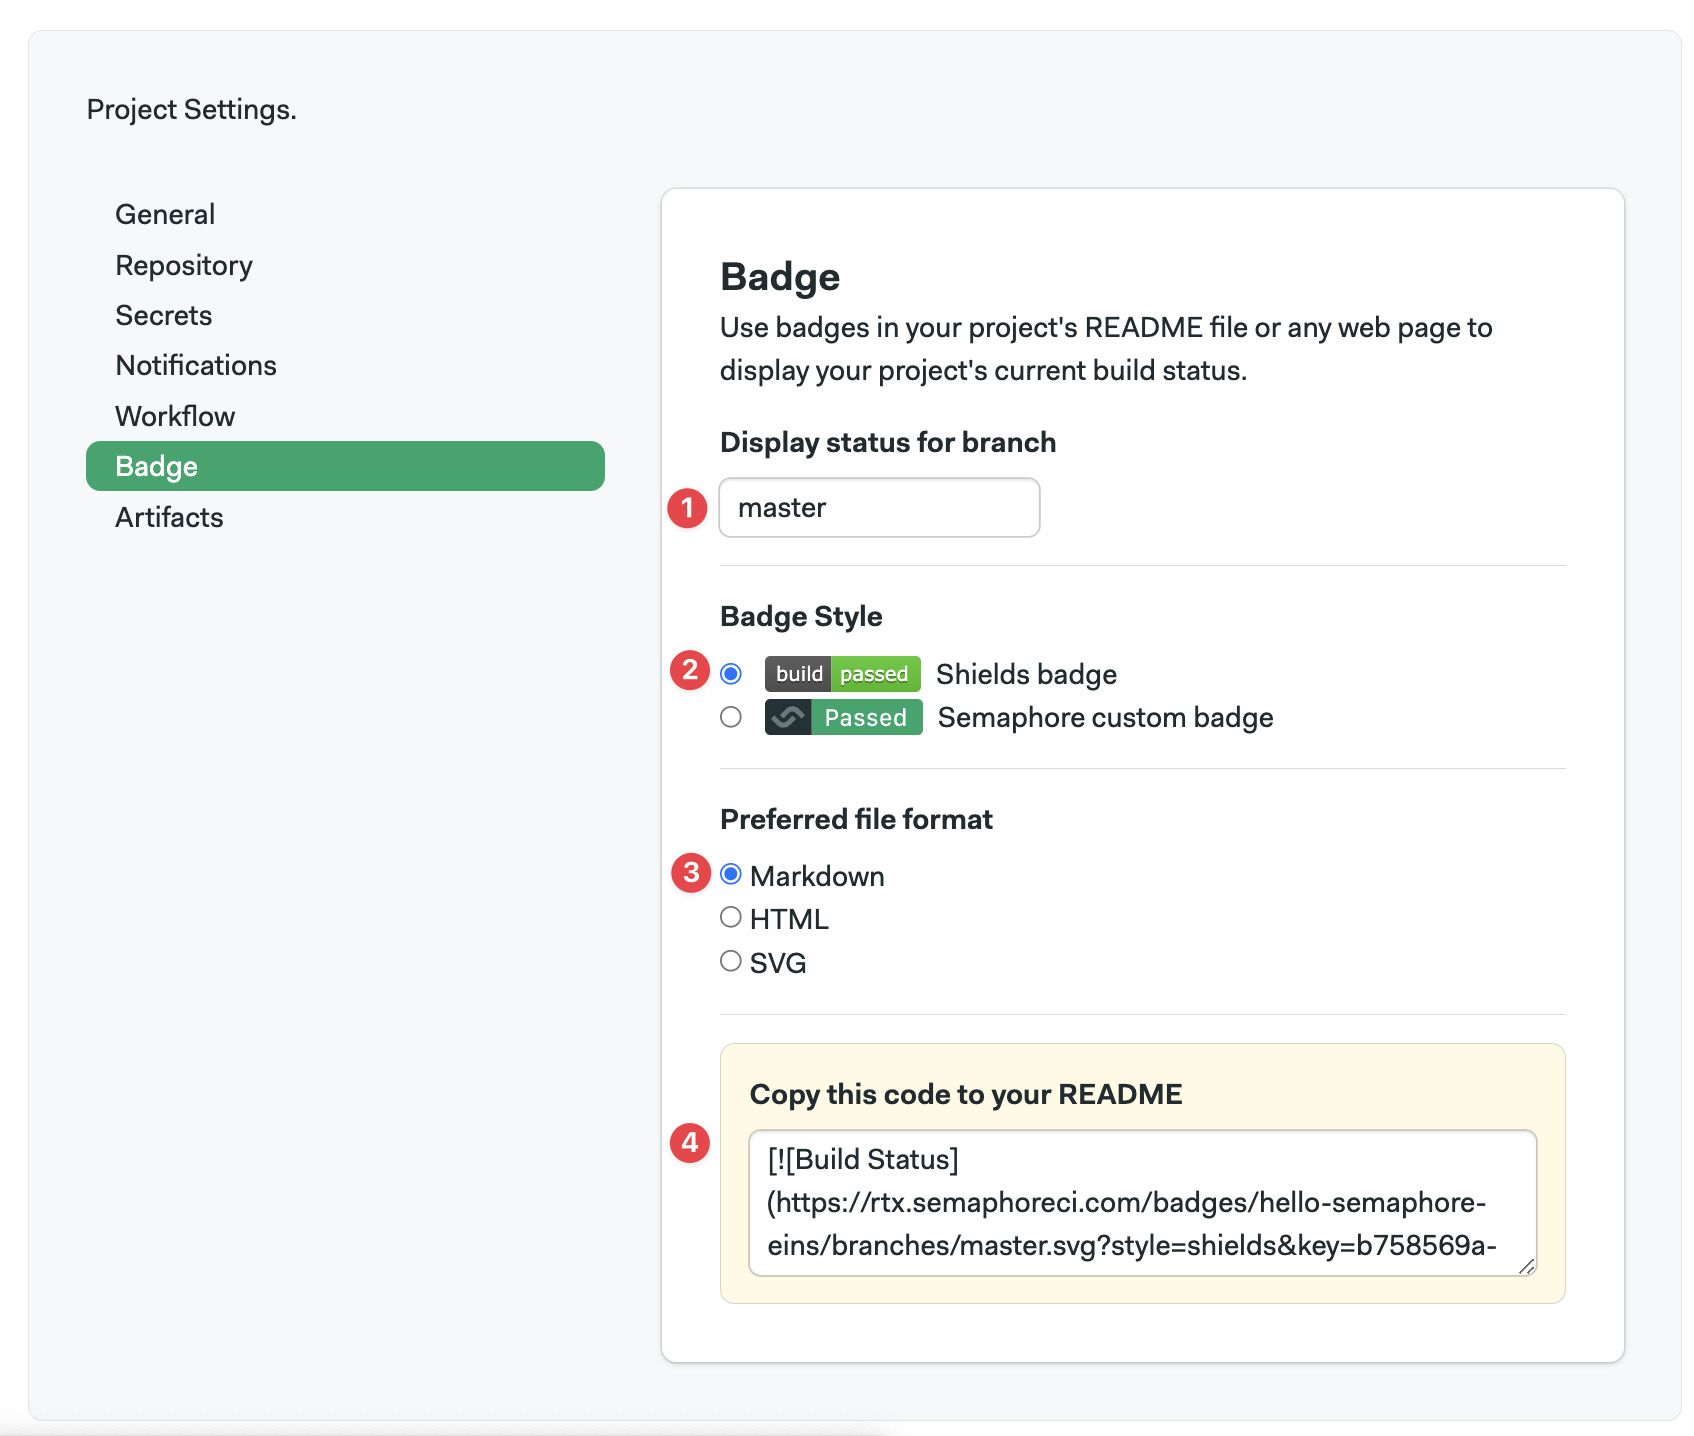
The Badge settings page shows you shields embed codes for your README or any webpage, allowing team members and users about the build status of your project.
To get a badge embed code:
-
Type the branch name you want to show the status for. This is typically "main" or "master"
-
Select a badge style. This is only a style choice
-
Choose the file format where you will embed the badge
-
Copy the code into your README or webpage
Badge URLs follow the following format for the "master" branch:
https://<organization-url>.semaphoreci.com/badges/<PROJECT-NAME>.svg
On other branches the format is:
https://<organization-url>.semaphoreci.com/badges/<PROJECT-NAME>/branches/<BRANCH-NAME>.svg
The visual style of the badge can also be customized. There are two styles:
| Style | Example |
|---|---|
| Semaphore (default) | |
| Shields |
The Semaphore style is the default. To use shields style, add ?style=shields to the URL. For example:
https://<organization-url>.semaphoreci.com/badges/<PROJECT-NAME>.svg?style=shields
Artifacts
The Artifacts settings page lets you configure the artifact retention policy.
To learn more, see the artifacts retention page
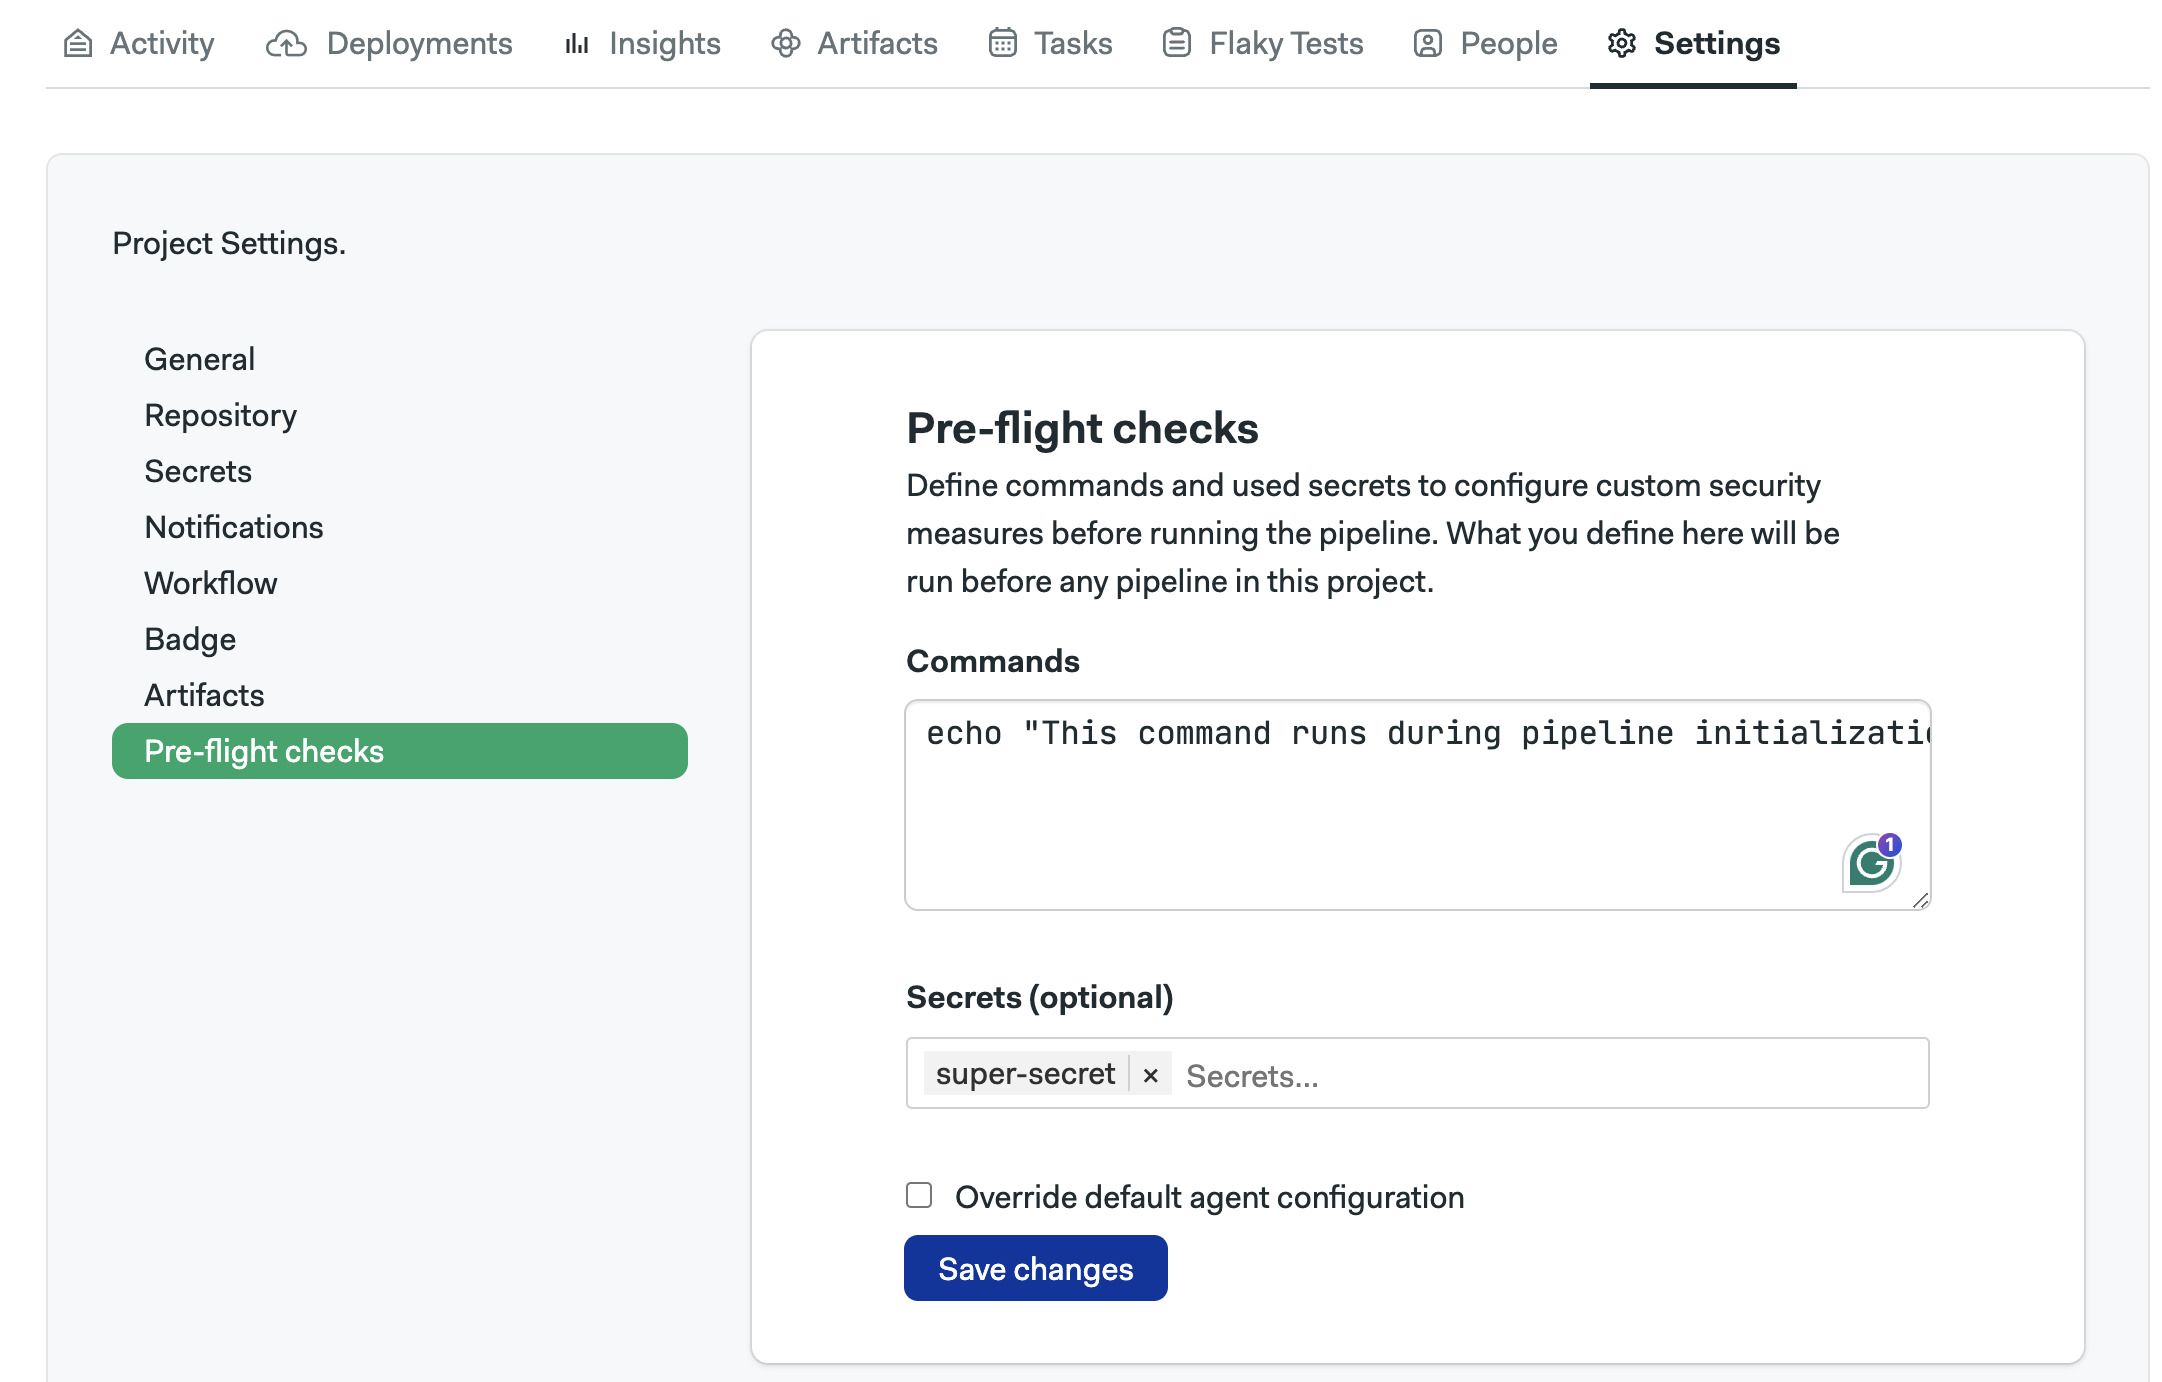
Pre-flight checks
Pre-flight checks are user-defined commands executed before the pipeline begins as part of the pipeline initialization job. These checks allow you to define the type of agent running the initialization job and to manually run commands before a pipeline starts.
If you want to run commands for all pipelines in your organization, see organization pre-flight checks.
How to set up preflight checks
To create, edit, or delete project pre-flight checks, follow these steps:
-
Open the project on Semaphore
-
Go to the Settings tab
-
Select Pre-flight checks
-
Type the pre-flight commands
-
Optionally, type the name of secrets to be injected during the initialization job
-
Press Save changes
See the organization pre-flight page to learn about the available environment variables and see examples of pre-flight checks.
How to change init agent
You can change the agent in which the initialization and pre-flight commands run.
To change the initialization for the project, follow these steps:
-
Go to the Pre-flight settings page
-
Check the box Override default agent configuration
-
Select an Environment type
-
Select a Machine type
-
Select an OS image
-
Press Save changes
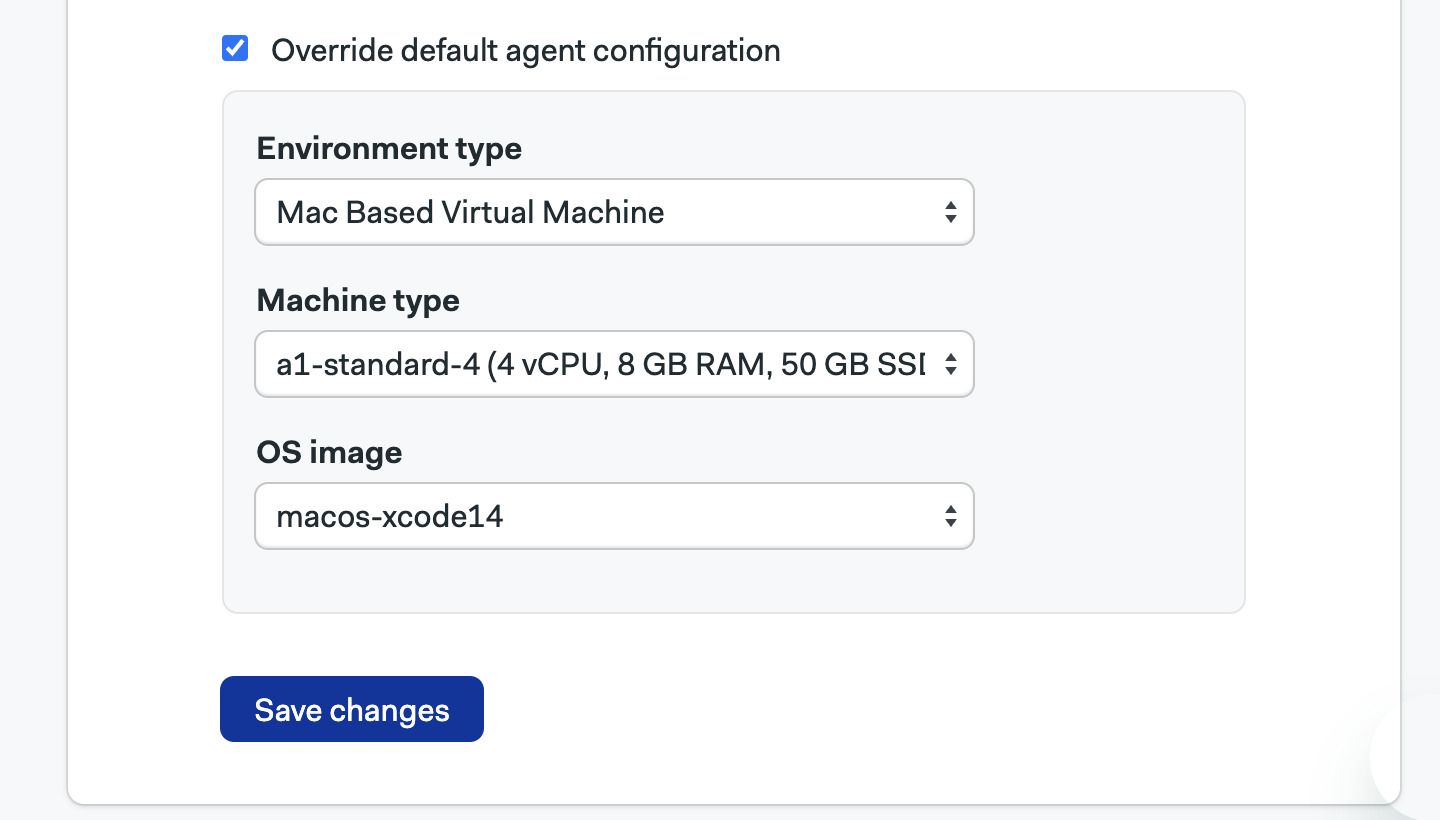
This setting overrides the organization-wide initialization agent.
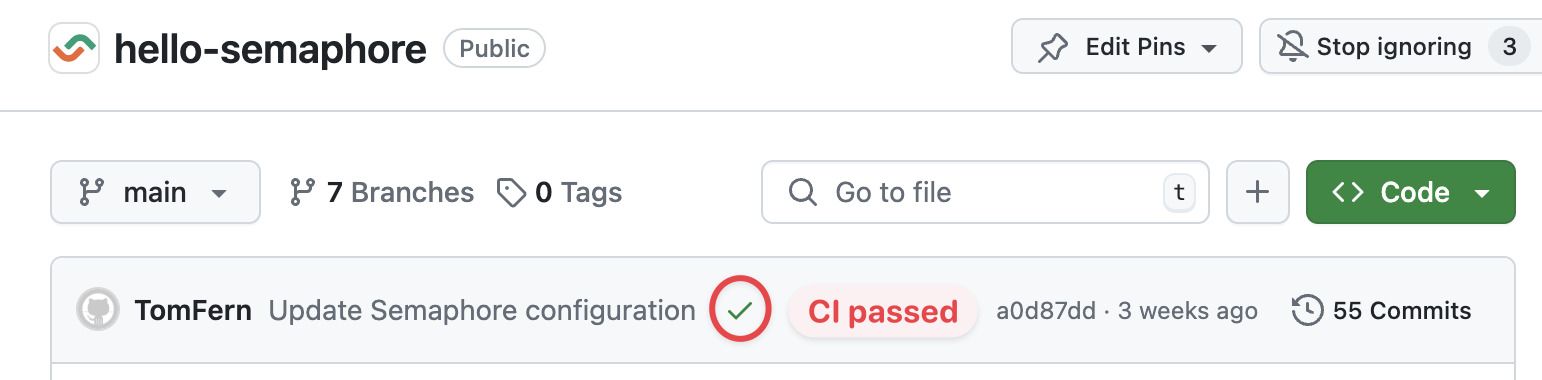
How to configure status checks
Semaphore sends status checks to your GitHub or BitBucket repositories. Status checks show the latest Semaphore activity right in your repository.
Status checks appear in the commit messages.
And also on pull requests.

Semaphore only reports status checks on the initial pipeline (.semaphore/semaphore.yml). But you can configure status checks on any other pipelines in the workflows or even on blocks.
Edit status checks
Status checks can only be configured using the Semaphore Command Line.
To add status checks on other non-initial pipelines, follow these steps:
-
Edit your project resource using
sem editon a terminalsem edit project <project-name> -
The project configuration is opened in the default text editor. For example:
apiVersion: v1alpha
kind: Project
metadata:
  name: example

spec:
  repository:
    url: "git@{github|bitbucket}.com:renderedtext/example.git"
    run: true
    run_on:
      - branches
      - tags
    pipeline_file: ".semaphore/semaphore.yml"

    status:
      pipeline_files:
        - path: ".semaphore/semaphore.yml"
level: "pipeline" -
Add more items under the
status.pipeline_files. The following example sends status checks for thesemaphore.ymlandstaging-deploy.ymlpipelinesstatus:
pipeline_files:
- path: ".semaphore/semaphore.yml"
level: "pipeline"
- path: ".semaphore/staging-deploy.yml"
level: "pipeline" -
You can even send block-level status checks by using
level: "block". For example:status:
pipeline_files:
- path: ".semaphore/semaphore.yml"
level: "pipeline"
- path: ".semaphore/staging-deploy.yml"
level: "block"
Troubleshooting guide
If your repositories aren't showing in Semaphore or changes are not triggering new workflows, check the connection between GitHub and Semaphore.
- Navigate to your Semaphore account
- Read the status next to GitHub
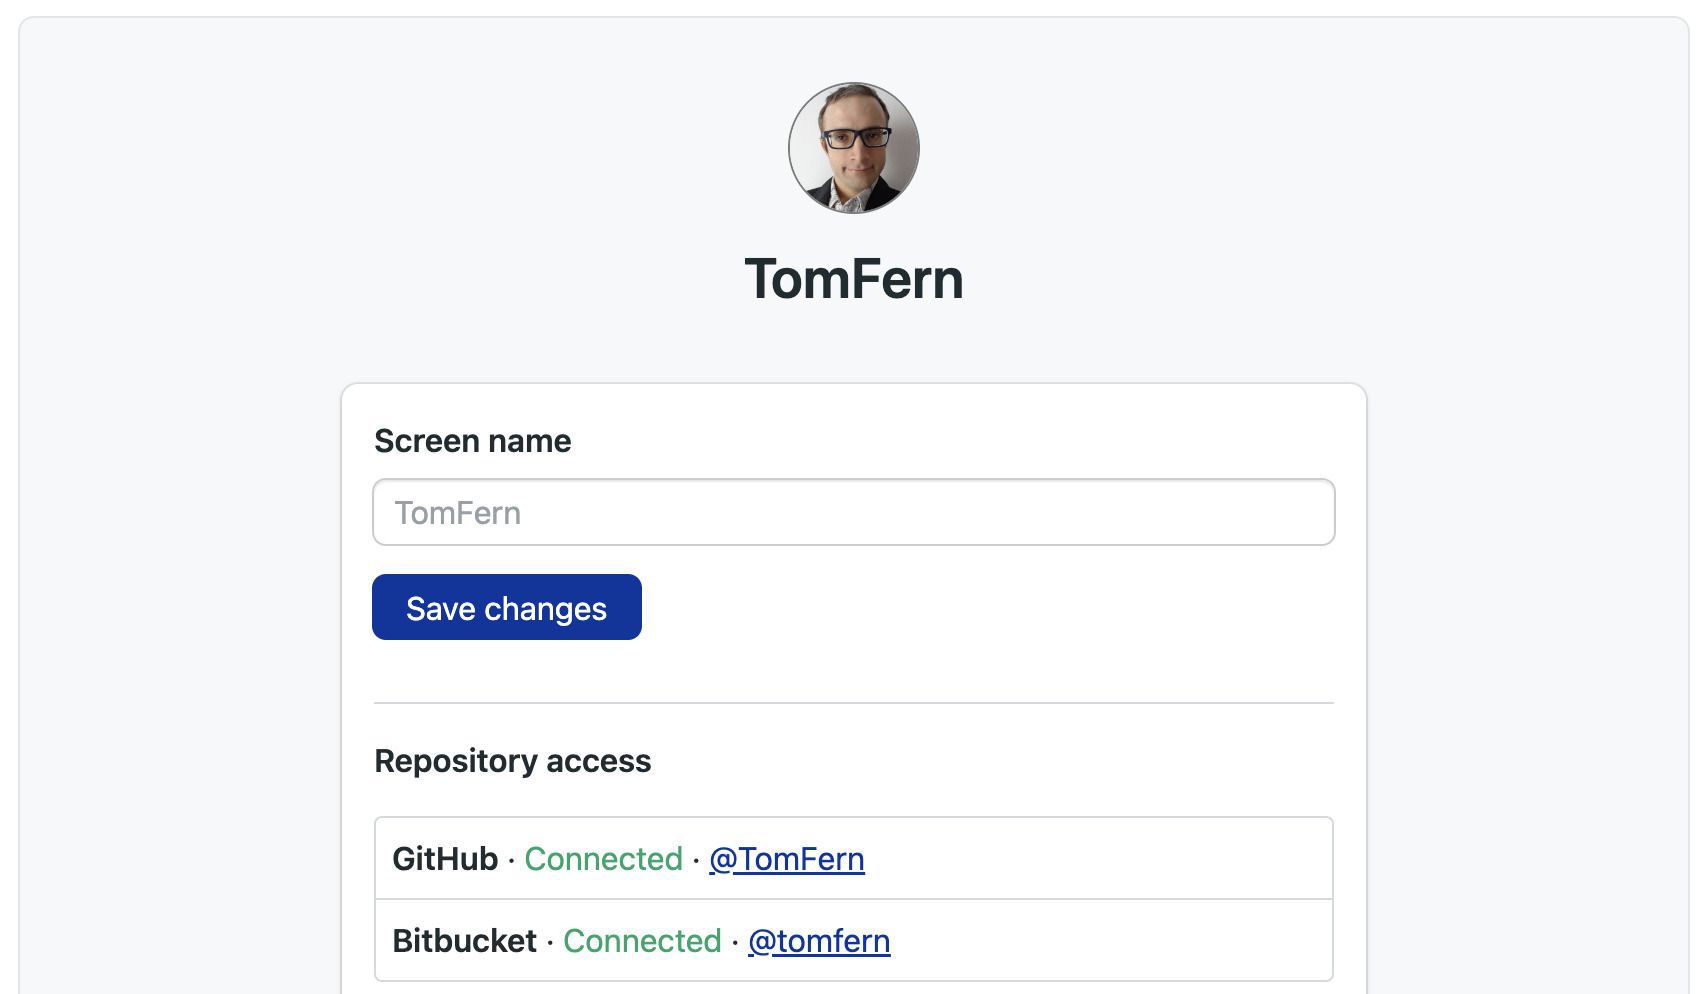
- If the status is disconnected, click on Grant public access or Grant private access
You can check and change the permissions of your OAuth App connection in the Semaphore OAuth page.
Verify deploy key health
Semaphore generates a deploy key when a project is created. This means there is a deploy key per repository connected to Semaphore.
When a deploy key is broken or invalid, Semaphore shows the following error message:
git@github.com: Permission denied (publickey).
fatal: Could not read from remote repository.
To verify the status of a deploy key:
- Open your project settings
- If there isn't a green check next to Deploy Key, the key is invalid
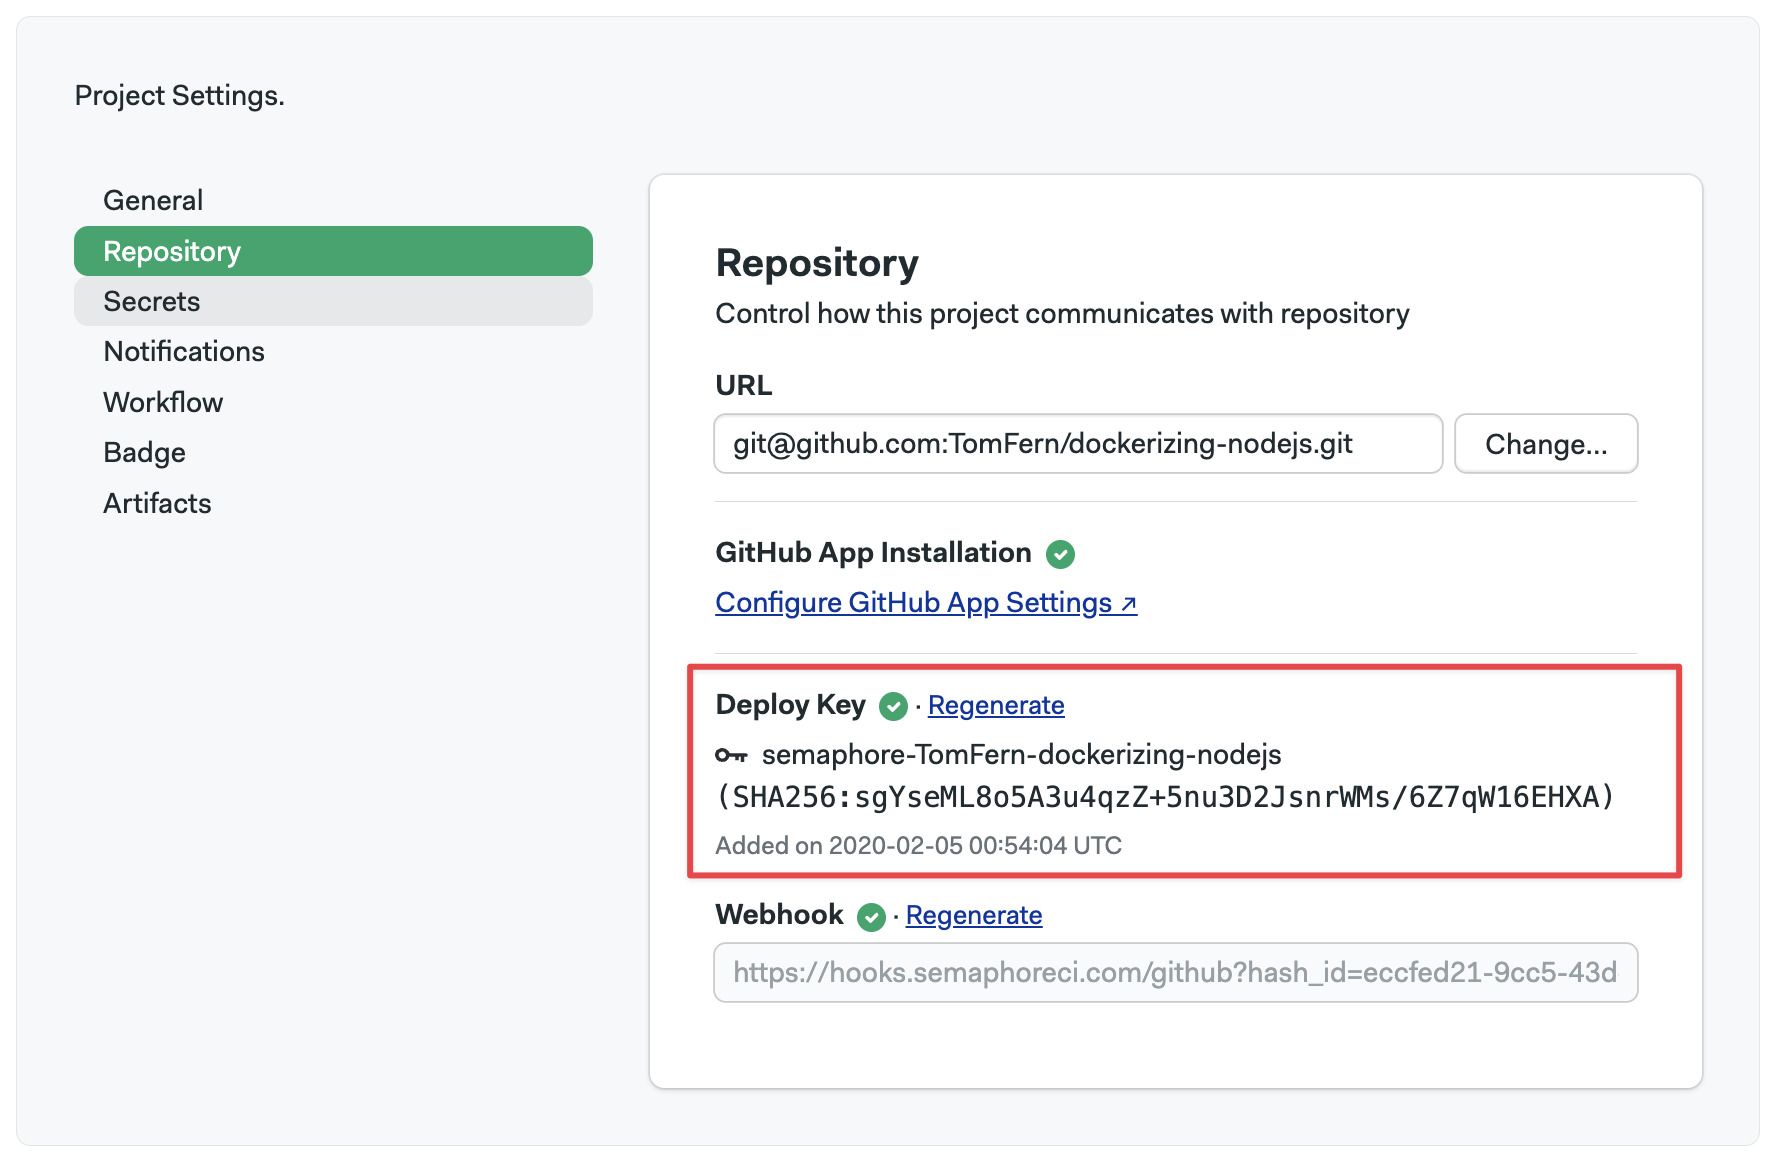
To deploy a new key, click on Regenerate
A deploy key can be invalidated if:
- it was manually removed from the repository
- access via OAuth or GitHub App was revoked
- the repository's original owner no longer has access to it (only for projects added via OAuth
Verify webhook health
Semaphore uses a webhook to detect changes in your repository. When the webhook is broken, Semaphore can't trigger new workflows.
To verify the status of a webhook:
- Open your project settings
- If there isn't a green check next to Deploy Key, the key is invalid

To fix the broken webhook, click on Regenerate. This should generate a new webhook and repair the connection between Semaphore and GitHub.
Reconnecting moved or renamed projects
There are several actions that can break the connection between GitHub and Semaphore. For example:
- moving the repository to a different location
- renaming the repository
- renaming the GitHub user account
- renaming the GitHub organization
When this happens, please email Semaphore at support@semaphoreci.com providing the following details:
- Previous repository name and URL
- New repository name and URL
The Semaphore support team will relink the project to the new repository.