Continuous Delivery
We succeeded into having a program built and tested using Continuous Integration. It's time to release it automatically using Continuous Delivery.
In this section you will learn about:
- Protecting sensitive data with Secrets
- Creating multiple pipelines
- Using automated promotions
Prerequisites
For this part of the tutorial you will need:
- A GitHub Access Token with read+write content permissions
- The
gitcommand line tool
Releasing to the world
The goal is to automatically deploy the built binary to the GitHub repository so people can download and enjoy our program. Next, we're going to add a job that automatically uploads the binary to the repository every time we tag a release with git tag
Creating a Secret
In order to upload files from the Semaphore job we need to authenticate with your GitHub account. For that, we'll need an access token.
Now, the problem with such tokens is that they should remain secret. This rules out using environment variables in our jobs to store the token, as these are visible to anyone with read access to the repository.
We can protect sensitive data such as tokens with secrets. Secrets provide a secure way to store key-value pairs and files within your organization. So, even if our repository is public, no one outside your organization can access these secrets.
To create a secret, follow these steps:
-
Open the project in Semaphore and go to the Settings tab
-
Go to Secrets
-
Press New Secret
-
Type a name for the secret, e.g.
github-release -
Type the key-value pair required to authenticate with GitHub
The variable name is
GH_TOKENand the value is your unique token generated in your GitHub account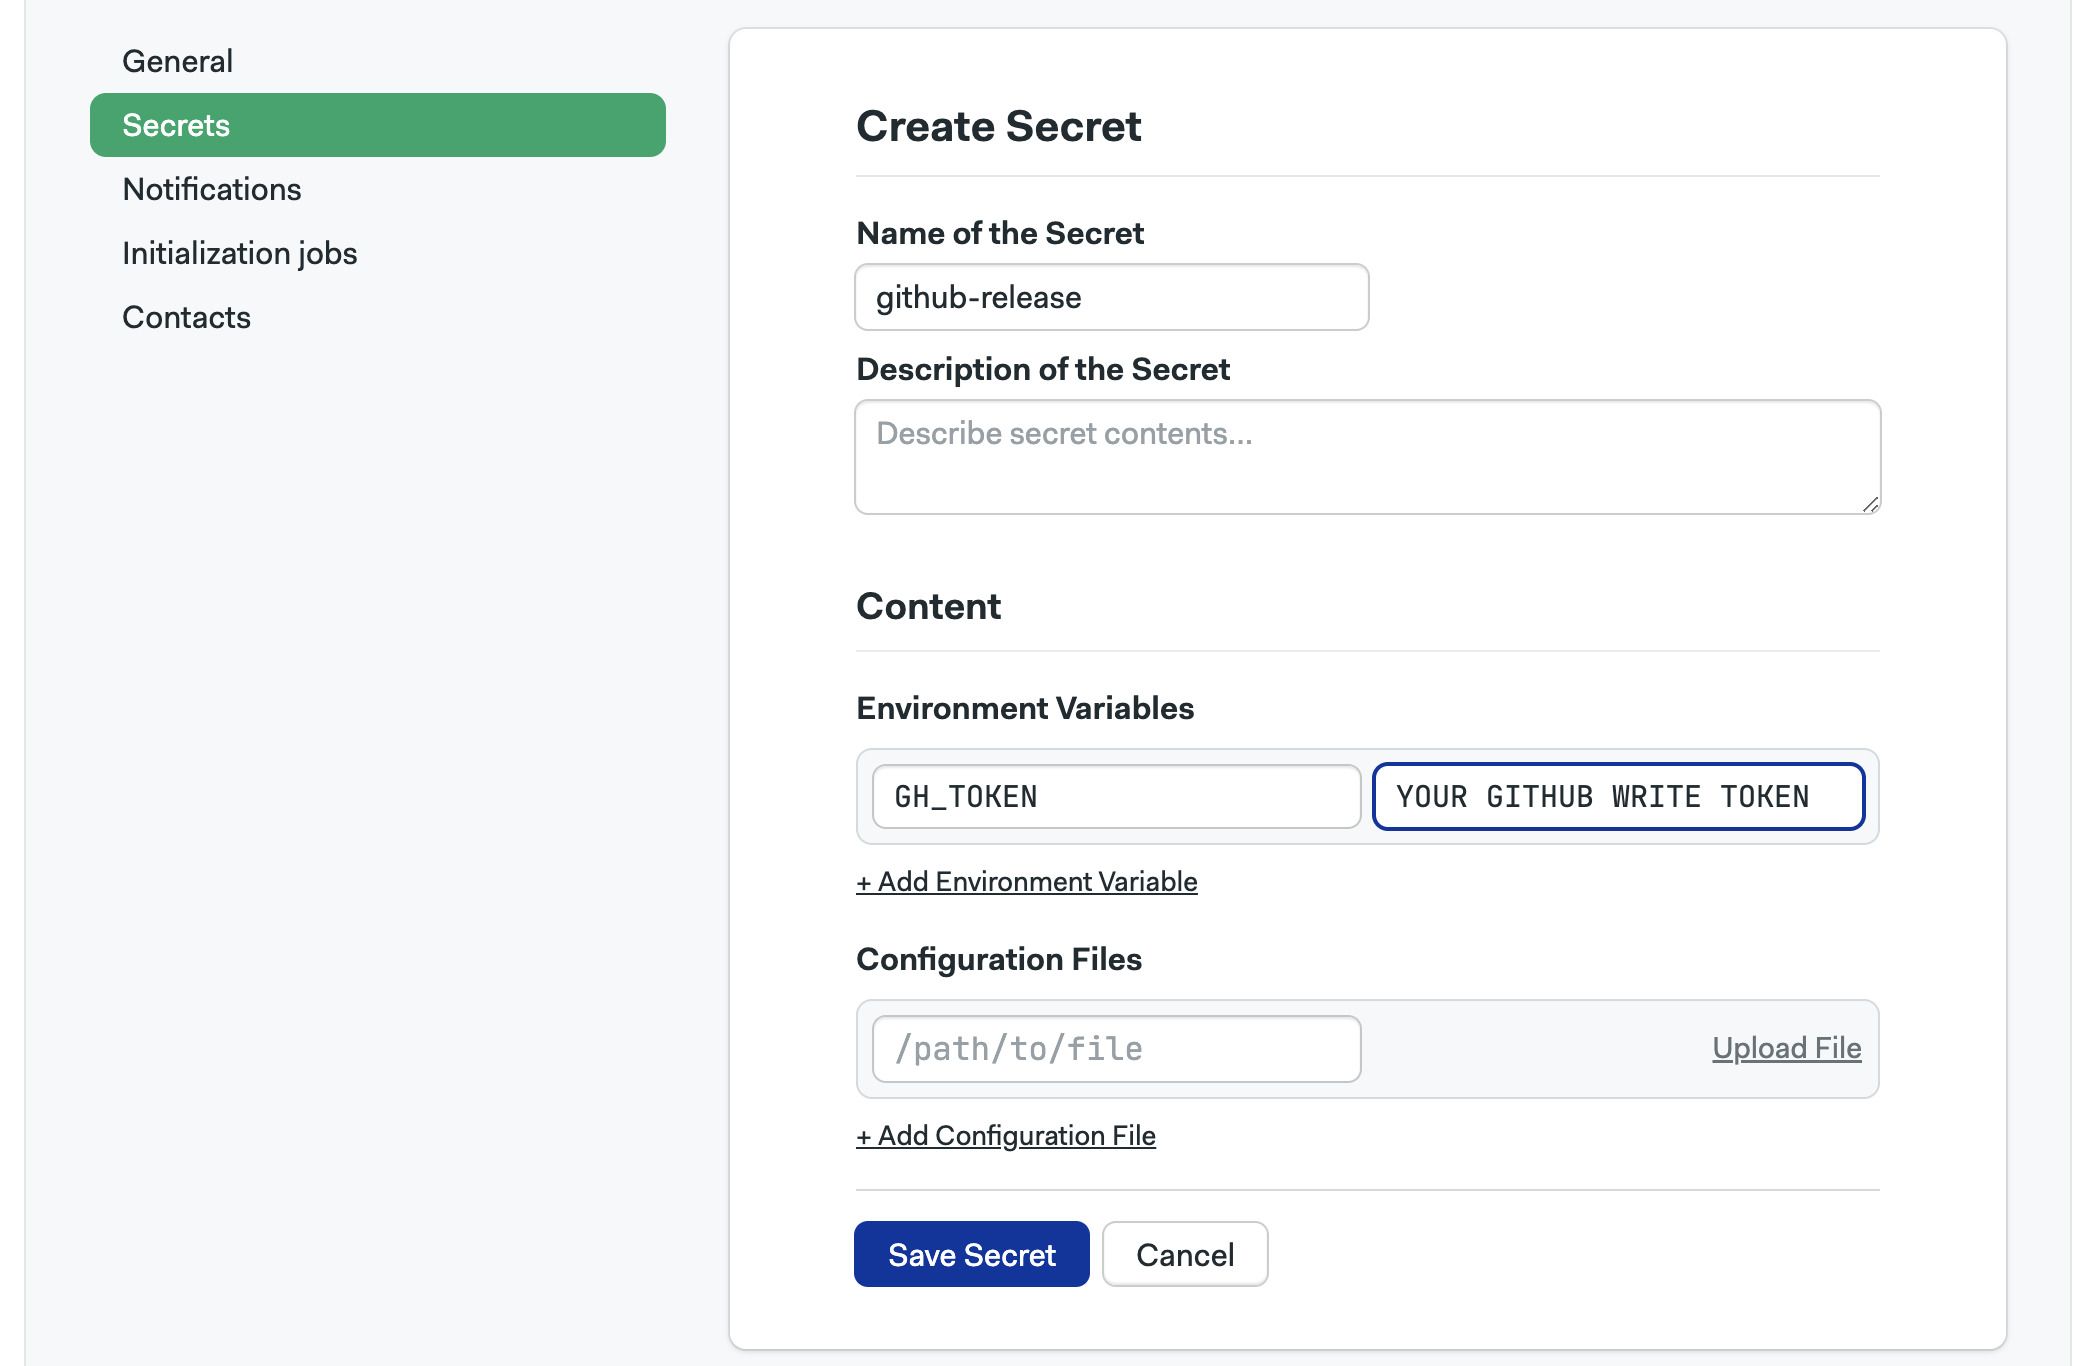
-
Press Save Secret
Release job
Now we're ready to add a release job. We can use the gh command line tool to automate the release from a Semaphore job.
-
Open the workflow editor
-
Add a block
-
Type the following commands
Release jobcheckout
artifact pull workflow hello-go
gh release create "$SEMAPHORE_WORKFLOW_ID" hello-go --latest -t "$SEMAPHORE_WORKFLOW_ID" -n "Continuous Delivery Release: $SEMAPHORE_WORKFLOW_ID"The job pulls the binary from the artifact repository and publishes it using a unique UUID generated by Semaphore
-
Open the Secrets section on the block and enable
github-release
-
Start the workflow
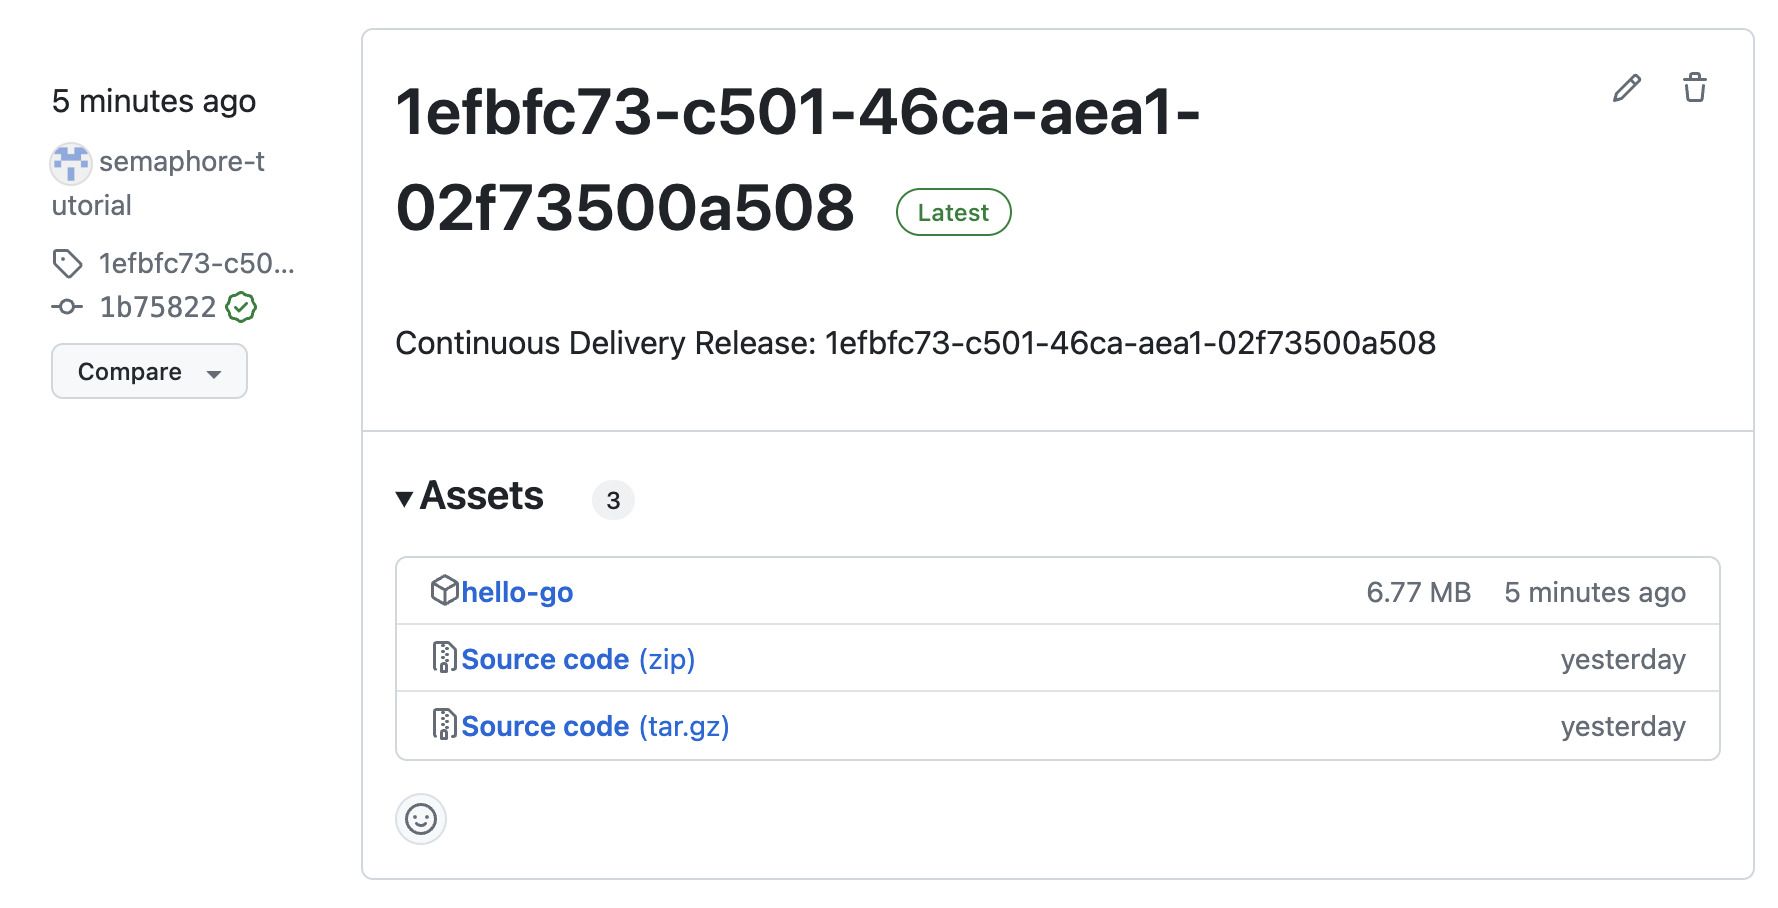
After the workflow finishes you should see a new release on your GitHub repository.
This works, however, there are quite a few problems with this approach:
- Releases are randomly named instead of using sensible version numbers
- Every update on every branch generates a release. This is too much, we usually only want to release on certain milestones
- Continuous Integration and Continuous Delivery should be logically separated tasks. Here, they are all smashed together
What we need is to split the pipeline in two: Continuous Integration and Continuous Delivery. For that, we need to learn about promotions.
What are promotions?
By now, you know what a pipeline is. But you might not know that a project can have multiple pipelines. Logically, every pipeline has one goal or fulfills one task: test, release, deploy, and so forth.
In Semaphore, we use promotions to link pipelines. A promotion represents a pointer to one or more pipeline files in the project.
Let's take the release block and put it on a separate pipeline.
-
Delete the "Release" block in the first pipeline
-
Press Add Promotion. This creates and links a new pipeline.
-
Give descriptive names to the Promotion and the new pipeline
-
Select the first block on the new pipeline
-
Just like before, type the job commands
Release jobcheckout
artifact pull workflow hello-go
gh release create "$SEMAPHORE_GIT_TAG_NAME" hello-go --latest -t "$SEMAPHORE_GIT_TAG_NAME" -n "Continuous Delivery Release: $SEMAPHORE_GIT_TAG_NAME"We've changed the release command to use the Git tag for the release name. This allows us to tag releases using sensible version numbers.
-
As before, open the Secrets section on the block and enable
github-release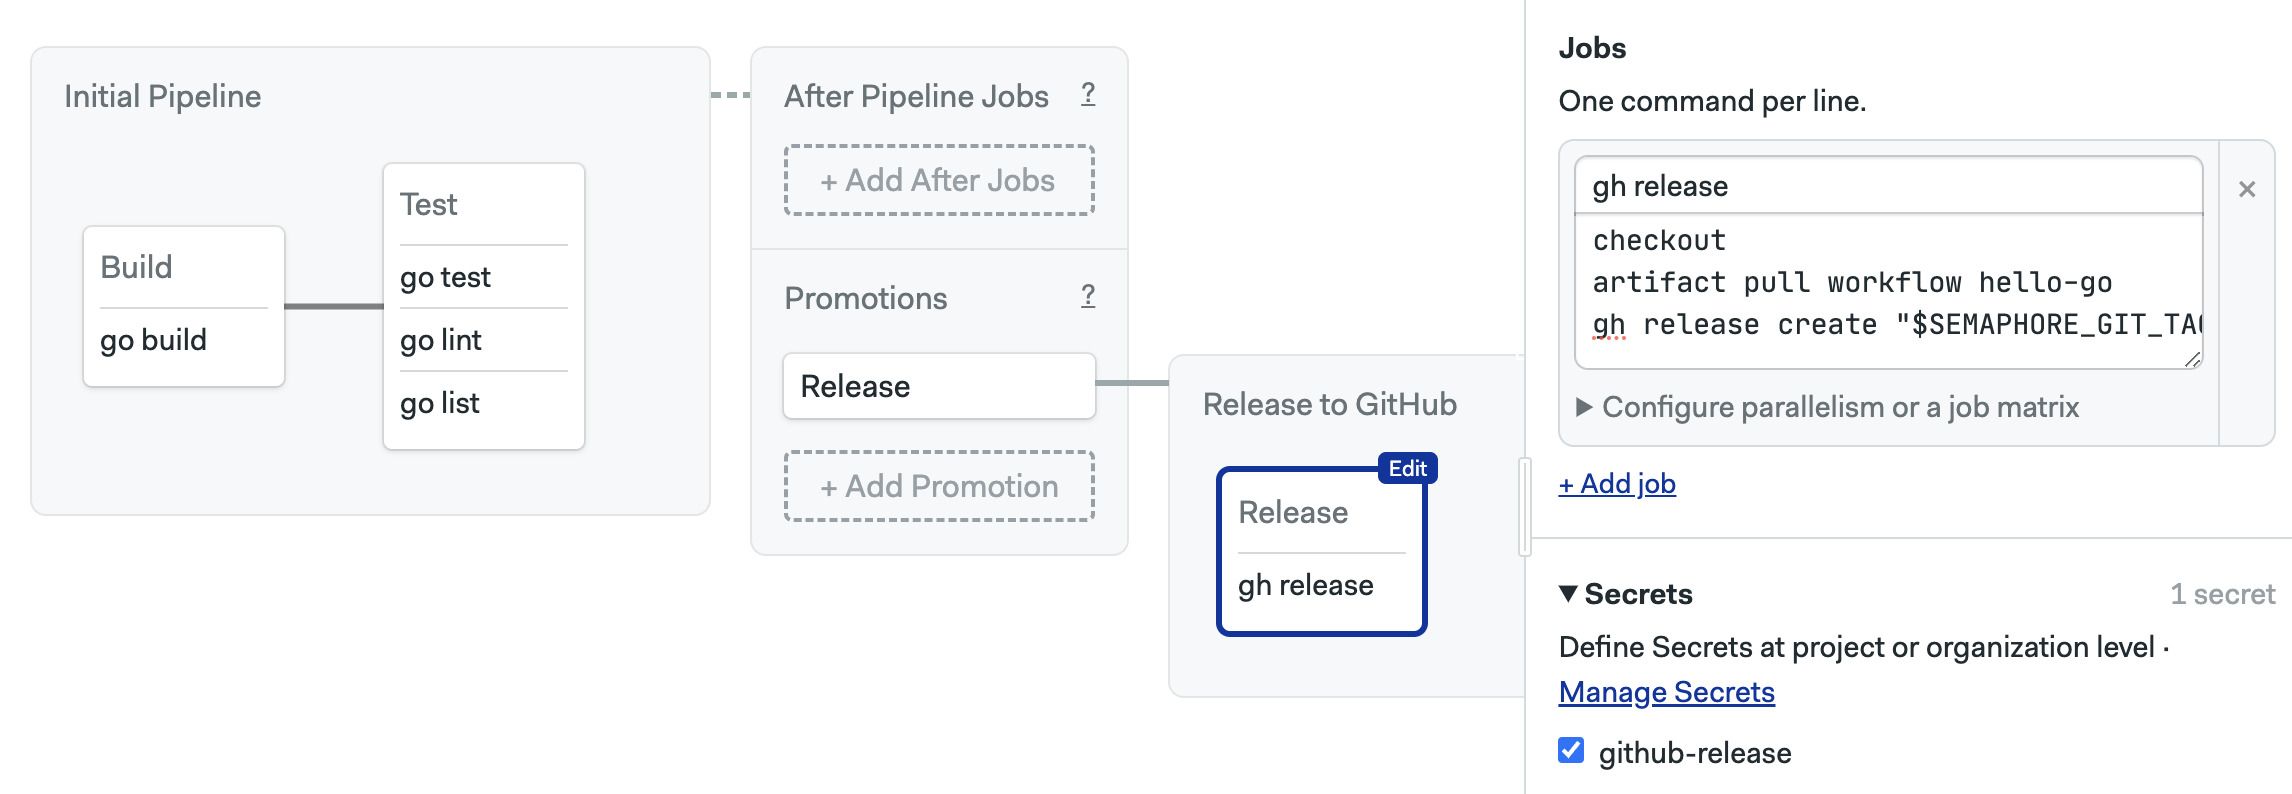
-
Start the workflow
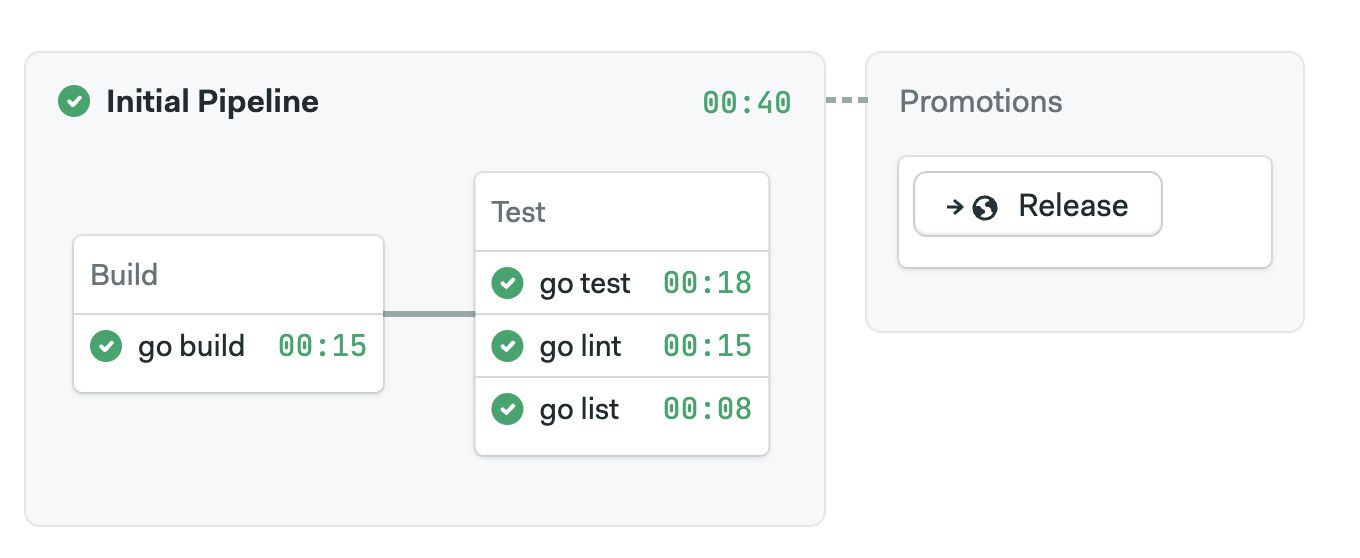
Now the execution of the workflow will stop on the Continuous Integration pipeline. Release won't happen unless we press the "Release" button.
But before we can release we should create a tag for our build. Run these commands in the repository on your machine:
git pull origin setup-semaphore
echo "This is release v1.0.0" > release-notes.txt
git add release-notes.txt
git commit -m "release v1.0.0"
git tag -a v1.0.0 -m "Releasing version v1.0.0"
git push origin v1.0.0
The push will initiate a new workflow related to the tag we just pushed. Check the progress of the CI pipeline and once done, press the Release button.
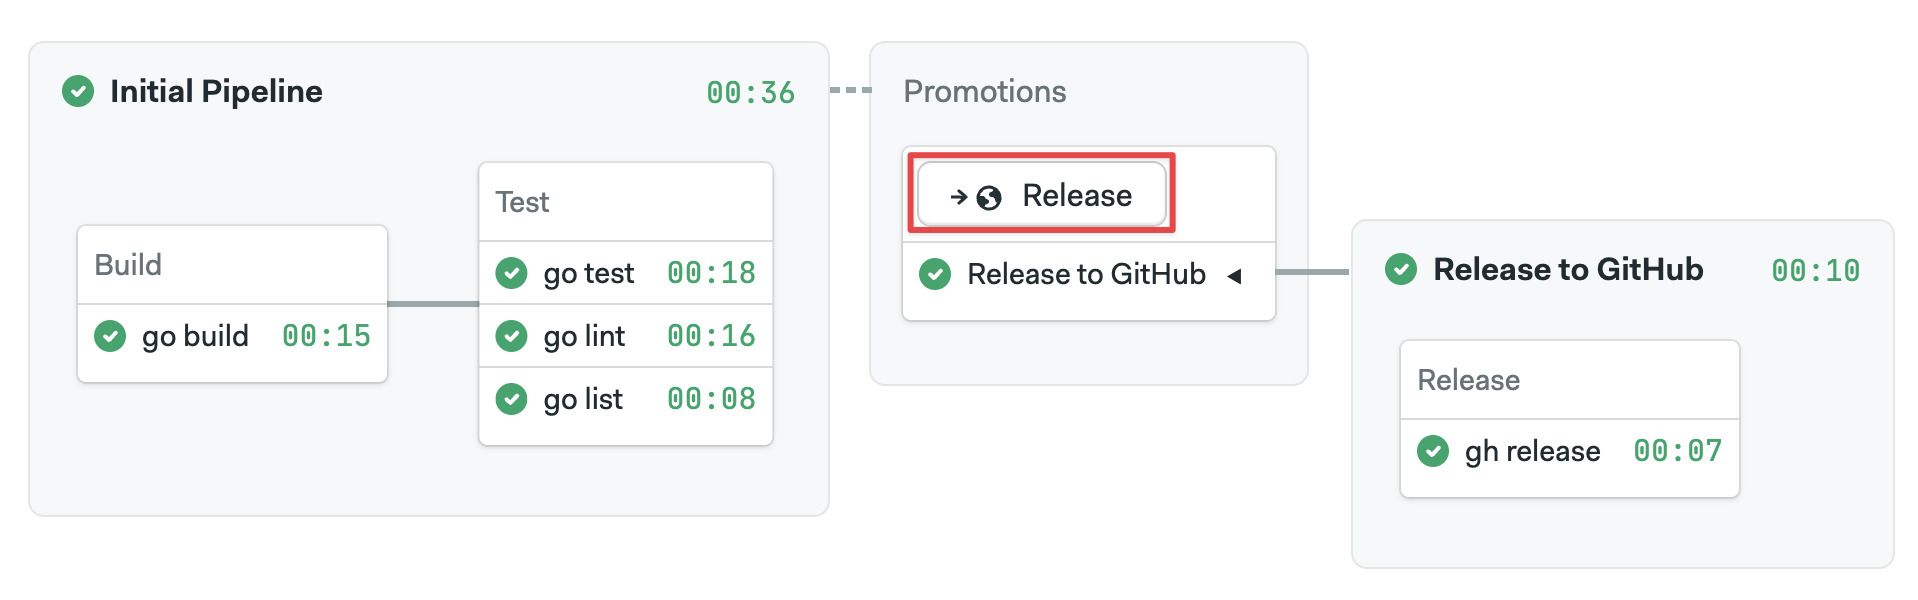
If you check your GitHub repository, you should now find a release correctly tagged as "v1.0.0"
Semaphore environment variables
Semaphore provides several environment variables you can use in your scripts. In the examples we have used:
$SEMAPHORE_WORKFLOW_IDa unique ID for every workflow$SEMAPHORE_GIT_TAG_NAMEcontains the name for the pushed Git tag
See environment variables for a list of all the variable available in the CI environment.
Automating releases
Releasing packages by pressing a button is great. But you know what's even better? Doing it automatically. Especially if you have a very robust test suite that gives you confidence in the build.
To automate the release we need to add a promotion condition.
-
Go back to the main project and open the workflow editor
-
Semaphore may ask which branch to open: select
setup-semaphore -
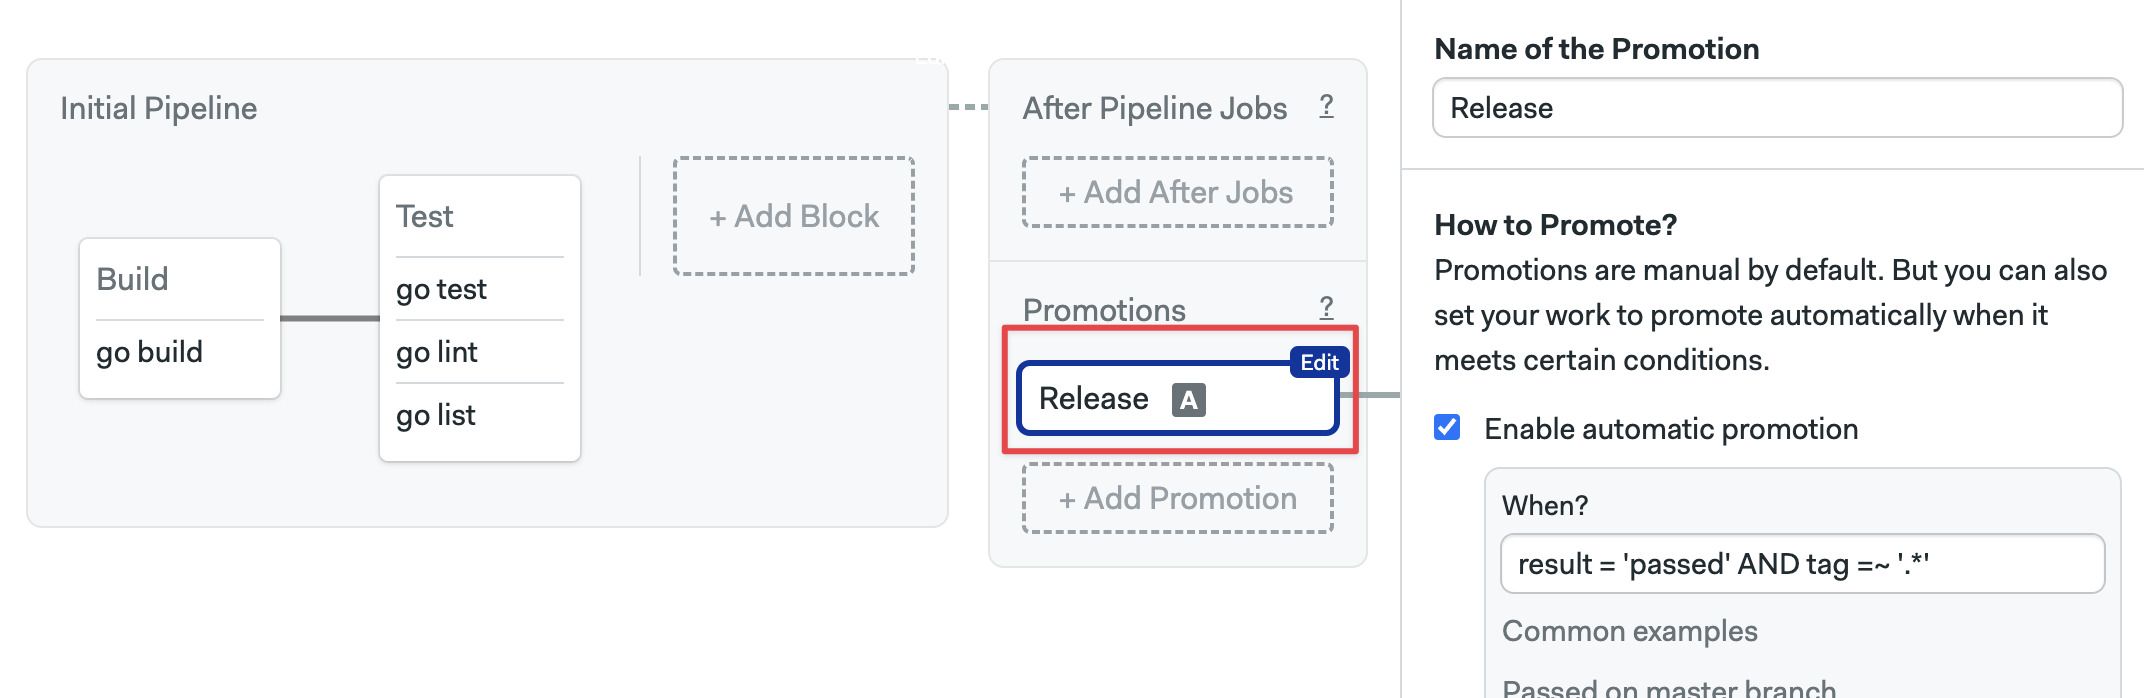
Select the "Release" promotion
-
Activate the checkbox Enable automatic promotion
-
Now we need to specify conditions to automatically start the promotion
Let's use this condition:
result = 'passed' AND tag =~ '^v.*'This will start the promotion when all tests have passed and the commit includes any tag starting with "v" (the syntax supports regular expressions)
-
Start the workflow
Let's make another release. Type these commands in the repository on your machine:
git pull origin setup-semaphore
echo "This is release v1.0.1" > release-notes.txt
git add release-notes.txt
git commit -m "release v1.0.1"
git tag -a v1.0.1 -m "Releasing version v1.0.1"
git push origin v1.0.1
This time the Release pipeline should automatically start as soon as all jobs in the CI pipeline have passed. We should also find a new release on the GitHub repository when everything is finished.
What have we learned?
- How to create and use Secrets
- How to release packages to GitHub
- How to use promotions to connect pipelines
- How to automate triggering promotions
What's next?
That's all for the guided tour. What you've learned here will serve you well to build complex workflows for a lot of scenarios.
There is, of course, a lot more to learn. Semaphore is packed with features that do more with less work and optimizations to greatly speed up your workflows.
We recommend going next to the Using Semaphore page. Here you will find the complete handbook for all Semaphore operations.
Thank you for trying out Semaphore and happy building!