Apple macOS Images
This page describes the Apple macOS images supported on Semaphore Cloud.
Overview
The Operating System image defines what OS and software are pre-installed in your agents.
This page describes OS images to run on Apple-based Semaphore Cloud machines. You can add more OS options using self-hosted agents.
macOS Xcode 16
- Editor
- YAML
To use this operating system, choose macos-xcode16 in the OS Image selector. This OS can be paired with A2s Apple machine.
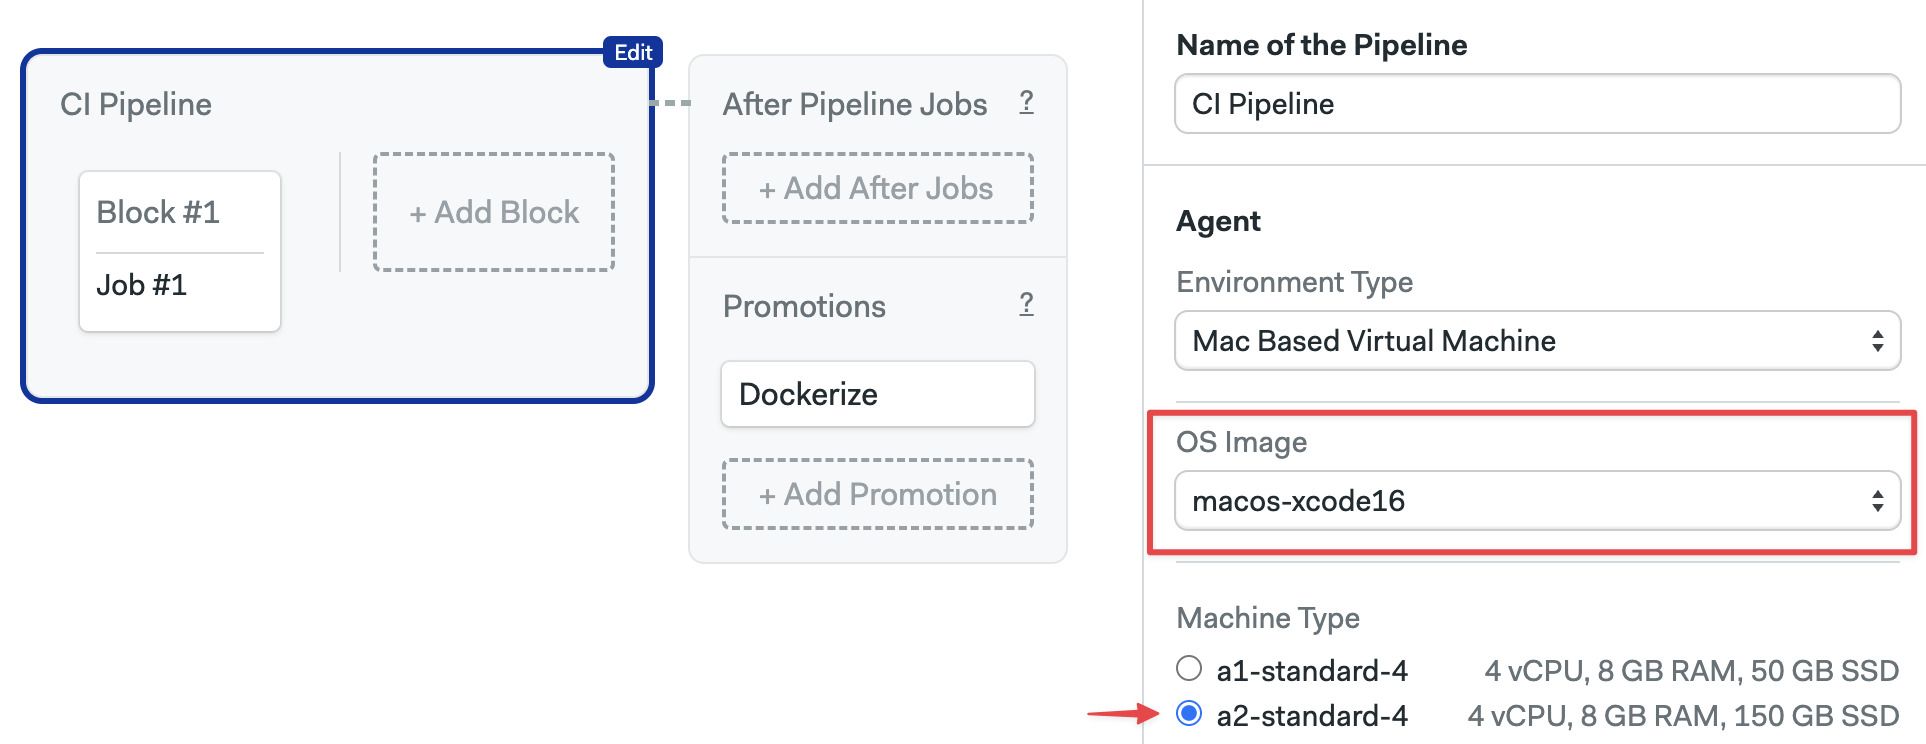
To use this operating system, use macos-xcode16 as the os_image. This OS can be paired with A2s Apple machine.
version: v1.0
name: Initial Pipeline
agent:
  machine:
    type: a2-standard-4
    os_image: macos-xcode16
System version:
- ProductVersion: 15.4.1
- BuildVersion: 24E263
- Kernel Version: Darwin 24.4.0
Version control
The following version control tools are pre-installed:
- Git (2.x)
- Git LFS (Git Large File Storage)
- Svn
Utilities
The following utilities are pre-installed:
- homebrew
- bundler
- rbenv
- nvm
- curl
- wget
- jq
- carthage
Browsers
The following browsers are pre-installed:
- Safari
- google-chrome
- firefox
- microsoft-edge
Languages
Xcode
Installed versions:
- 16.3
- 16.4 (default)
The default installed Xcode version is 16.4.
Xcode 16.3 has the following SDKs preinstalled:
- iOS 18.4
- macOS 15.4
- tvOS 18.4
- watchOS 11.4
- visionOS 2.4
Xcode 16.4 has the following SDKs preinstalled:
- iOS 18.5
- macOS 15.5
- tvOS 18.5
- watchOS 11.5
- visionOS 2.5
iOS
Installed standalone iOS simulators runtimes:
- 18.3
- 18.5
JavaScript and Node.js
Installed version:
- Node.js: v22.14.0
- Yarn: 1.22.22
Python
Installed version:
- 3.13.3
Supporting libraries:
- pip3: 25.1.1
Ruby
Installed versions:
- 3.4.4 (system)
- 3.2.8
Following gems are pre-installed:
- fastlane (2.227.2)
- cocoapods (1.16.2)
Java and JVM
- openjdk 17
Flutter
- 3.32.1
macOS Xcode 15
- Editor
- YAML
To use this operating system, choose macos-xcode15 in the OS Image selector. This OS can be paired with all Apple machines.
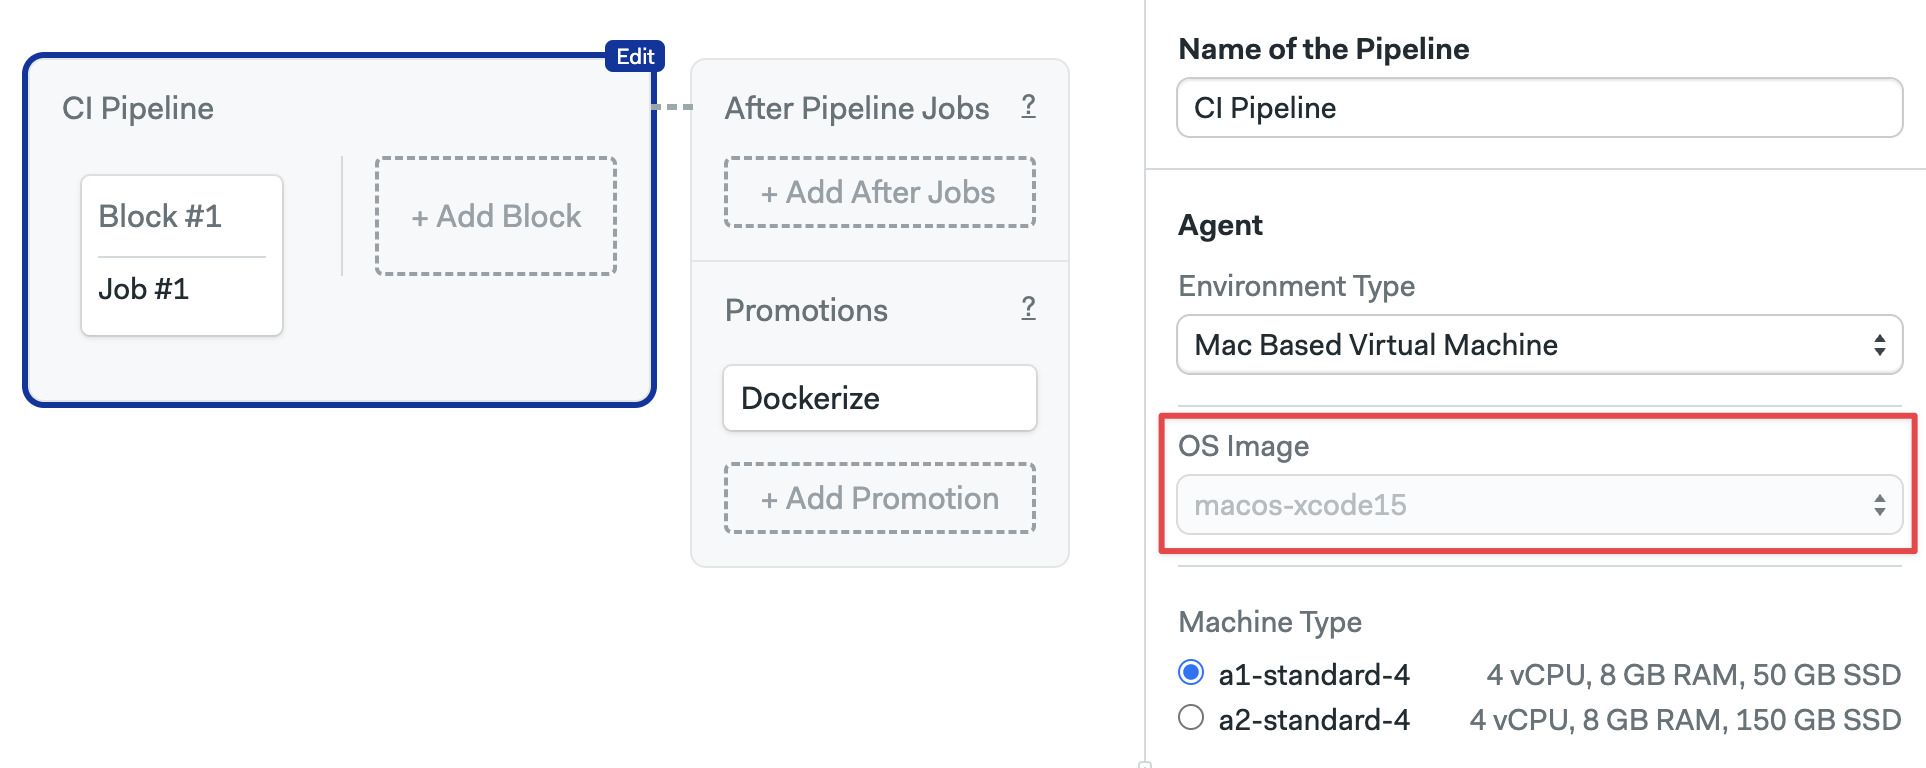
To use this operating system, use macos-xcode15 as the os_image. This OS can be paired with all Apple machines.
version: v1.0
name: Initial Pipeline
agent:
  machine:
    type: a1-standard-4
    os_image: macos-xcode15
System version:
- ProductVersion: 14.1
- BuildVersion: 23B74
- Kernel Version: Darwin 23.1.0
Version control
The following version control tools are pre-installed:
- Git (2.x)
- Git LFS (Git Large File Storage)
- Svn
Utilities
The following utilities are pre-installed:
- homebrew
- bundler
- rbenv
- nvm
- curl
- wget
- jq
- carthage
Browsers
The following browsers are pre-installed:
- Safari
- google-chrome
- firefox
- microsoft-edge
Languages
Xcode
Installed versions:
- 15.0.1
- 15.2
- 15.3 (default)
The default installed Xcode version is 15.3.
Xcode 15.3 has the following SDKs preinstalled:
- iphoneos 17.4
- iphonesimulator 17.4
- driverkit.macos 23.0
- macos 14.2
- appletvos 17.4
- appletvsimulator 17.4
- watchos 10.4
- watchsimulator 10.4
- visionos 1.0
JavaScript and Node.js
Installed version:
- Node.js: v20.9.0
- Yarn: 1.22.19
Python
Installed version:
- 3.9.11
Supporting libraries:
- pip3: 23.3.1
Ruby
Installed versions:
- 2.6.10 (system)
- 3.1.4
- 3.1.5
- 3.1.6
- 3.2.0
- 3.2.1
- 3.2.2
- 3.2.3
- 3.2.4
- 3.2.5
- 3.3.0
- 3.3.1
- 3.3.2
- 3.3.3
- 3.3.4
- 3.3.5
Following gems are pre-installed:
- fastlane (2.222.0)
- cocoapods (1.15.2)
Java and JVM
- openjdk 17
Flutter
- 3.16.7
(DEPRECATED) Monterey Xcode 14
The macOS Monterey (Xcode 14) was deprecated on September 2024.
Show me the deprecated information
System version:
- ProductVersion: 12.7
- BuildVersion: 21G651
- Kernel Version: Darwin 21.6.0
The following version control tools are pre-installed:
- Git (2.x)
- Git LFS (Git Large File Storage)
The following utilities are pre-installed:
- homebrew
- bundler
- rbenv
- nvm
- curl
- wget
- jq
- carthage
The following browsers are pre-installed:
- Safari
- google-chrome
- firefox
- microsoft-edge
Xcode
Installed versions:
- 14.1
- 14.2
- 14.3.1
The default installed Xcode version is 14.3.1.
Xcode 14 has the following SDKs preinstalled:
- iphoneos 16.0
- iphonesimulator 16.0
- driverkit.macos 21.4
- macos 12.3
- appletvos 16.0
- appletvsimulator 16.0
- watchos 9.0
- watchsimulator 9.0
JavaScript and Node.js
Installed versions:
- nvm: 0.39.1
- Yarn: 1.22.19
Python
Installed version:
- 3.9.11
Supporting libraries:
- pip3: 22.0.4
Ruby
Installed versions:
- 2.7.8 (system)
The following gems are pre-installed:
- fastlane (2.213.0)
- cocoapods (1.11.3)
Java and JVM
- openjdk 17
Flutter
- 3.10.5